Content Moderation Tools (CMMOD) - Use Case - How to Improve the Process of Editing Content Using ChatGPT
Use Case - How to Improve the Process of Editing Content Using ChatGPT
Note: this guide requires:
- Content Moderation Tools - This document uses version 1.2.5.
Video Use-Case
Introduction
Content Moderation Tools is a time-saving plugin for content editors and moderators. It helps editors moderating articles and improves communication between the post authors and editors.
The plugin has a ChatGPT support which can significantly simplify the content editing process.
Use Case Front-End
A handy tool for editing text content with ChatGPT right while editing a post/page:

Use Case Assumptions
In this example use case guide, we'll cover how to configure the ChatGPT integration and improve the editing content process on your site.
We assume that you have already bought the plugin, but not installed it yet.
It follows:
- Installing the plugin
- Quick recap
- What is ChatGPT
- Enabling ChatGPT integration on your site
- Editing content with ChatGPT
- Allow users to configure ChatGPT settings manually
- What else you can do with ChatGPT?
- End result
Installing the Plugin
The process is the same for all CM plugins and add-ons.

- Download the plugin from your customer dashboard.
- Log in to WordPress and navigate to the WordPress Admin → Plugins settings.
- Click on Add New.
- Activate it and add the license.
Learn more: Getting Started - Plugin Overview
Quick Recap
In this use case guide we will consider only how to setup the integration with ChatGPT and how to edit the content with it. So, we recommend you first to get to know how to configure the basic plugin settings and how the plugin works: Content Moderation Tools (CMMOD) - Use Case - How to Improve the Process of Moderating Posts and Pages On Your Site
What is ChatGPT
ChatGPT is an artificial intelligence program created by OpenAI that is capable of understanding human language and can have a conversation with people just like another human being. It works by using complex algorithms and deep learning models to analyze and understand the meaning of words and sentences.
ChatGPT processes text using tokens. Tokens are pieces of words used for natural language processing. For English text, 1 token equals about 4 characters or 0.75 words. Learn more how Tokens work. Every time the plugin request the term definition, it spends tokens which are paid. When you register your account, OpenAI gives a start credit which you can spend. When your credit is run out, you can pay to continue using the service. You can check the Pricing Plans.
Learn more about Tokens and check the Pricing Plans.
In order to connect your forum with ChatGPT, you need to obtain the API Key.
Creating API Key
To get the API key, please do the following:
- Go to the OpenAI website at https://openai.com/.
- Click on the “Get Started” button.
- Fill in your email address and password to create a new account.
- Verify your email address by clicking the link sent to your email.
- Once you have verified your email address, log in to your OpenAI account.
- Click on the “API keys” link in the right-hand navigation menu.
- Click the “Create new Secret key” button.
- Copy the API key that is generated from the popup.
- Keep your API key safe and secure, as it provides access to your OpenAI account and services.
As creating an API key is committed on a third-party service side, so the process of obtaining an API key can have some minor changes from time to time. Follow the instructions on the OpenAI site.
Enabling ChatGPT Integration On Your Site
To configure the integration, navigate to Admin Dashboard → CM Editor Moderation Tools → Settings → General tab.

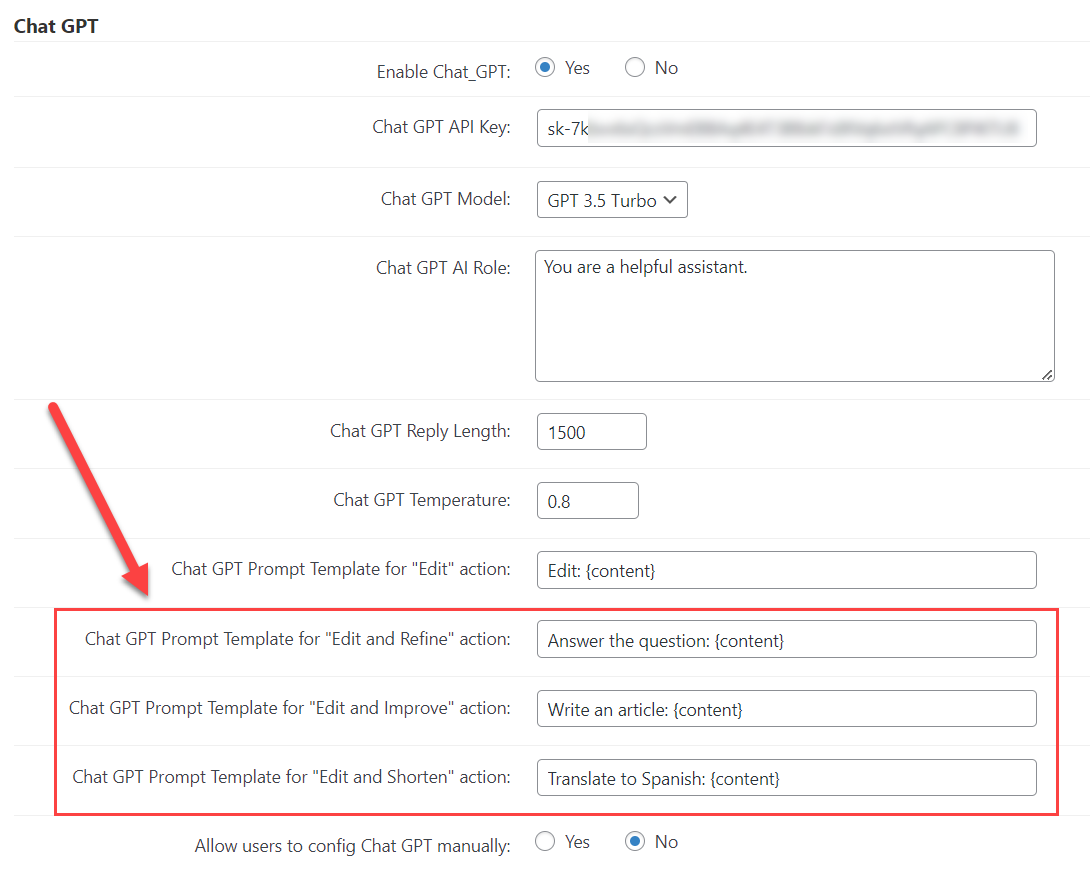
Scroll down and find the section Chat GPT. It has the following options:
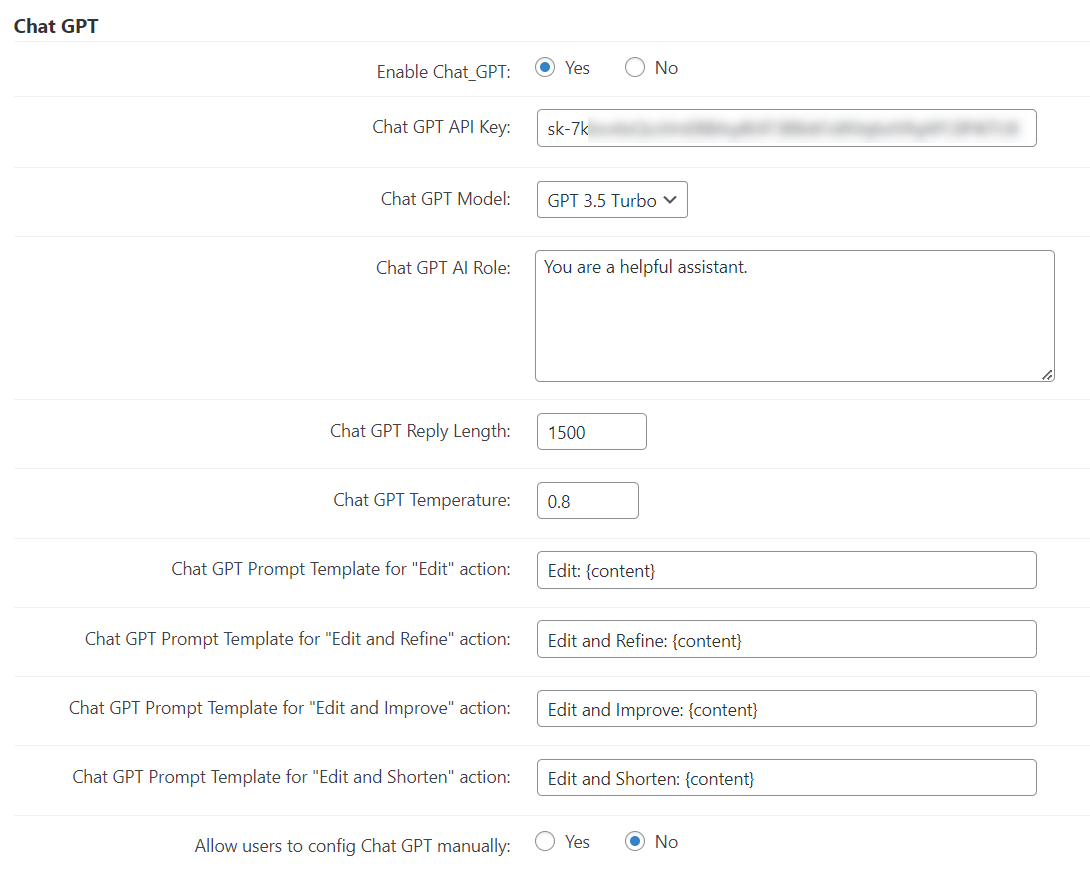
- Enable Chat_GPT - Turn on this option to activate ChatGPT feature.
- Chat GPT API Key - Enter here the API key obtained from OpenAI site.
- Chat GPT Model - The plugin supports two versions of ChatGPT which you can choose - GPT 3.5 Turbo and GPT 4 (beta). Have a note that currently the version GPT 4 may not be available for you as it is in a limited beta stage and requires joining the waitlist on the OpenAI page.
- Chat GPT AI Role - Here you can define the role for the Chat GPT assistant to make your content more specialized. This way, if you define the assistant as an expert in some certain area, it will generate the content related to your main topic. We will consider this option more detailed further.
- Chat GPT Reply Length - Set the maximum length of the reply requested from the ChatGPT. This value is set in tokens. Warning: longer replies use more tokens, so you can reach limit faster. Learn more about Pricing Plans.
- Chat GPT AI Temperature - This option allows to define how accurate the generated content will be. This value ranges from 0 to 2. Higher values like 0.8 will make the output more random, while lower values like 0.2 will make it more focused and deterministic.
- Chat GPT Prompt Template for "..." action - Specify the request which the plugin will be sending to ChatGPT for getting answers. Important: this template must contain the following placeholder: {content}. You can define this kind of template for 4 actions, by default they are:
- Edit
- Edit and Refine
- Edit and Improve
- Edit and Shorten
- Allow users to config Chat GPT manually - If enabled, users will be able to set AI temperature, AI role and reply length when they edit content. Let's keep this option disabled for now, and consider this more detailed further.
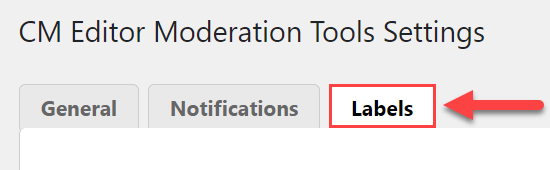
Labels
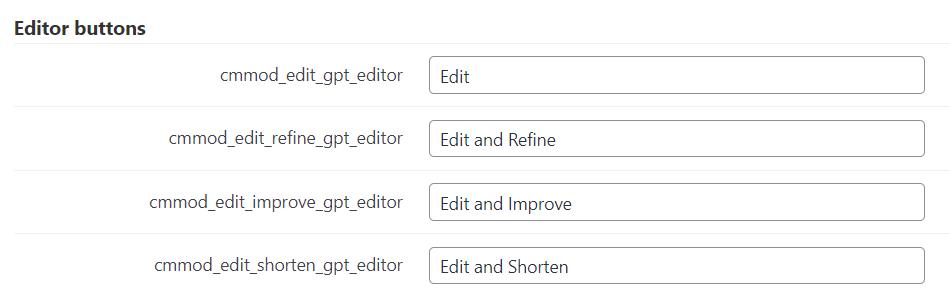
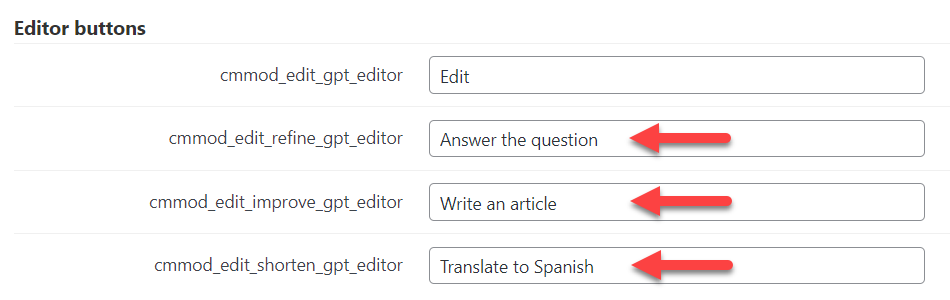
Now head to the Labels tab.
Scroll down to the section Editor buttons. Here you can change labels for 4 actions that are used in the ChatGPT editor:
When you finished configuring the settings, click the button Save at the bottom of the page.

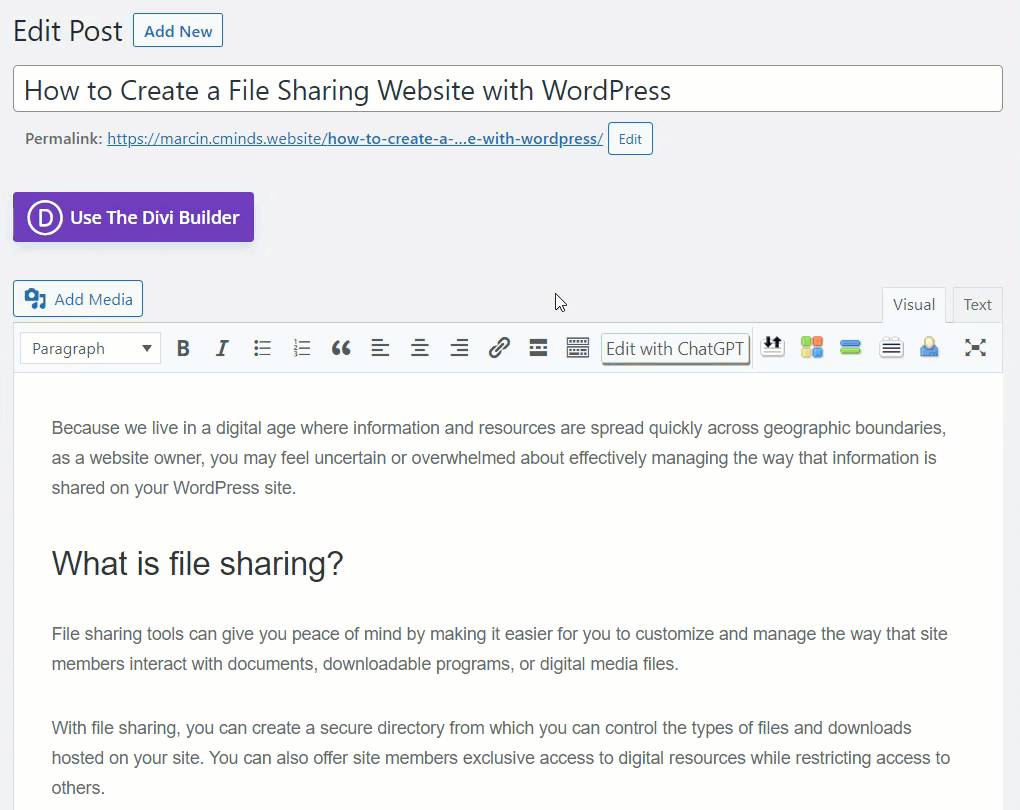
The configuration is done, now when editing some post or page you can find a button for editing content with ChatGPT.
Important
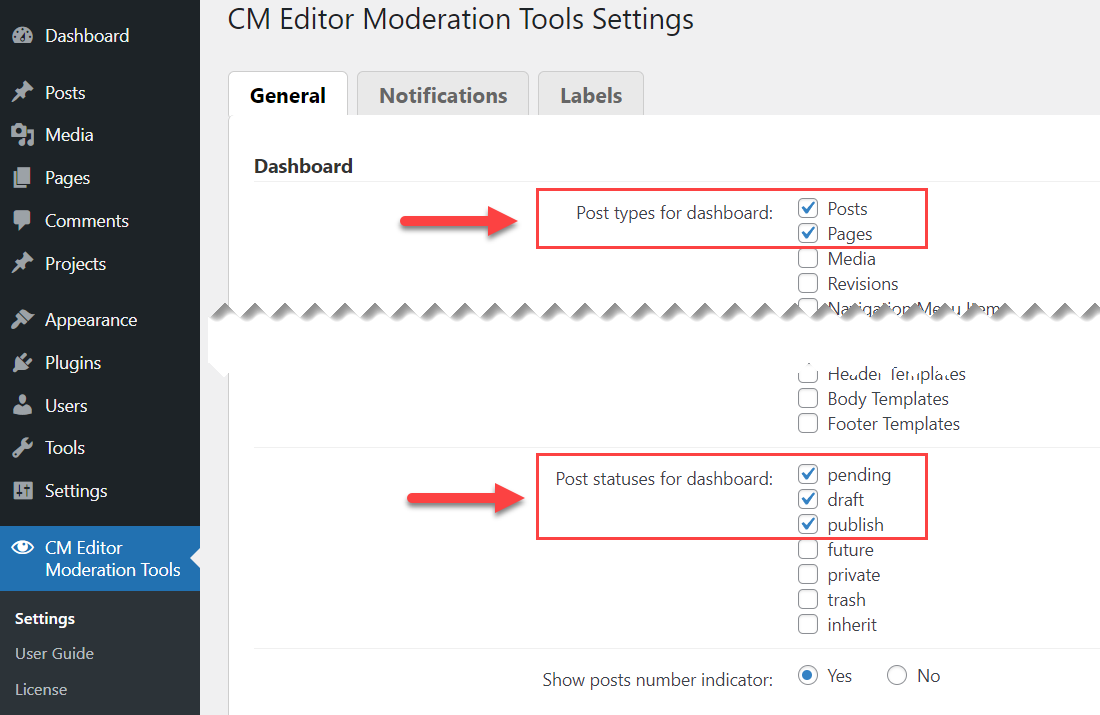
The tool for editing content with ChatGPT will be available only on specific post types with specific statuses which are defined in plugin settings in options Post Types for dashboard and Post statuses for dashboard. Learn more: Content Moderation Tools (CMMOD) - Use Case - How to Improve the Process of Moderating Posts and Pages On Your Site
Now let's check how it works in action.
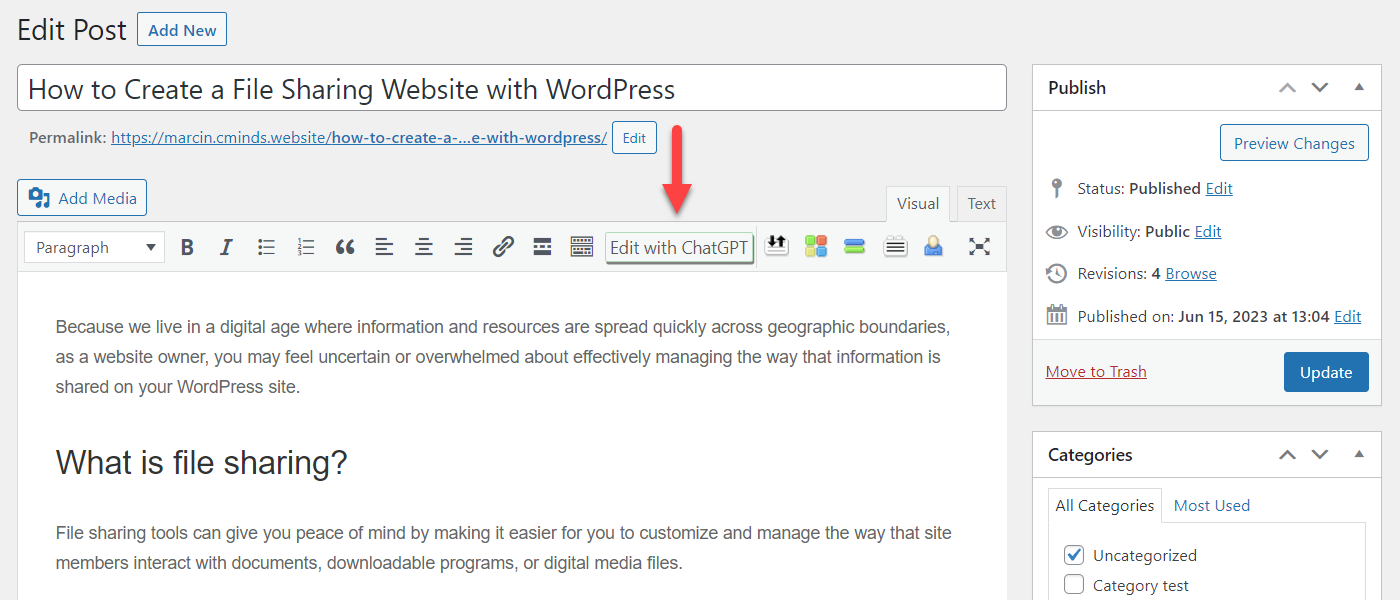
Editing Content With ChatGPT
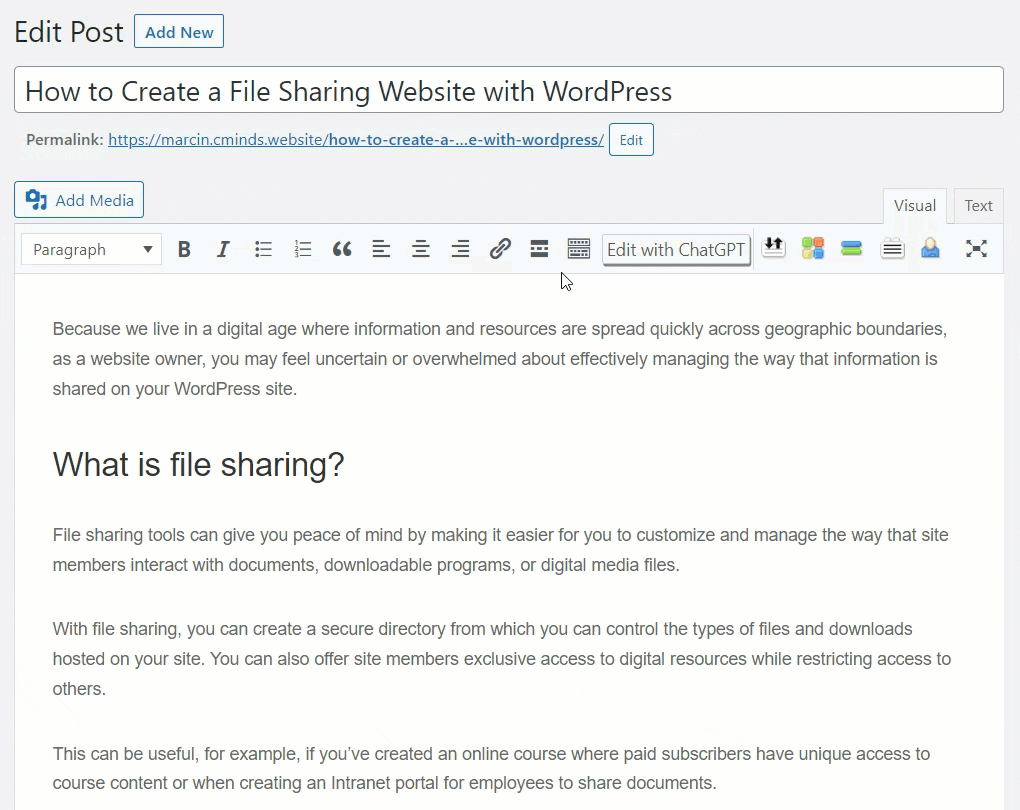
When editing some post or page, you will find a button Edit with ChatGPT on the toolbar.
Gutenberg Editor
In this use case we use Classic Editor, but the same tool is available in the Gutenberg Editor and it works the same:
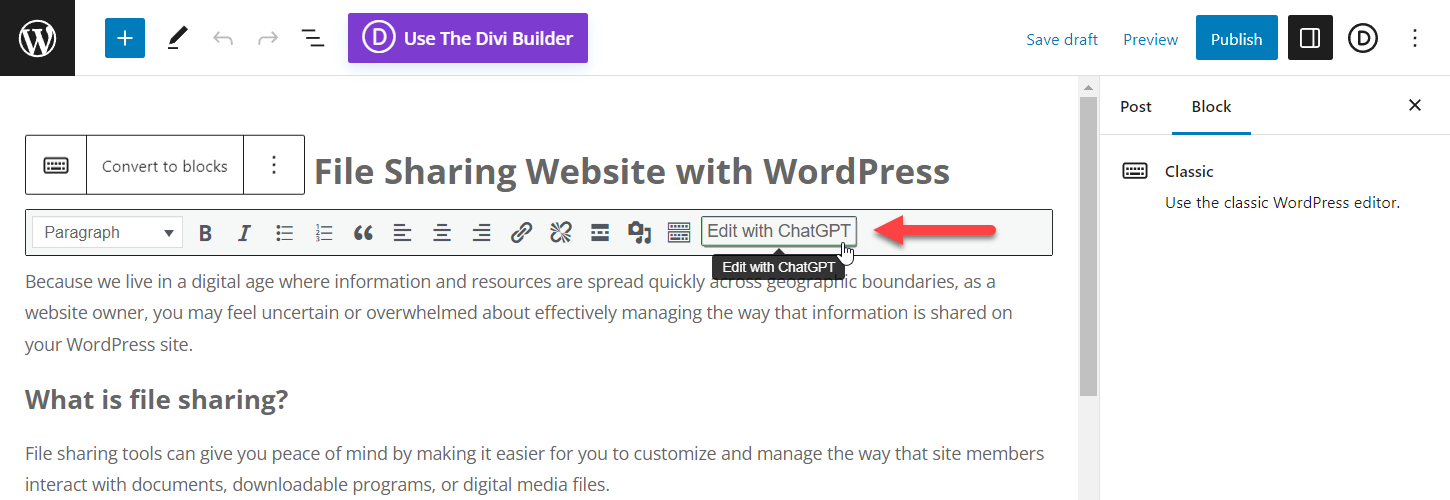
To edit the content with ChatGPT, mark the text that you want to change and click the button Edit with ChatGPT on the toolbar. There will appear a pop-up. Here you can choose the Type of action (which are defined in plugin settings). In the text area Original Content you can see the text that you marked, and you can edit it right here if needed. Click the button Generate.
The result will appear in the text area AI Generated Content. You can edit it right here as well. If you are satisfied with the generated content, click the button Replace and new content will replace the old one. If new content doesn't suit you, you can just click Cancel, or generate new content.
Using ChatGPT AI Role
The way how you define the AI role can have a huge affect of the result and generate totally different content. It allows to give more context to the content that you want to generate. If your site specializes on some certain topic, you can define the AI role as an expert in this niche.
Let's change the Chat GPT AI Role to another one. For example - "You are a poet". The ChatGPT responds should be generated according to this role.
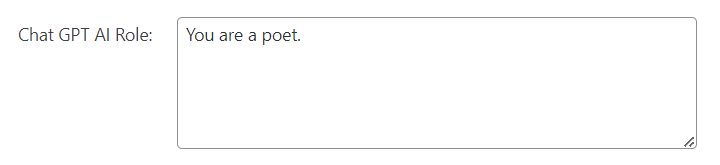
Now let's check it in action. As a result, the content is generated in the verse form.
Allow Users to Configure ChatGPT Settings Manually
Now let's get back to ChatGPT integration settings and enable the option Allow users to config Chat GPT manually.

Now when the user is editing a post or page, the pop-up will contain a few more options which override the global settings:
- AI System Role
- Temperature
- Reply Length
This way, the user can have more control on the generated content:
What Else You Can Do With ChatGPT?
With modern AI technologies, you have unlimited possibilities to work with text. You can ask the AI assistant to do more than just edit, refine or improve your writing. It can also answer questions, write articles, translate the content to other languages and much more, depending on your needs.
So, let's change a few prompt templates to other actions, for example the following ones:
- Answer the question
- Write an article
- Translate to Spanish
Reminder
Don't forget that the options Chat GPT Prompt Template for "..." action must contain the placeholder {content}. It is needed for sending the content to ChatGPT.
And for convenience, we also can change the labels for actions which are displayed in Edit with ChatGPT pop-up tool when editing a post/page.
Don't forget to save the changes.
Let's check the result in action.
Answer Questions
Now our ChatGPT assistant can easily answer questions:
Write Articles
And write articles based on the marked text:

Translate to Other Languages
And translate it into Spanish:

End Result
Following instructions found in the plugin and guides, you should be able to configure the ChatGPT integration and improve the editing content process on your site.
Use Case Front-End
A handy tool for editing text content with ChatGPT right while editing a post/page:
 |
More information about the Content Moderation Tools plugin for WordPress Other WordPress products can be found at CreativeMinds WordPress Store |
 |
Let us know how we can Improve this Product Documentation Page To open a Support Ticket visit our support center |