WordPress Restricted Site Access (SAR) - Use Case - How to Control Your Site Menus By the User Role and Type
Use Case – How to Control Your Site Menus By the User Role and Type.
Note: This guide requires:
- WordPress Restricted Site Access – This document uses version 1.6.1.
Video Use-Case
Introduction
WordPress Restricted Site Access plugin is a powerful membership and content restriction solution. The content restriction is based on user WordPress roles and if they are logged in or not. Choose which post type, category or even specific page should be locked – and to whom.
Use Case Front-End
What the Logged-out User (guest) sees in the menu:
What the regular Logged-in User sees in the menu:

What the Logged-in User with the user role Student sees in the menu:

Use Case Assumptions
In this use case guide we will consider how to control the visibility of menu items for different user roles on your WordPress site. It means that different types of users can see different items in the same menu.
We consider that you have already bought the plugin, but not installed it yet.
It follows:
Installing the Plugin
The process is the same for all CM plugins and add-ons.

- Download the plugin from your customer dashboard.
- Log in to WordPress and navigate to the WordPress Admin → Plugins settings.
- Click on Add New.
- Activate it and add the license.
Learn more: Getting Started - Plugin Overview
How Menu Restriction Works
The WordPress Restricted Site Access plugin allows users to create a membership and content restriction solution. The menu restriction is based on user WordPress roles and if they are logged in or not.
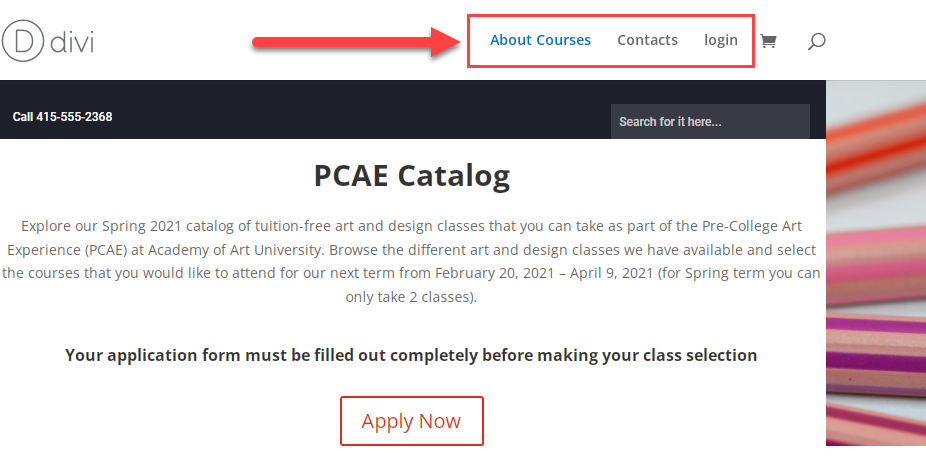
Let's consider it more detailed on the example of the site with online courses. Here is the list of menu items that we are going to separate for different users:
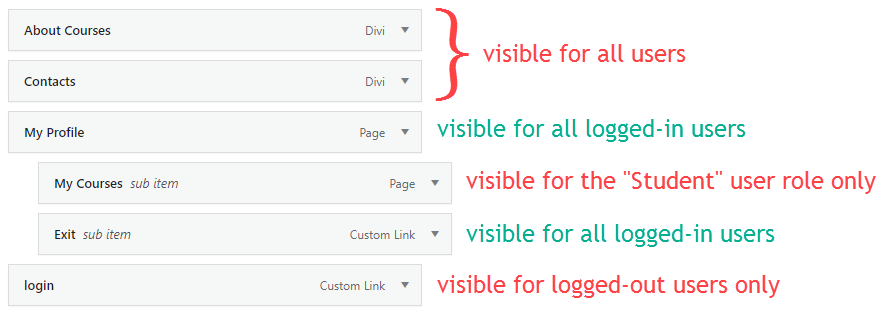
- About Courses - Main page with the general information about courses. Can be visible for all users.
- Contacts - Page with site contacts. Can be visible for all users.
- My Profile - Page with the general information about user's profile. Can be visible for all logged-in users.
- My Courses - The dashboard for users where they can manage their courses. Can be visible only for logged-in users with the user role Student.
- Exit - This is a button to logout and it can be visible for all logged-in users.
- Login - This is a button to login/register. Can be visible for logged-out users only.
Now let's consider more detailed how to configure the visibility of these menu items.
Menu Configuration
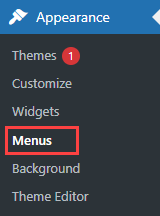
To reach the menu settings, navigate to Admin Dashboard → Appearance → Menus.
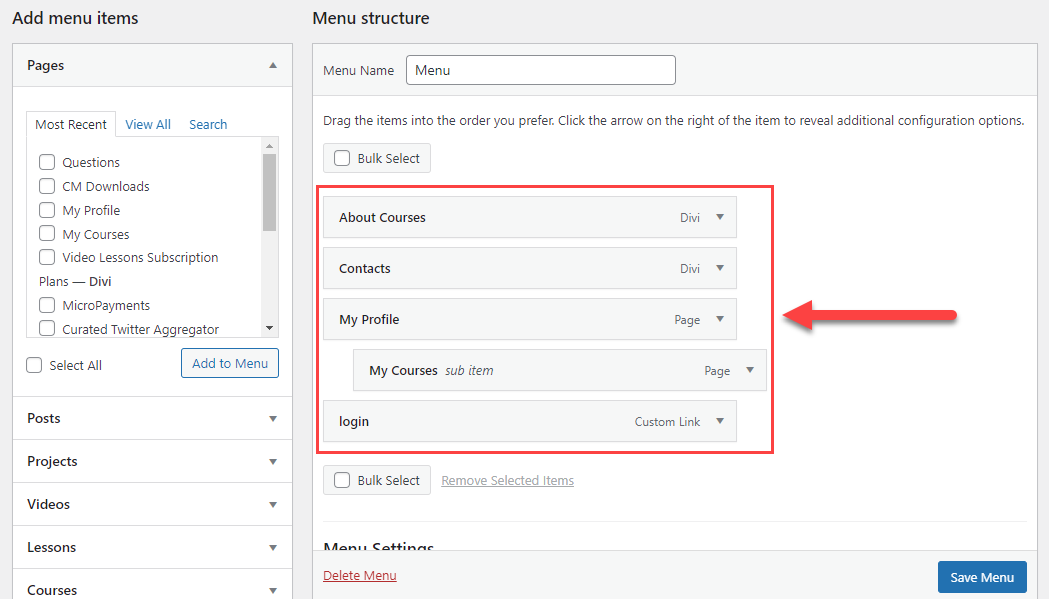
The page for configuring menus is separated into two parts:
- On the left part of the page you can see the list of items that you can add to the menu.
- On the right part of the page is located the menu itself. We've prepared some items in advance, so let's start configuring them.
The plugin Site Access Restriction provides a few new options for configuring.
Let's expand the first menu item - About Courses. Each menu item has a dropdown Visible for. You can find there these 3 options:
- Everyone
- Logged In Users
- Logged Out Users
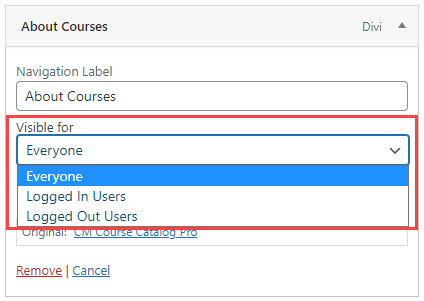
As we said before, we are going to make this menu item visible for everyone, so we choose the option Everyone.
Next menu item is Contacts, and it also should be visible for all kind of users, so we do the same here:
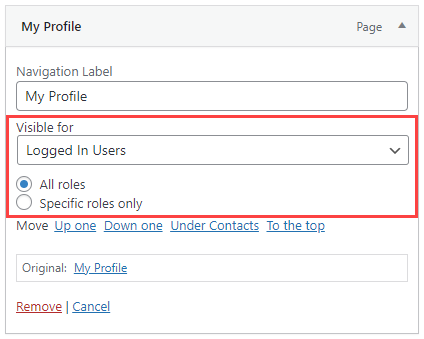
Next menu item is My Profile. It should be visible for all logged-in users, so they could see and edit general information about their profiles. When we choose the option Logged In Users in Visible for, two new options appear: All roles and Specific roles only. In this case we need to choose All roles.
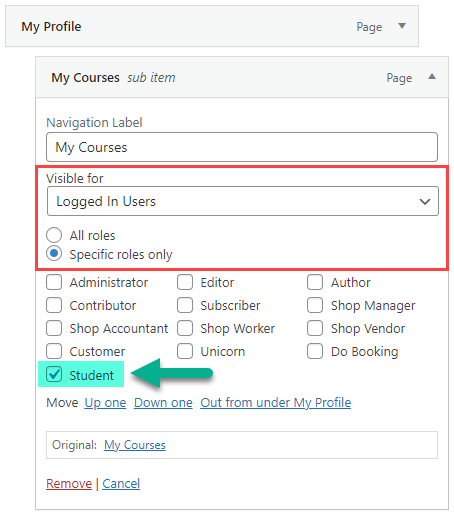
Next menu item is My Courses (for the convenience, we made this menu item as sub item for My Profile menu item). This page allows users that are registered as Students to manage their courses, so it should be visible only for that user role. In the Visible for dropdown we choose Logged In Users, then choose the option Specific roles only. There will appear the list of existing user roles on your site. We choose only one role here - Student.
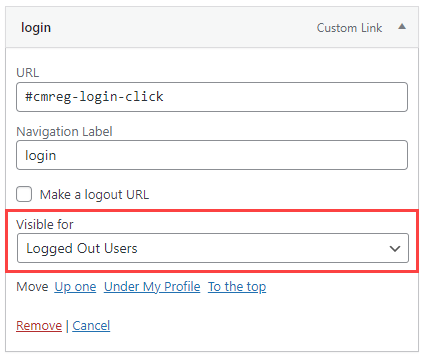
One more menu item that we have - Login. This button opens the form that allows users to login or register. When the user logs-in, the button Login will turn to Logout, but we don't want this menu item to be displayed separately in the menu. So, we will make this button visible for guest users only. To do that, we choose Logged Out Users in Visible for.
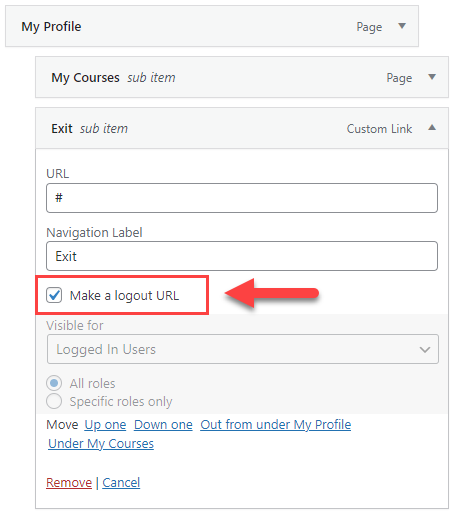
But, anyway we need to display the button that allows users to logout. We will do the following - we need to add the menu item with the type Custom Links, call this item Exit and add it as sub item under the My Profile menu item.

Menu items with the Custom Links type have one more feature - Make a logout URL. If enabled, it will be visible only for all logged-in users and this button allows them to logout.
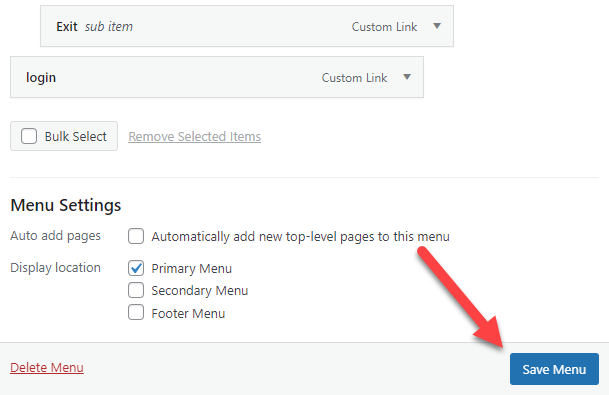
The configuration is finished, now click the button Save Menu.
Here is the visibility structure that we've made:
Now let's check it on the front-end.
End Result
Following instructions found in the plugin and guides, you should be able to control the visibility of menu items for different user roles on your WordPress site.
Use Case Front-End
What the Logged-out User (guest) sees in the menu:
What the regular Logged-in User sees in the menu:
What the Logged-in User with the user role Student sees in the menu:
 |
More information about the WordPress Restricted Site Access plugin Other WordPress products can be found at CreativeMinds WordPress Store |
 |
Let us know how we can Improve this Product Documentation Page To open a Support Ticket visit our support center |