WordPress Ad Server (CMAC) - Getting Started - Free Version Tutorial
The Free Plugin
This guide covers the free version of the WordPress Ad Server plugin.
Download from WordPress.org | Learn about the Pro version of WordPress Ad Server
The WordPress Ad Server free version acts as a fully customized banner rotating service for one site. Banner advertisements can be placed anywhere in a page or post using a custom shortcode or displayed as a customized widget.
There is no limit for the number of banners that can be made to appear on a given page. Changing the CSS of the banner can be done via a control panel in the admin user interface.
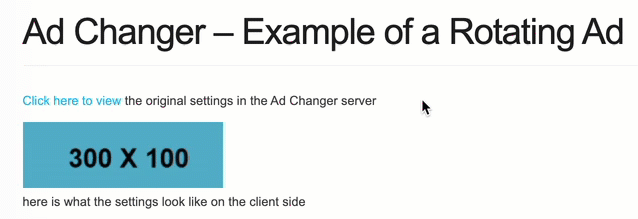
Example
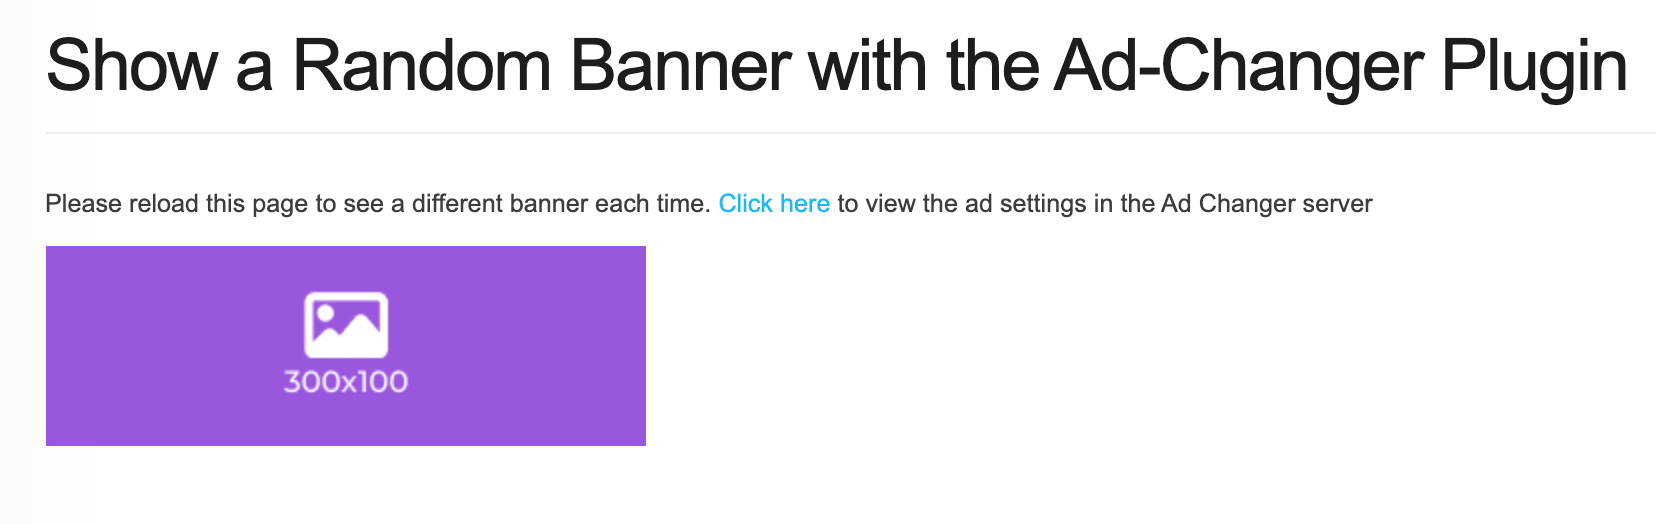
Displaying Banners with the WordPress Ad Server Free version
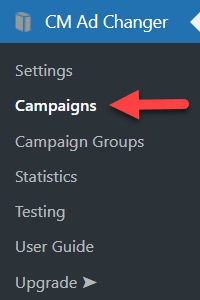
To create and manage ad campaigns, navigate to Admin Dashboard → CM Ad Changer → Campaigns.
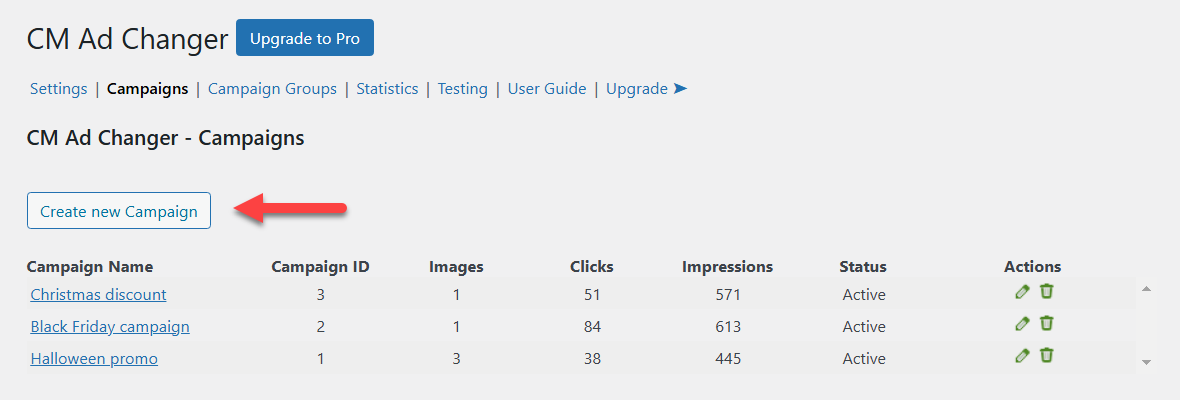
Here you can manage and view the basic info about created ad campaigns. To add a new campaign, click the button Create new Campaign.
There will appear a form for creating an ad campaign. It consists of a few tabs and present options that are available in the Free and Pro versions of the plugin. In this guide we will consider only Options that are available in the Free version.
Campaign Settings
First tab is Campaign Settings, the options are:
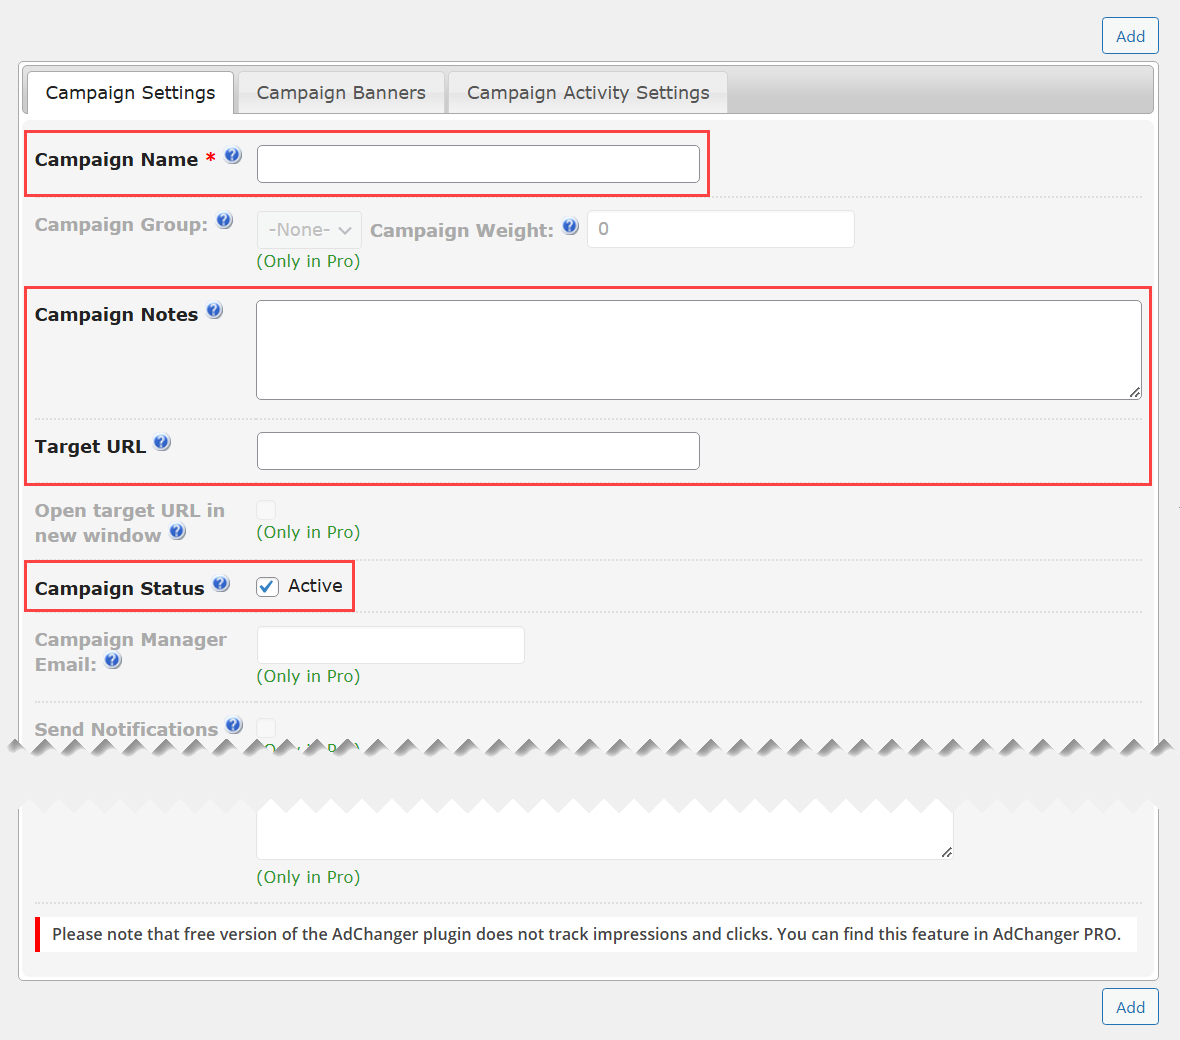
- Campaign Name - Add a campaign name. It is for internal use only.
- Campaign Notes - Add a note for the campaign. It is for internal use only.
- Target URL - Add a URL where the site visitor will be redirected to. You can override a URL specifically for each banner within this campaign.
- Campaign Status - Uncheck this option if you want to pause the campaign.
Campaign Banners
Next tab is Campaign Banners, the options are:
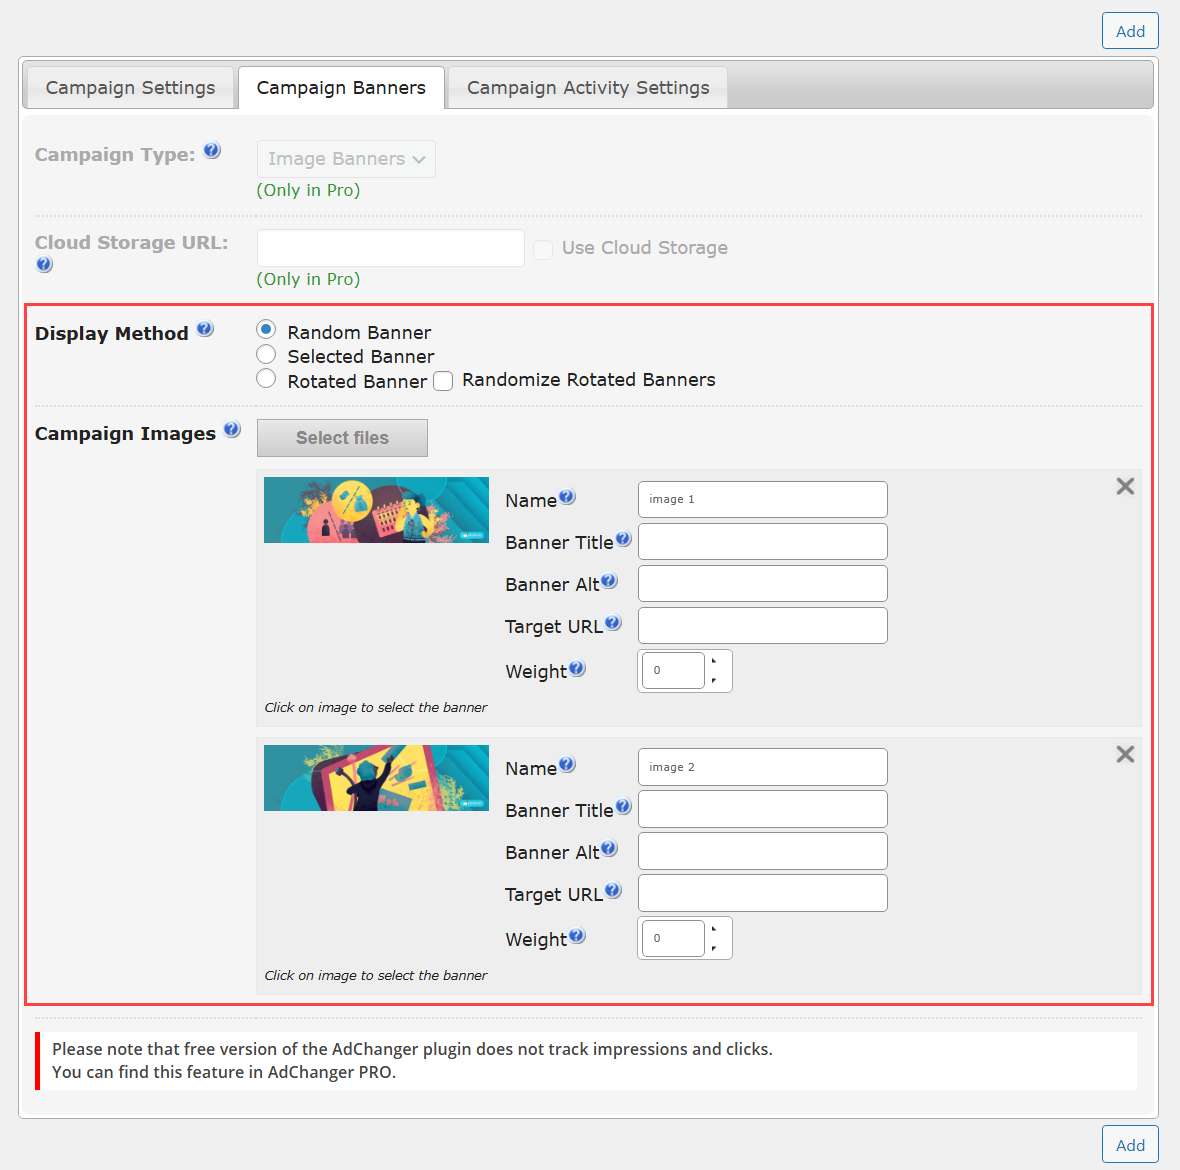
- Display Method - Choose the method of displaying the banners:
- Random Banner - Will display random banner based on banner weight.
- Selected Banner - Will display only selected banner.
- Rotated Banner - All banners from this campaign will be rotating. The style of rotating and time of displaying each banner and transition are defined in the general plugin settings. By default they rotate in order one by one as they were added, but you can randomize the order by checking the option Randomize Rotated Banners.
- Campaign Images - Click the button Select files to add image banners. You can add multiple images. For each image, you can configure Name, Banner Title, Banner Alt, Target URL and Weight. The Weight value is useful when Random Banner is chosen as a display method - the higher the value, the more often the banner will be shown to users.
Once you finished setting up the campaign, click the button Add above or below the form to create the campaign.
Displaying Ad Campaigns On the Front-end
You can display ad campaigns in posts and pages by applying the shortcode [cm_ad_changer campaign_id=""]
The shortcode has the following attributes:
- campaign_id - ID of the campaign (required).
- linked_banner - Define if your banner images should be linked to a URL. Set "1" to enable or "0" to disable. The default value is "1".
- debug - Allows to show the debug info. Set "1" to enable or "0" to disable. The default value is "0".
- wrapper - Allows to add a wrapper for the banner. Set "1" to enable or "0" to disable. The default value is "0".
- class - Allows you to set a custom class for the banner.
Examples of custom shortcodes:
[cm_ad_changer campaign_id="1"]- Minimum attributes.[cm_ad_changer campaign_id="1" debug="1"]- Outputs all banner info.[cm_ad_changer campaign_id="1" linked_banner="0"]- Outputs banner as image without link.[cm_ad_changer campaign_id="1" wrapper="1"]- Wraps banners with div tag.
Rotated Banners Settings
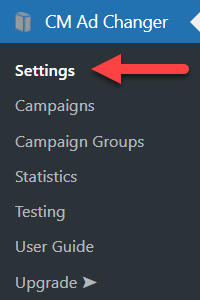
To configure the general plugin settings, navigate to Admin Dashboard → CM Ad Changer → Settings.
There are a few tabs which mostly showcase the options that are available in the Pro version only. The options that are available in the Free version can be found under the Rotated Banners tab. The options are:
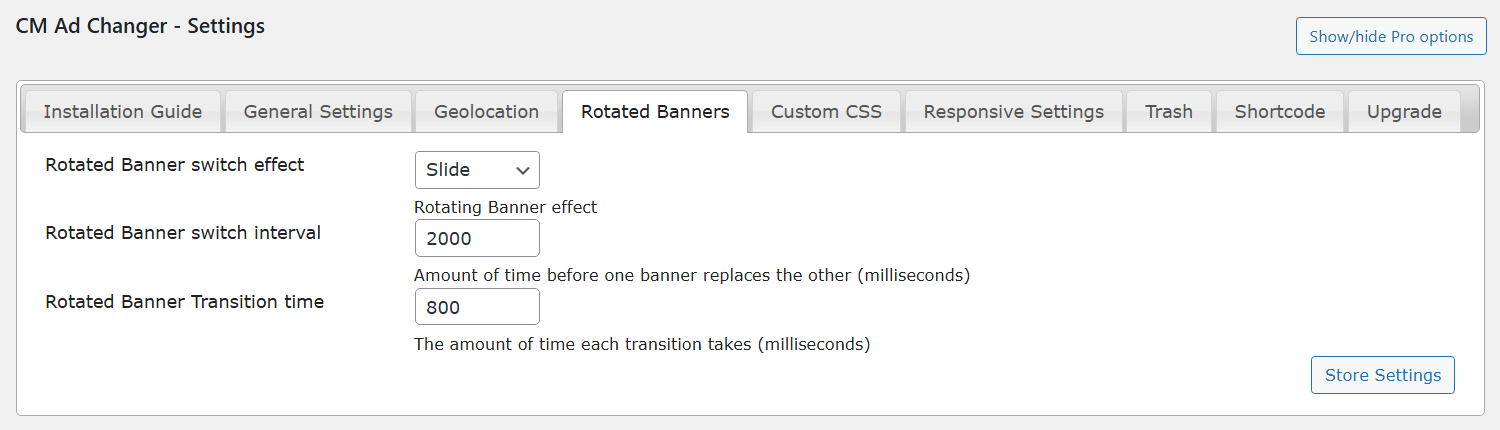
- Rotated Banner switch effect - Select switch effect between Fade or Slide.
- Rotated Banner switch interval - Set the time when one banner changes another one. The value should be set in milliseconds.
- Rotated Banner Transition time - Set the time that transition takes. The value should be set in milliseconds.
Click the button Store Settings to save the changes.
Why Upgrade to Pro - Differences Between Free and Pro
 |
More information about the WordPress Ad Server plugin Other WordPress products can be found at CreativeMinds WordPress Store |
 |
Let us know how we can Improve this Product Documentation Page To open a Support Ticket visit our support center |