Appointment Booking Calendar - Calendars - Forms
Creating Forms
To enable site visitors to add their bookings to the Calendar without the site admin having to do it manually you must create Booking Forms. Each booking form is directly related to one Calendar.
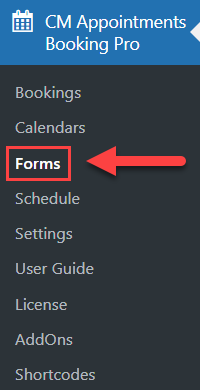
To create a form navigate to Admin Dashboard → CM Appointments Booking Pro → Forms.
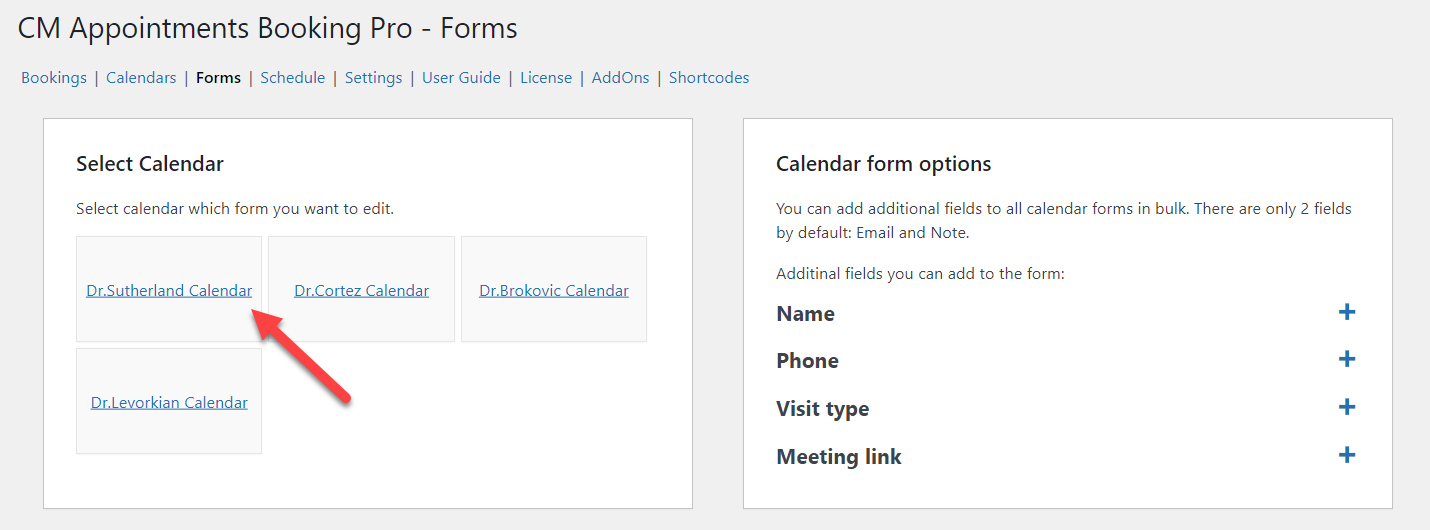
There you will see 2 sections. We will start from the Select Calendar section, and later consider the section Calendar form options.
Select the calendar for which you want to build or edit the form for.
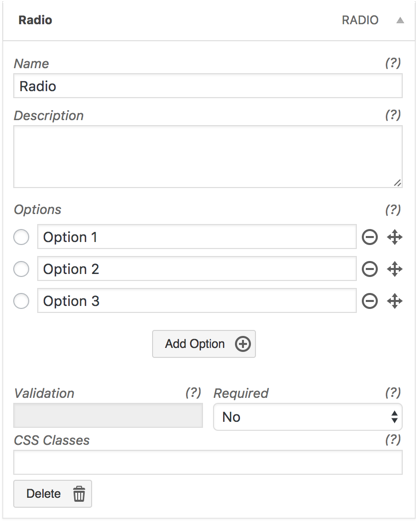
Click on the desired field on the left and a few moments later it will appear in the draft form on the right.
To rearrange form items they can be dragged and dropped into whichever order is needed.
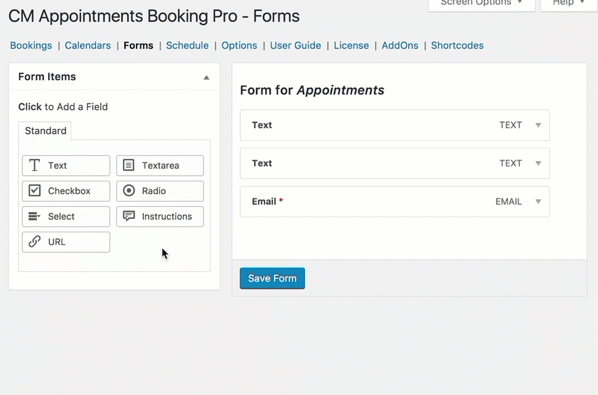
Each field can be marked as Required so that users cannot send the form without completing them. Fields can be given a placeholder Default Value. Files can also have short Description added to help customers progress through the form.
For some fields such as Email, phone number email etc it may be helpful to add validation to ensure that the required information has been added properly.
You can also use radio buttons, checkbox and select box as part of the form.
Once saved, the form will appear in the front-end view when the user tries to book an appointment.
Example
Form information is saved in the appointment post which is accessible from the booking dashboard. It is also represented in the placeholder {booking-form} which can be added to any email notification sent.
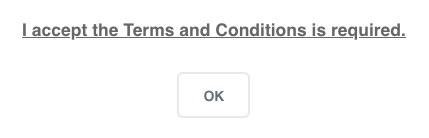
Notice: the name and the email fields in the form are mandatory and cannot be removed from the form
TIP: Obligatory Terms and Conditions Field
This is a good opportunity to add terms and conditions information to a required field.
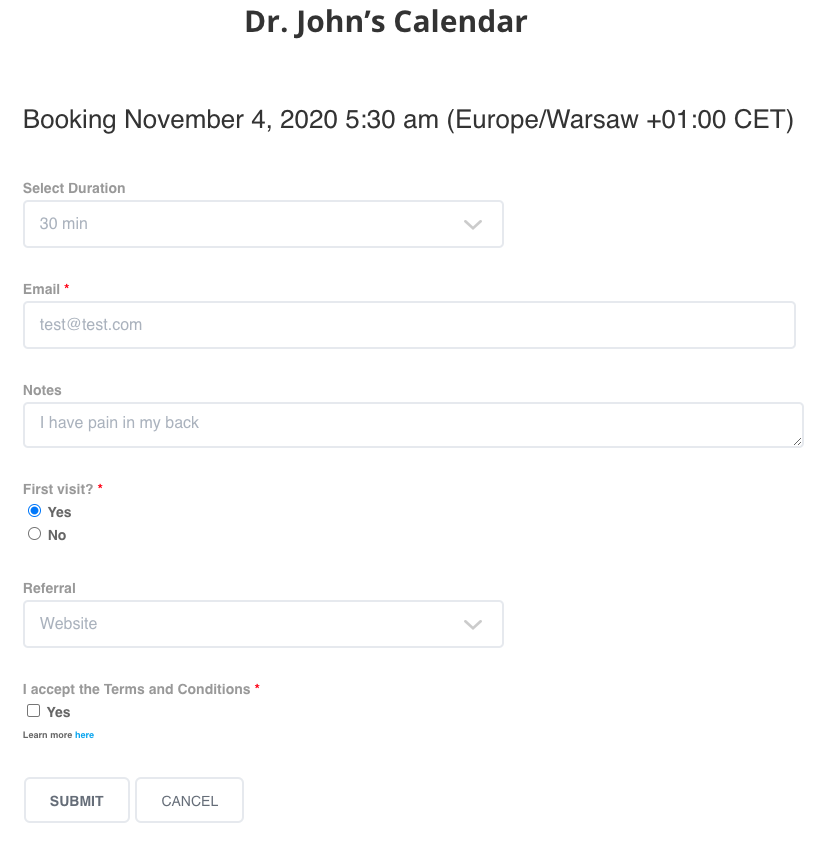
Back-end and Front-end example
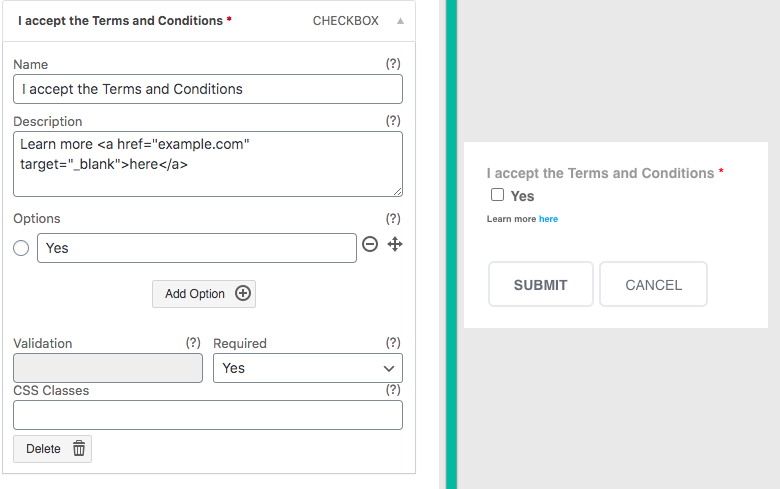
Result
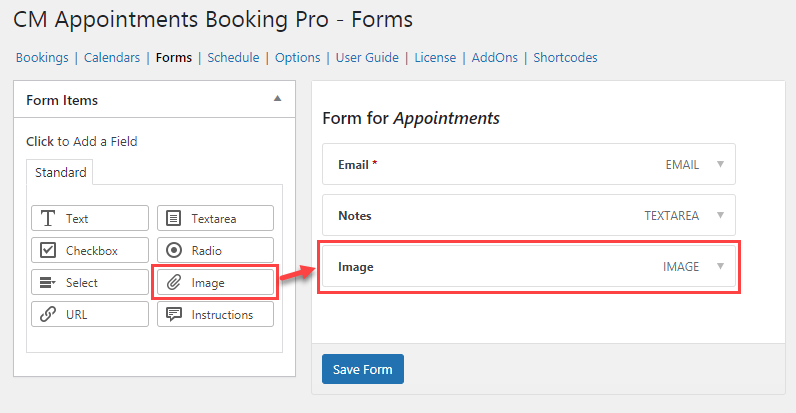
Adding Images
Note: This feature was introduced in version 1.7.0 of Appointment Booking Calendar.
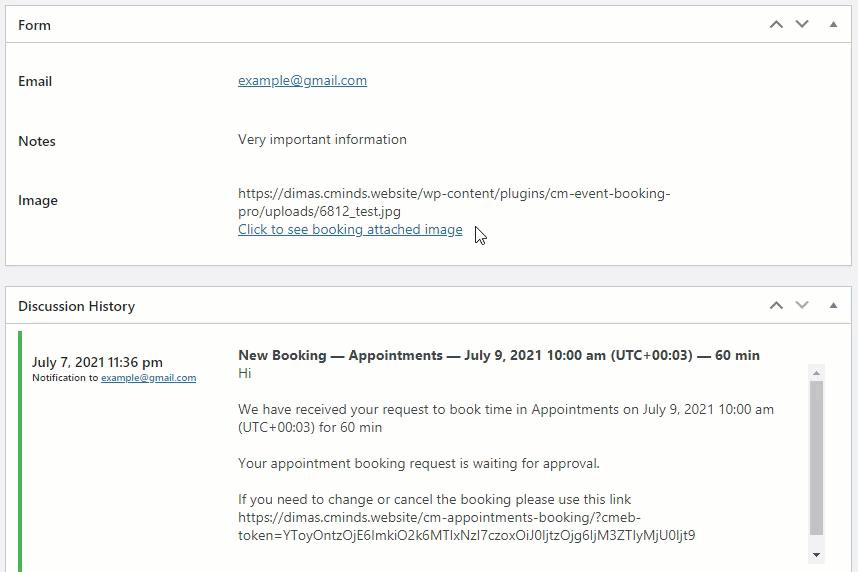
You can let the users to attach images in the booking form on the front-end. You can find the item Image and add it to your Form.
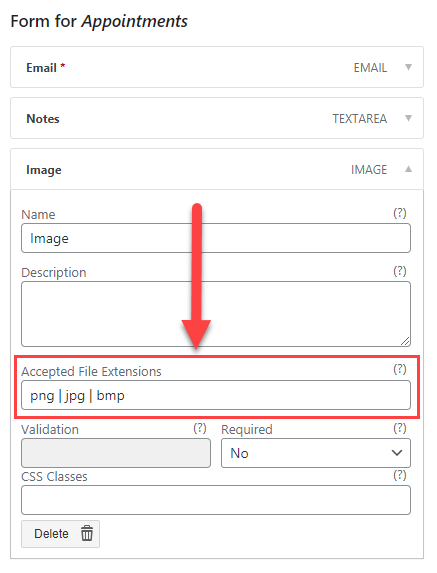
Important field for configuring this item is Accepted File Extensions. You need to decide what types of images will be allowed and write them in the field without periods and separate multiple extensions using the pipe character - "|", as shown on the screenshot below.
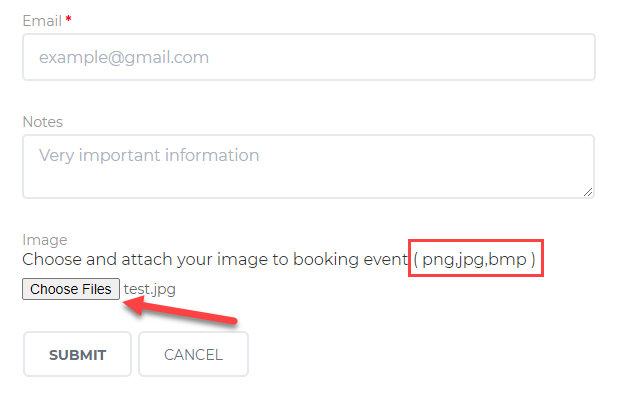
The user will be able to see the list of allowed extensions on the front-end. There is a button Choose Files for adding the image. Note: The user is able to attach only one image.
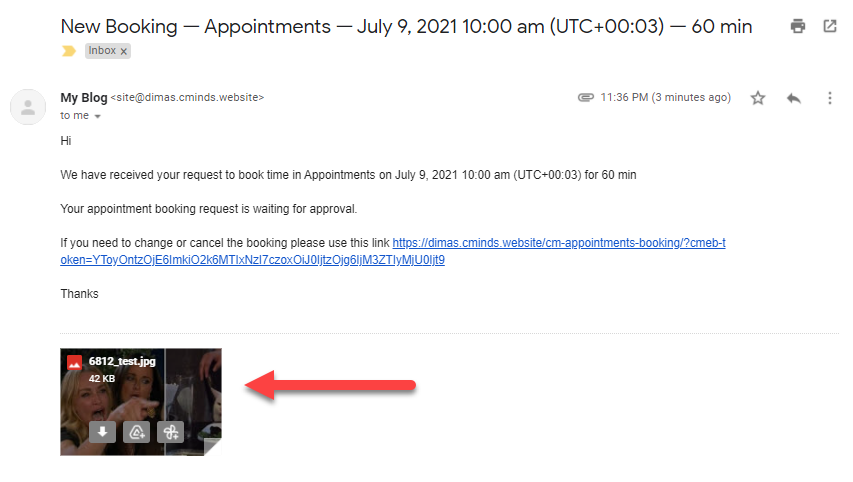
When the booking is submitted, the image is attached to emails that are sent to the user and to the admin.
All attached images are stored in plugins folder by the following path: /wp-content/uploads/cm-event-booking-pro/
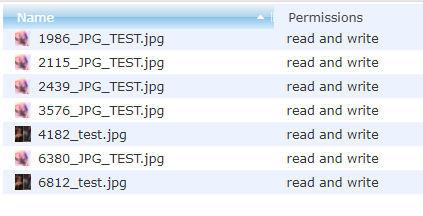
Note: to avoid possible problems with sending files with the same names, the plugin converts their names by adding a prefix with four random numbers.
The admin can also see the image attached to the booking while editing in the Form section by clicking the button Click to see booking attached image.
Calendar Form Options
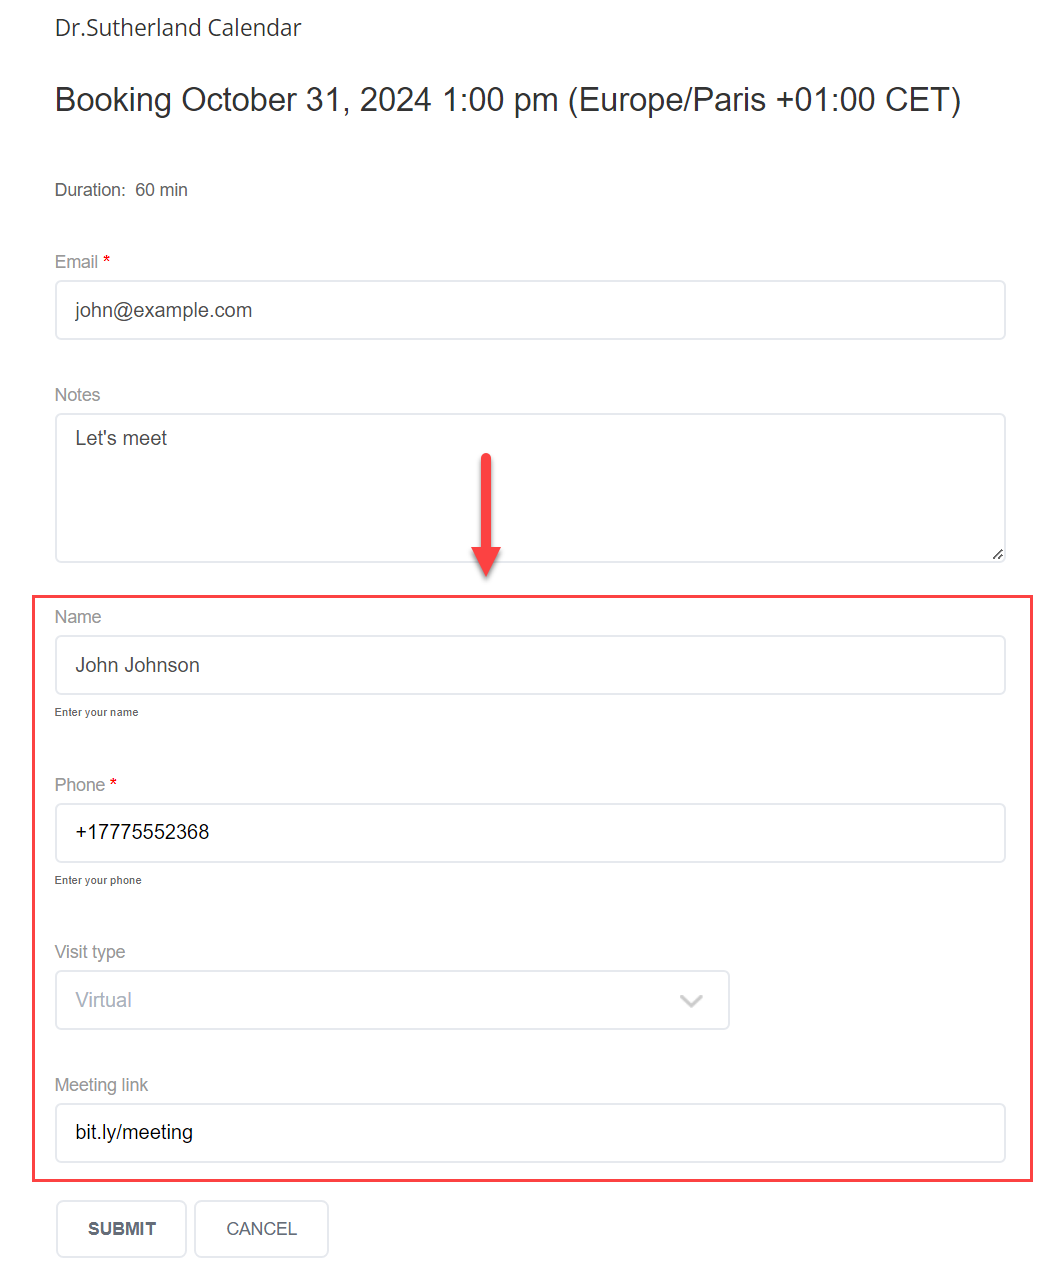
One more useful feature is a few additional fields for the form that you can add in bulk to all calendars. By default there are only two fields in the calendar form - Email and Notes.
On the right part of the screen you can see a section Calendar form options with a few expandable options:
- Name (this option was introduced in version 2.5.4)
- Phone (this option was introduced in version 2.3.6)
- Visit type (this option was introduced in version 1.6.1)
- Meeting link (this option was introduced in version 1.6.1)
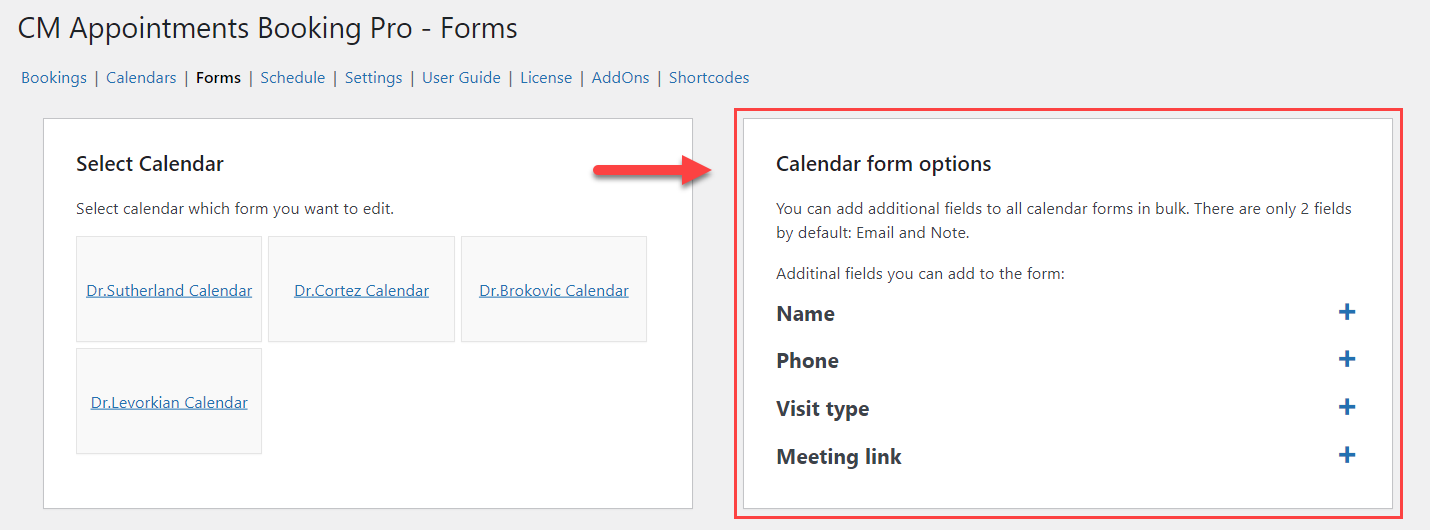
Click the "+" icon to expand any of these options to configure them. Click the "-" icon to collapse them.
Name
The option Name is useful to autofill the user name (of the logged-in user) in the booking submission form.
The user name is taken from 2 fields in the user profile: First Name and Last Name.

You can configure the following options:
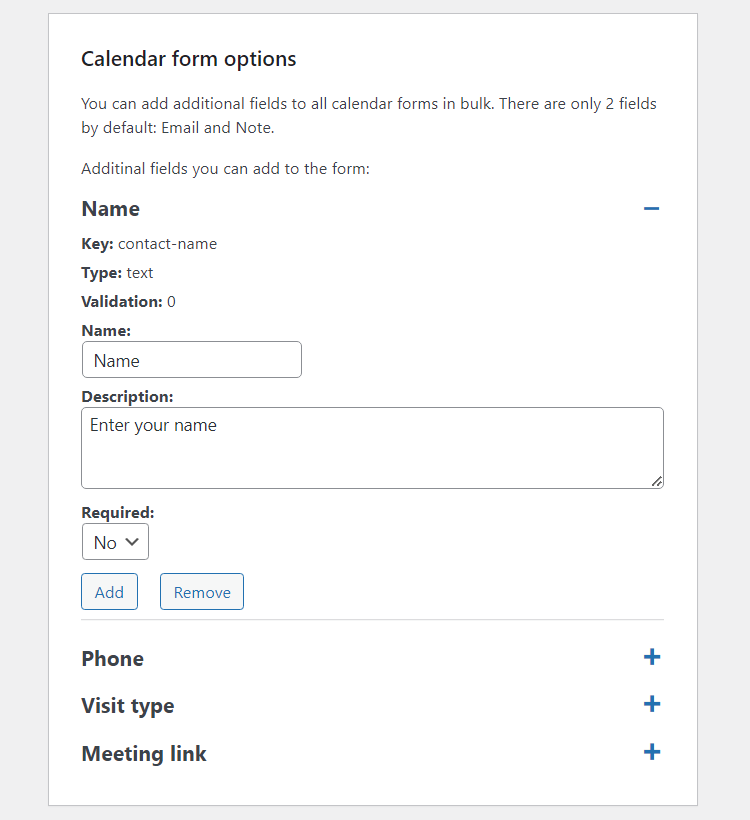
- Name - Name of the field.
- Description - Description of the field.
- Required - Define if this field should be required or not.
After you configured the field, click the button Add - this field will appear in all calendars. To delete these field from all calendars click the button Remove.
Phone
The option Phone can be useful, when you want to remind your customers about upcoming meeting with SMS messages. Learn more: Appointment Booking Calendar - SMS Notifications
You can configure the following options:
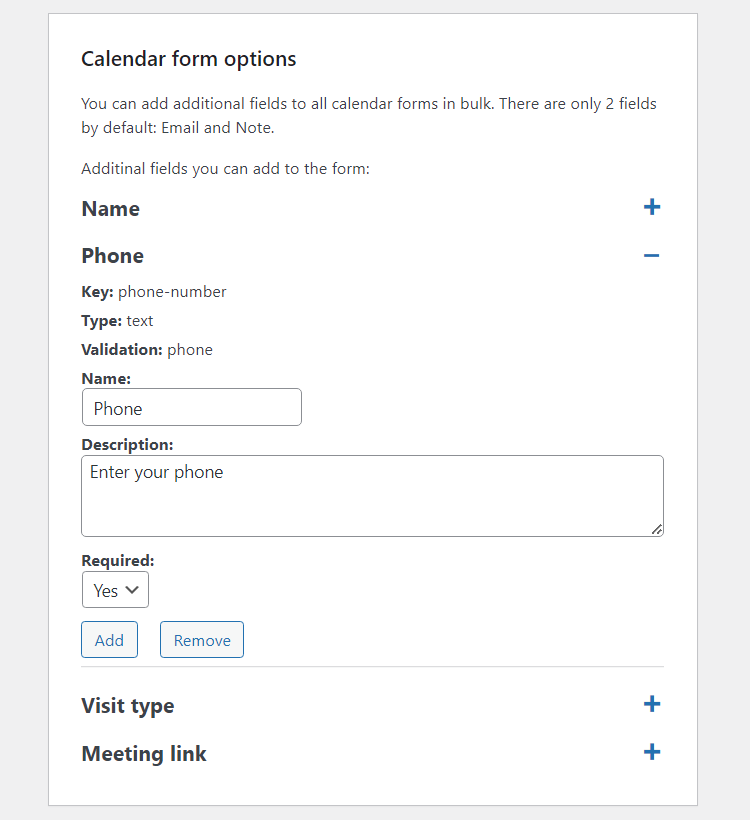
- Name - Name of the field.
- Description - Description of the field.
- Required - Define if this field should be required or not.
After you configured the field, click the button Add - this field will appear in all calendars. To delete these field from all calendars click the button Remove.
Visit type
The option Visit type is needed to lets the user choose the type of the visit.
You can configure the following options:
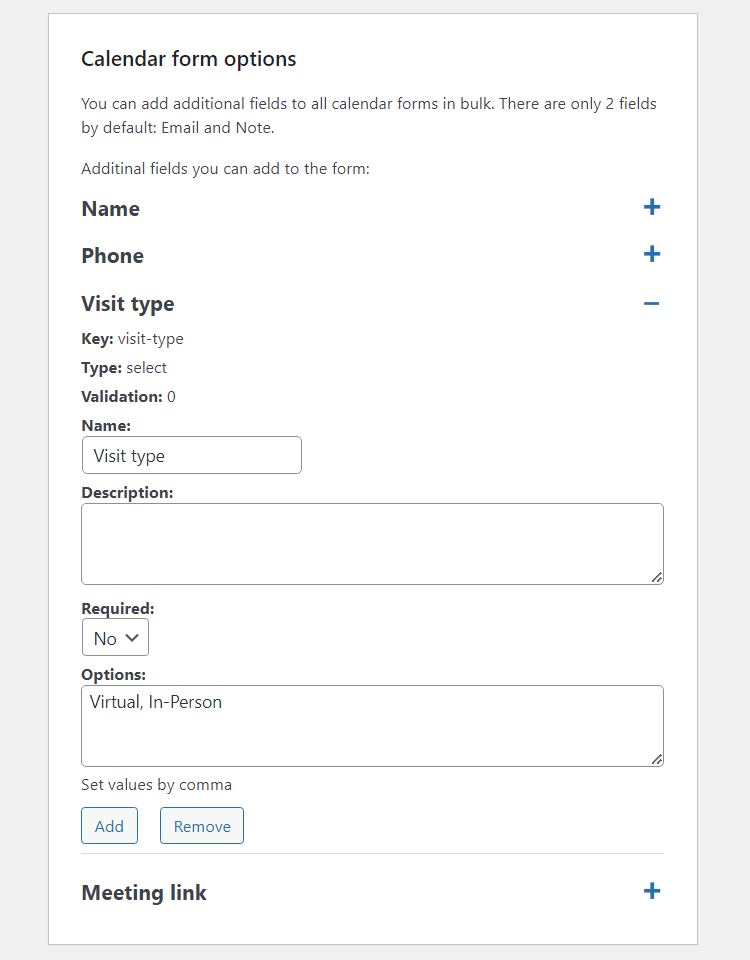
- Name - Name of the field.
- Description - Description of the field.
- Required - Define if this field should be required or not.
- Options - Here you need to write possible options that users can choose from. On the front-end it is displayed as a radio-button list. The options must be separated by comma.
After you configured the field, click the button Add - this field will appear in all calendars. To delete these field from all calendars click the button Remove.
Meeting link
You can add the option Meeting link when you have a type of meeting that is supposed to be online. So in this field the user can add the URL-link with invitation to Zoom or Google meeting for instance. This field has a URL-validation.
You can configure the following options:
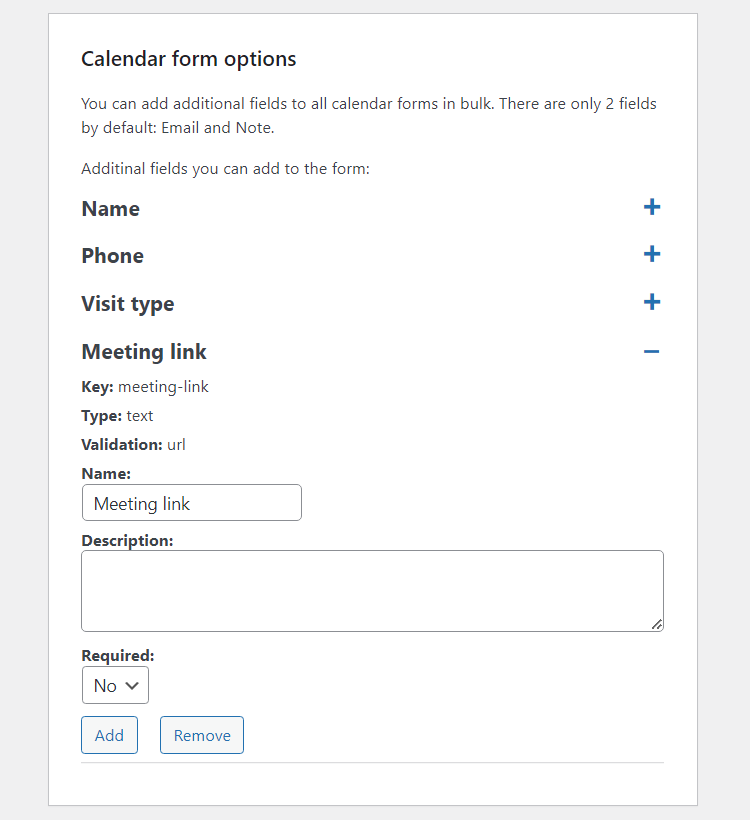
- Name - Name of the field.
- Description - Description of the field.
- Required - Define if this field should be required or not.
After you configured the field, click the button Add - this field will appear in all calendars. To delete these field from all calendars click the button Remove.
Result
Four new fields will appear in all your calendars:
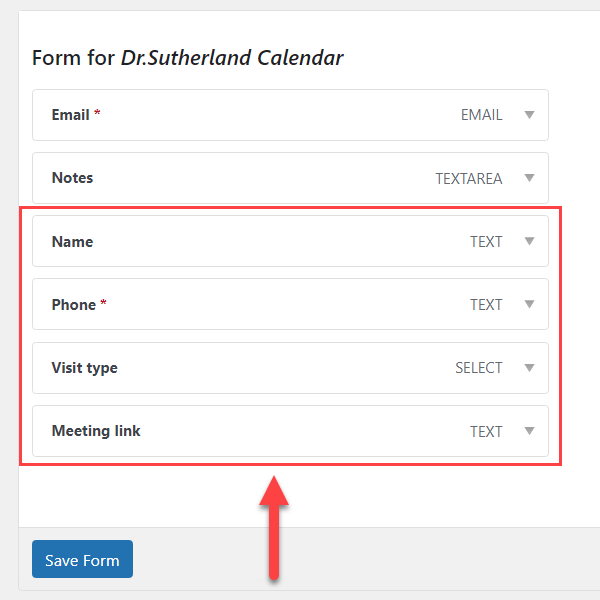
Front-end Example
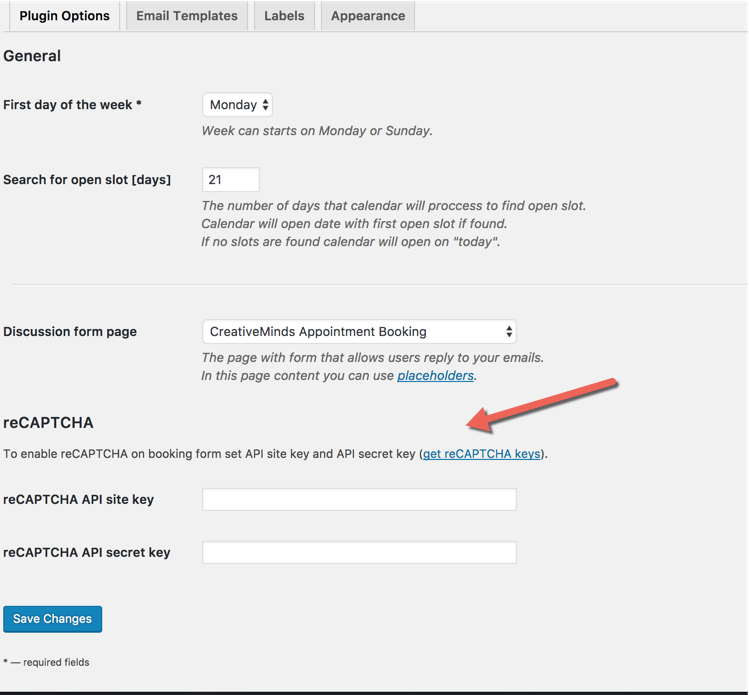
Adding ReCaptcha
if you want to reduce potential automatic spam request you should add a reCaptcha keys in the plugin general setting. Once added, all forms for all calendars will have reCaptcha at the bottom of the form
 |
More information about the Appointment Booking Calendar plugin for WordPress Other WordPress products can be found at CreativeMinds WordPress Store |
 |
Let us know how we can Improve this Product Documentation Page To open a Support Ticket visit our support center |