Appointment Booking Calendar - SMS Notifications
SMS Notifications
Introduction
Since the Appointment Booking Calendar plugin version 2.3.6 it is possible to remind users about scheduled appointments using SMS notifications.
Note: This feature demands connecting the plugin with Amazon SNS. You need to get API Key and Secret, and configure the region in order to enable the SMS feature. Learn more how to do this in this guide: General Support - Enabling SMS Messages (Amazon SNS API)
Setting Up SMS Notifications
To configure the SMS notifications feature, navigate to Admin Dashboard → CM Appointments Booking Pro → Options → SMS Notifications tab.
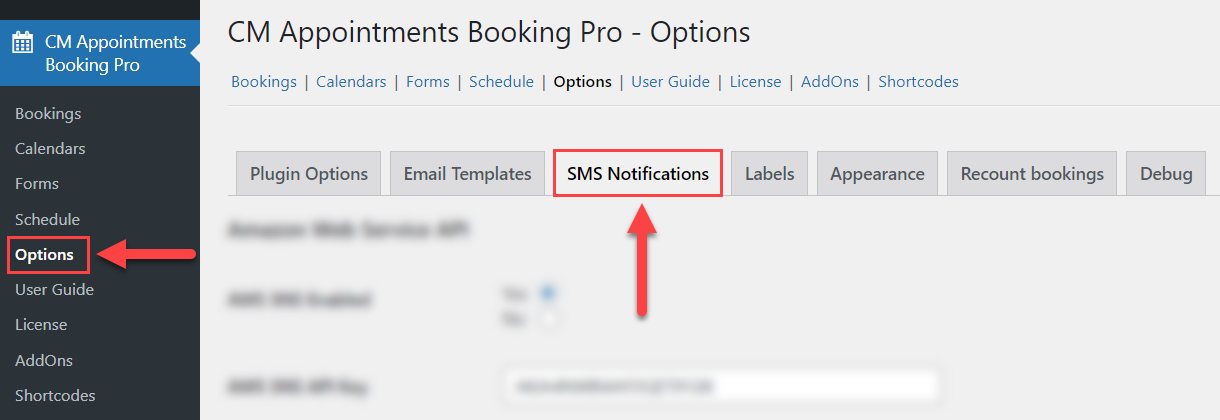
Here you can find 2 sections with the following options:
Amazon Web Service
In this section you need to connect the plugin with your Amazon SNS account.
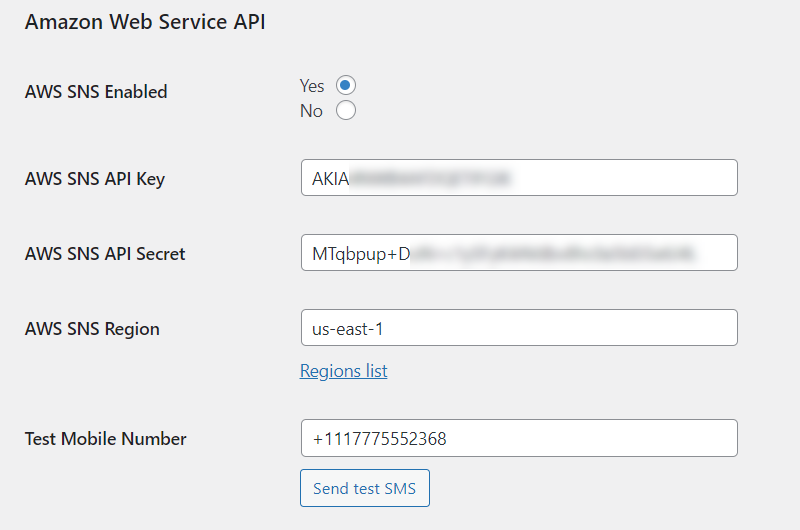
- AWS SNS Enabled - Choose Yes to enable the feature.
- AWS SNS API Key - Enter here the API Key which you obtained from you Amazon SNS account.
- AWS SNS API Secret - Enter here the API Secret which you obtained from you Amazon SNS account.
- AWS SNS Region - Enter here the region code which you configured in your Amazon SNS account.
- Test Mobile Number - You can send a test SMS notification to the specified number. Note: you need first to save the changes after configuring the options above.
Messages templates
Here you can customize the SMS template - what information will be included there.
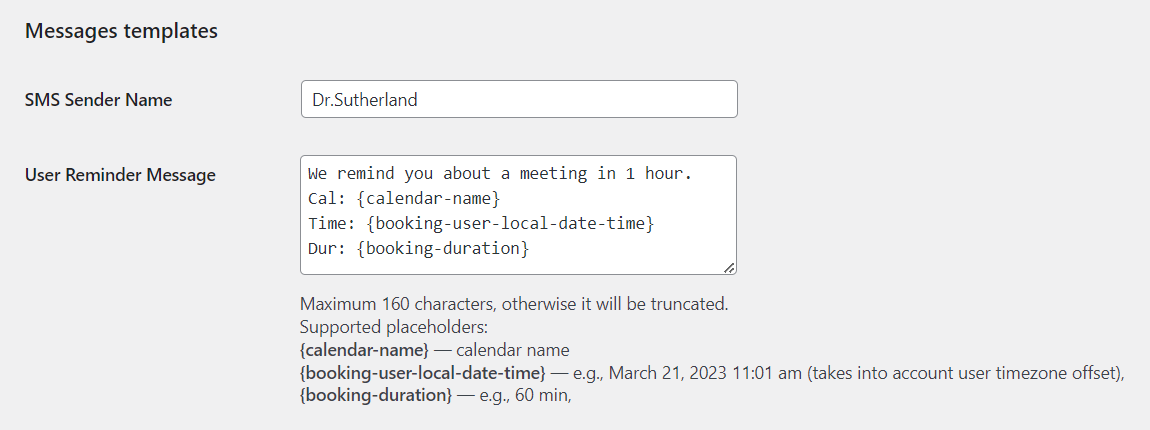
- SMS Sender Name - Specify the sender name which will be displayed in SMS notifications.
- User Reminder Message - Customize the SMS message template. Have a note that the maximum lenght of the SMS message is 160 characters, otherwise it will be truncated. The template accepts the following placeholders for adding dynamic content:
- {calendar-name} - Calendar name. For example - "Dr.Sutherland".
- {booking-user-local-date-time} - The date and time of the appointment according to the user local time. For example - "March 21, 2023 11:00 am".
- {booking-duration} - Duration of the meeting. For example - "60 min".
Don't forget to click the button Save Changes after configuring the settings.
Enabling SMS Notifications in Specific Calendar
The SMS notifications will be send to those users who provided the mobile phone number. It demands adding a new field to the form, which the user has to submit while booking the appointment.
To configure calendar forms, navigate to Admin Dashboard → CM Appointments Booking Pro → Forms.
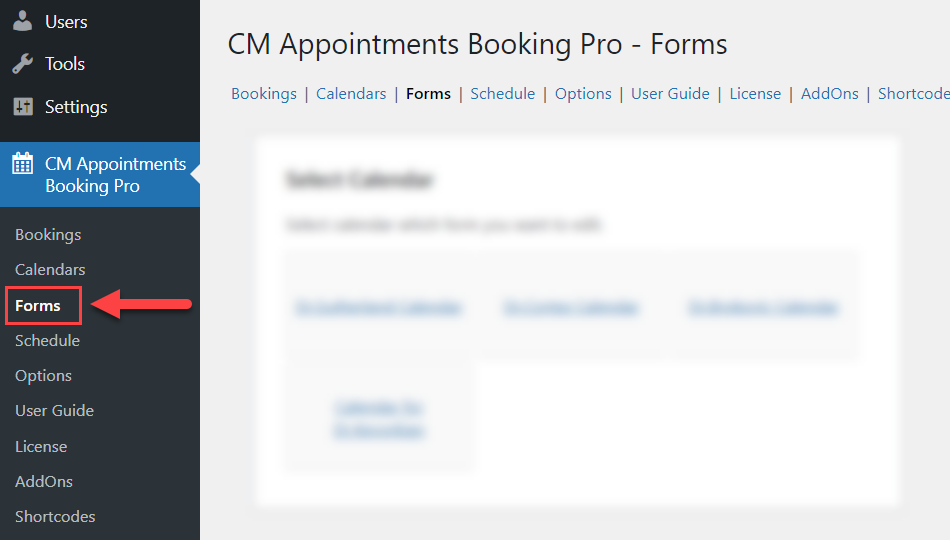
Here you can the phone field can be added to the form in two ways:
- To all calendars at once.
- Only to the specific calendar.
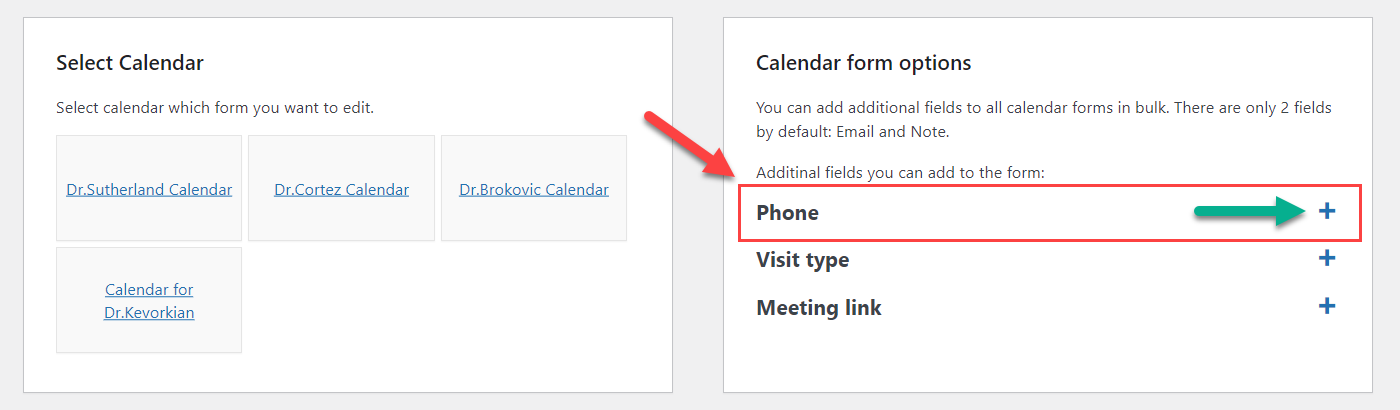
Adding Phone Field To All Calendars At Once
On the right part of the screen you can see a box Calendar form options. It has a few field templates which you can add to calendars in bulk. Click the "+" button next to the field Phone.
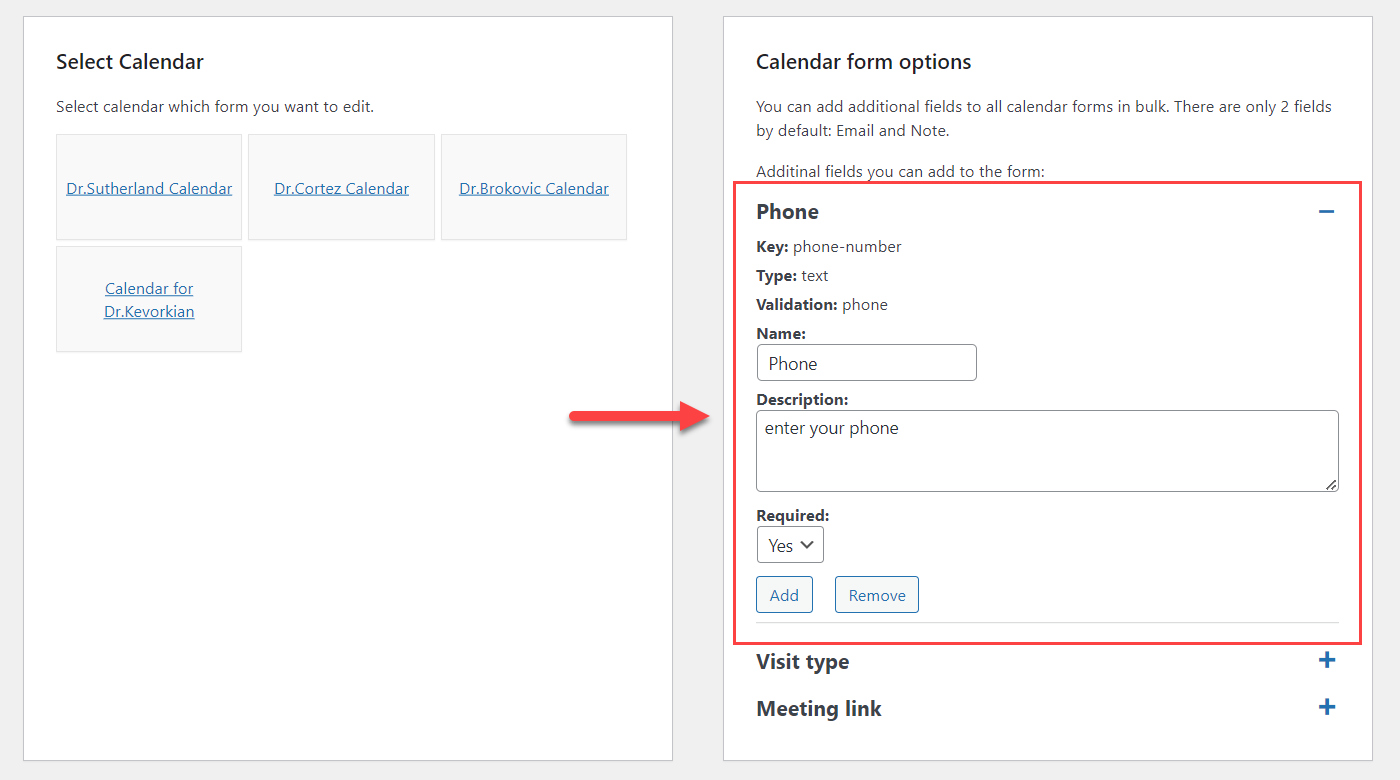
There will appear a form. You can edit here the field name, field description and decided if this field should be required. After clicking the button Add, this field will be added to all calendars.
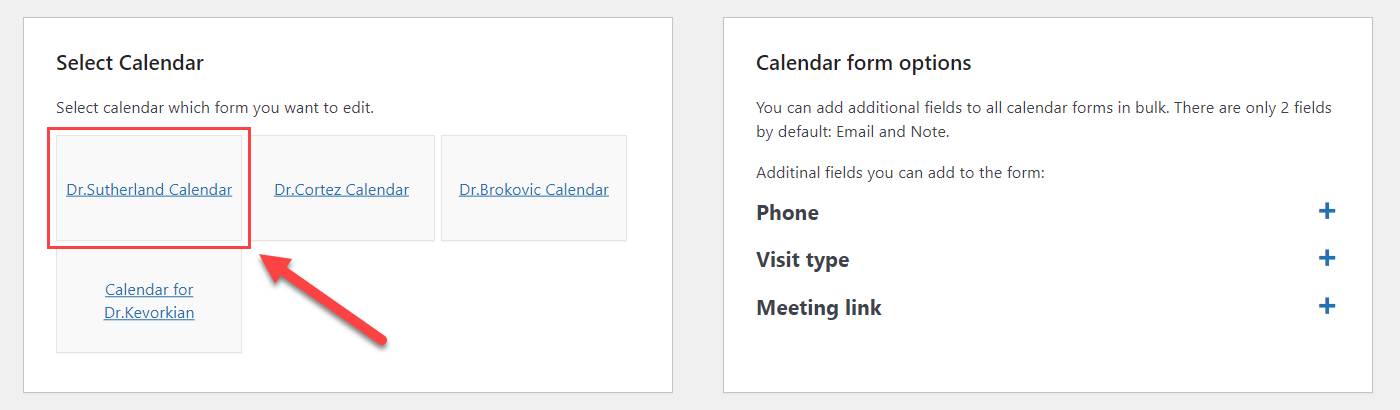
Adding Phone Field To the Specific Calendar
To add a phone field only to the specific calendar, click on any calendar in the box Select Calendar.
There will appear a form builder for a chosen calendar. On the left side in the box Form Items, you can see different field types which you can add to the form. On the right side you can see and manage the fields added to the form.
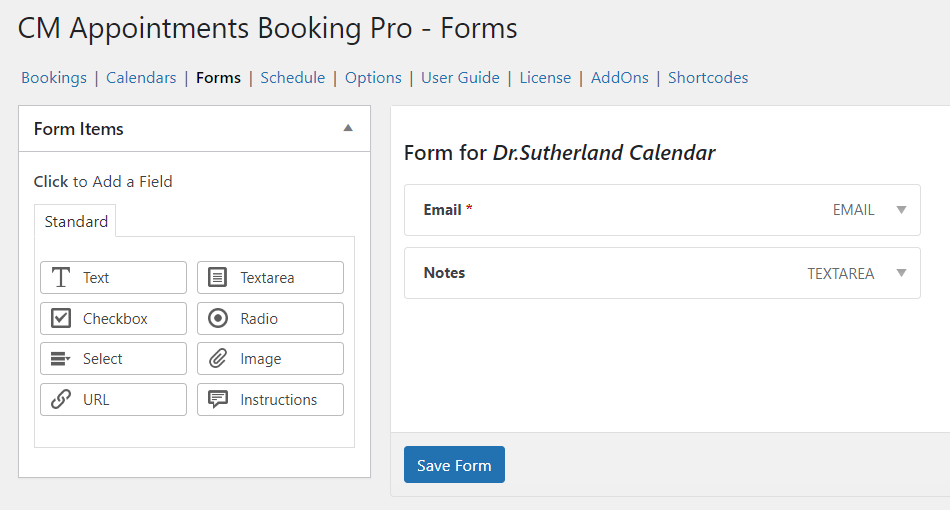
To add a phone field to the form, click on the field type Text in the Form Items box. It will be added to the form. Then expand the added field on the right side of the screen. Enter the field name and description, choose Phone in the Validation type dropdown, and additionally you can set up this field as required. Then click the button Save Form.

Front-end Example

 |
More information about the Appointment Booking Calendar plugin for WordPress Other WordPress products can be found at CreativeMinds WordPress Store |
 |
Let us know how we can Improve this Product Documentation Page To open a Support Ticket visit our support center |