WordPress MicroPayments (CMMP) - WooCommerce - Payment Gateway
Setting Up Payment Gateway for WooCommerce
WordPress MicroPayments allows you to allow users to use their points as payment currency in the shop you're running.
Settings
To use the WooCommerce Payment Gateway, you need to do the following:
- Enable it in the MicroPayments plugin settings
- Setup the Gateway in the WooCommerce
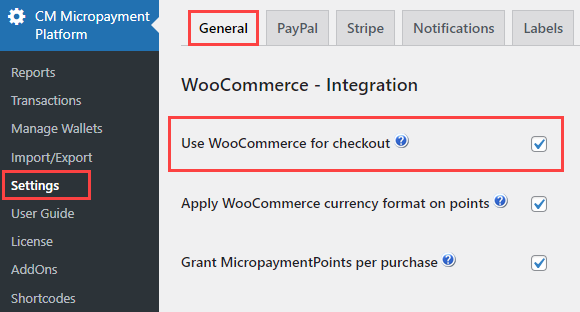
Below: To enable the WooCommerce payment gateway, you need to check the option called Use WooCommerce for Checkout in the CM Micropayment Platform → Settings → General.
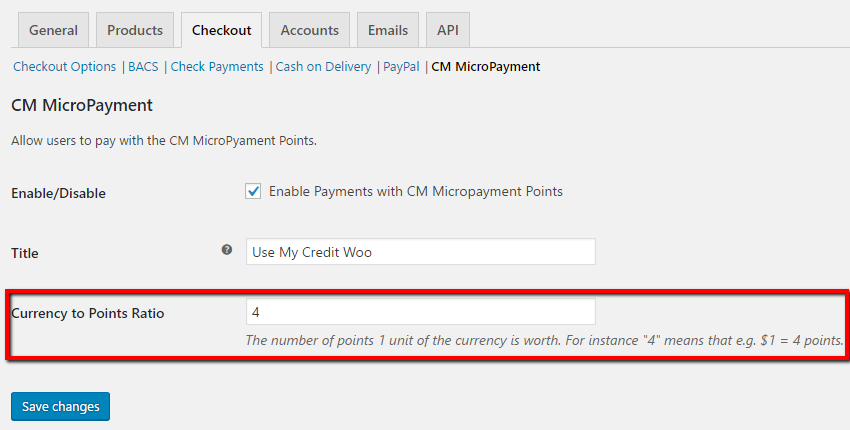
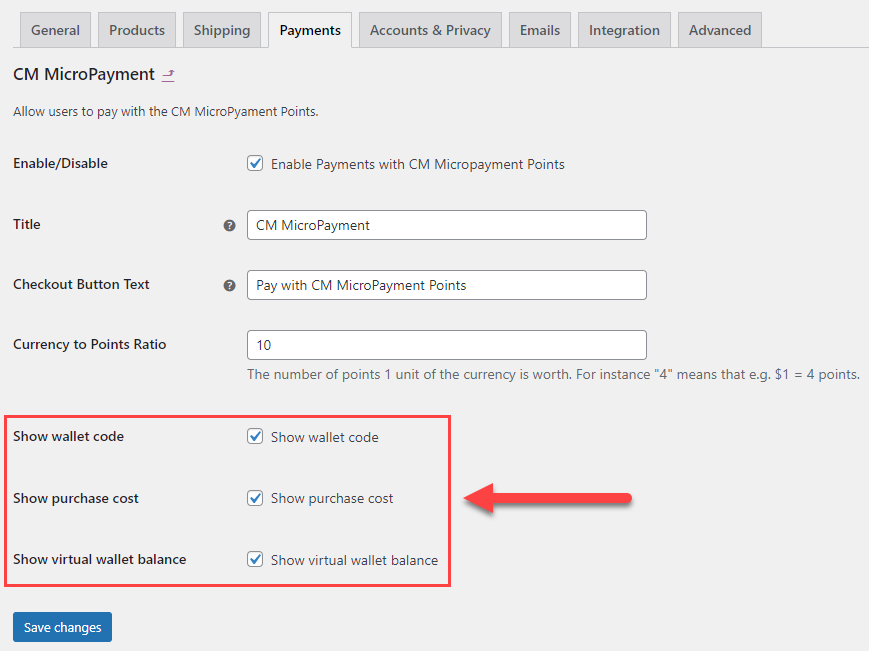
Below: The settings of the Gateway in the WooCommerce. One of the most important things is setting up the ratio (marked with red border)
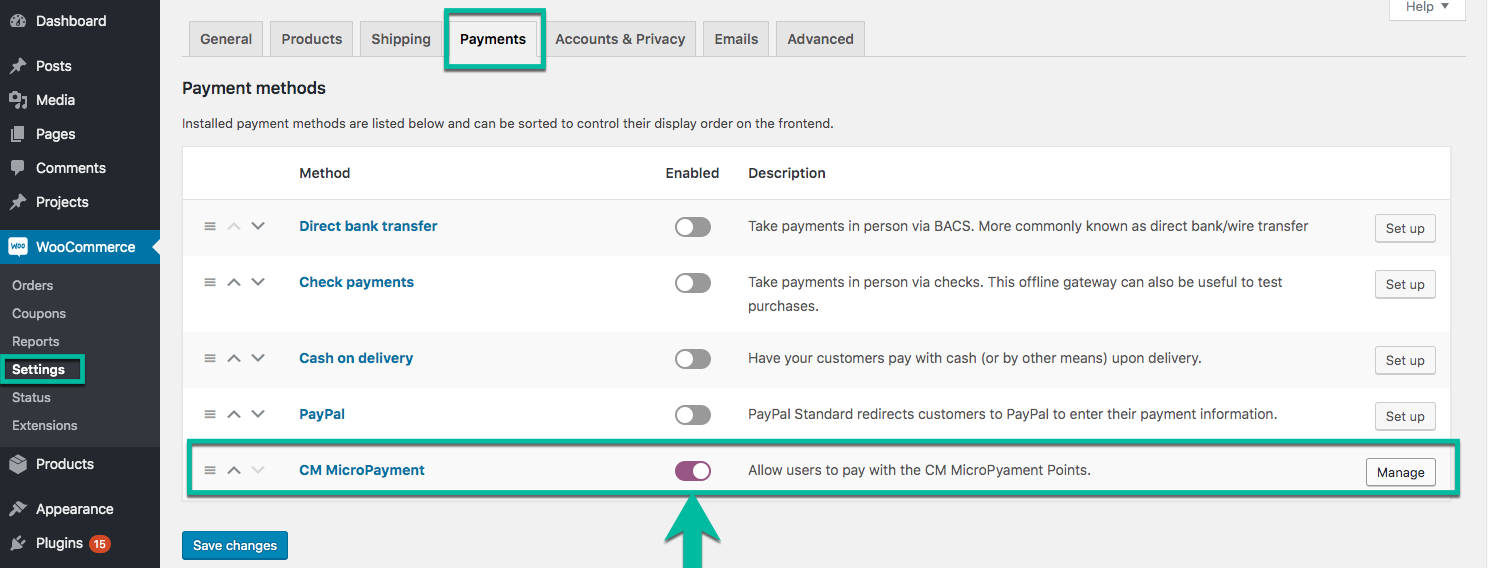
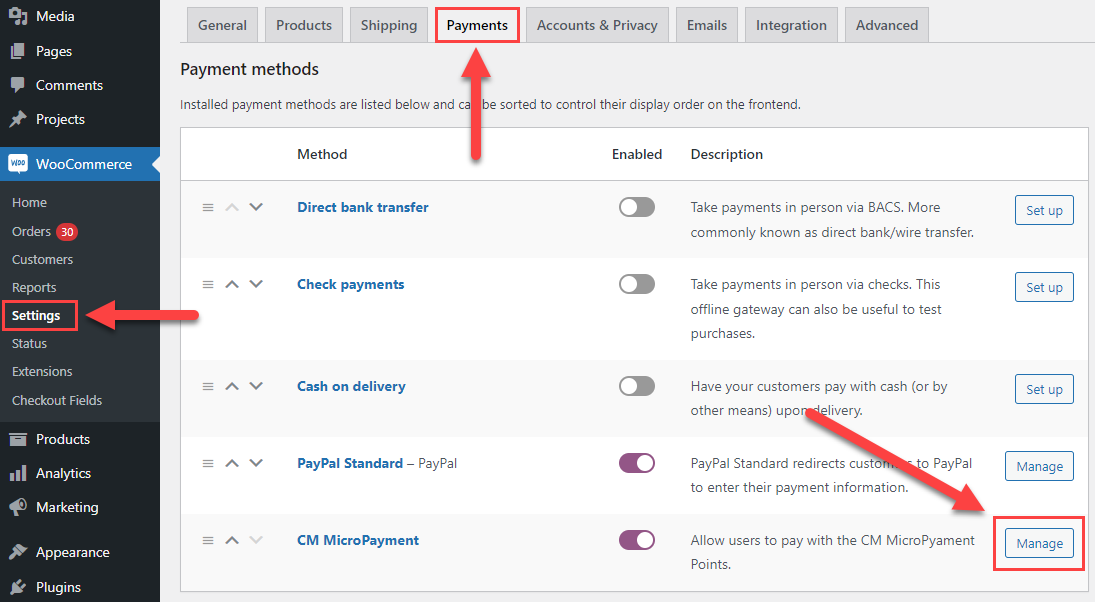
After saving changes, you can get back to WooCommerce → Settings → Payments and see if the payment gateway appears on the list.
Below: The Micropayment plugin gateway appears on the list under the name "CM MicroPayment"
Using the gateway
After setting up you can use the gateway as any other payment gateway.
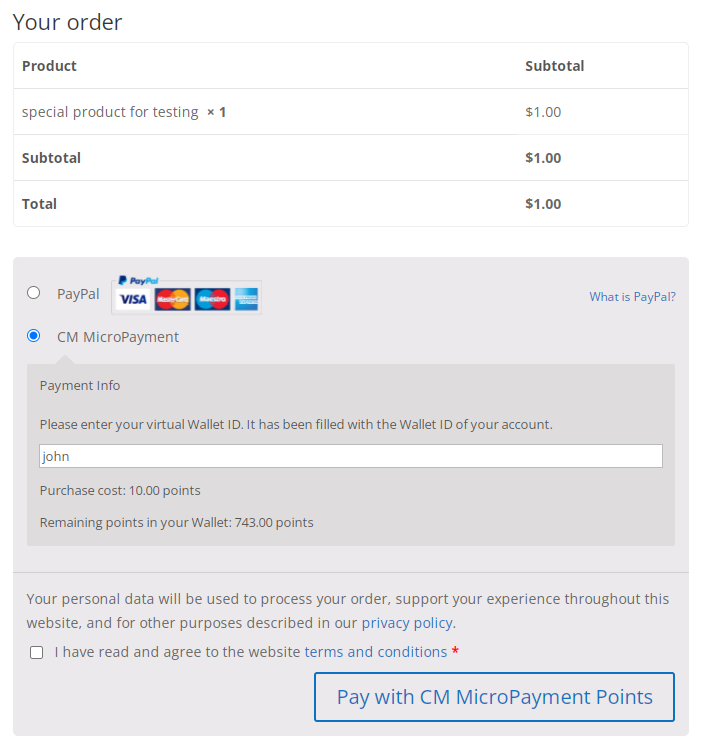
On the checkout after selecting the Gateway user will have to just fill the Wallet ID (which is pre-filled if the user is logged in and the Wallets are assigned to users). Below there's an information on how much points would be required to purchase and how many points are left in the given wallet.
Below: Example Checkout with the CM Micropayment Gateway selected.
TIP: Show/Hide Payment Info Elements
Since the version 2.1.1 you can show or hide Payment Info elements:
- Wallet ID/Nickname
- Purchase cost
- Wallet balance

To do this, navigate to Admin Dashboard → WooCommerce → Payments tab, find CM MicroPayment and click Manage.
Then check or uncheck the elements you want show or hide using the following options:
- Show wallet code
- Show purchase cost
- Show digital wallet balance
Then click Save Changes.
After Transaction
After the transaction, if it's successful, the number of points will be subtracted from the Wallet and the transaction will appear in the Wallet's history.
 |
More information about the WordPress MicroPayments plugin Other WordPress products can be found at CreativeMinds WordPress Store |
 |
Let us know how we can Improve this Product Documentation Page To open a Support Ticket visit our support center |