CM Product Directory (CMPD) - Custom CSS
Custom CSS Settings
Navigate to the Admin Dashboard → CM Product Directory → Settings.
Click on the Custom CSS tab.
In the Custom CSS box, enter the style you want. This style will only be used on pages where the Product directory appears and will alter the default css settings associated with it.

Tag filter elements with applied custom CSS.

There are several css examples which you can use and inject into the custom css tab. they are marked in the following example as A,B,C... once injecting them you can also make modifications based on your needs.

TIP: Making your custom CSS priority with !important
If your custom CSS is not working and appearing crossed out, it means other rules have higher priority. 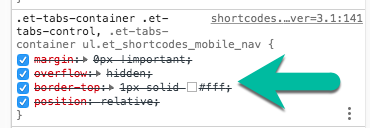
You can set your rule as more important by adding the !important property.
For example, this line
Read more about !Important: How to apply !important in CSS?
Quick Read
What is CSS
CSS allows you to make changes that WordPress, themes and even the plugins don't support. Be sure to test all changes before applying!
Learn more: General Support - Advanced - Custom CSS
CreativeMinds Can Help
If you prefer not modifying CSS and visual elements by yourself, CreativeMinds can help adapting CM plugins to your theme.
Learn more: Plugin Installation Service for WordPress by CreativeMinds
 |
More information about the CM Product Directory WordPress Plugin Other WordPress products can be found at CreativeMinds WordPress Store |
 |
Let us know how we can Improve this Product Documentation Page To open a Support Ticket visit our support center |