WordPress Registration Form Plugin (CMREG) + WordPress Restricted Site Access (SAR) - Use Case - How to Create a Membership Site
Use Case – How to Create a Membership Site
Note: This use case requires the following plugins and add-ons to be installed and activated:
- WordPress Registration Form Plugin - This document uses Pro version 3.4.3
- Registration Payment Add-on - This document uses version 2.1.7
- WordPress Restricted Site Access - This document uses version 1.6.7
- Either Easy Digital Downloads (EDD) or WooCommerce
Optionally, to allow recurring payments, use one of the following add-ons:
Introduction
The WordPress Registration Form plugin allows your users to login and register to your site via beautiful pop-ups. The Registration Payment add-on lets you charge users for registration.
The WordPress Restricted Site Access plugin allows you to create a membership and content restriction solution. The content restriction is based on user WordPress roles and if they are logged in or not. Choose which post type, category or even specific page should be locked - and to whom.
Both plugins also allow to manage user roles and edit their basic capabilities.
Use Case Front-End
Example of membership registration packages:
Choosing the membership level while registration:
Example of limiting access to the restricted area:
Example of restricting the post:
Example of restricting a certain part of the content:
Use Case Assumptions
In this example use case guide we will consider how to build a membership system on your site, create user roles and charge users for registration on your site.
It follows:
- Installing the plugin
- Installing payment plugin (EDD or WooCommerce)
- Managing user roles
- Assigning registration prices for each user role
- Displaying registration plans on the front-end
- Payment reminders
- Blocking content and areas on the site based on user roles
- Creating restricted user dashboard
- End result
Installing the Plugin
The process is the same for all CM plugins and add-ons.

- Download the plugin from your customer dashboard.
- Log in to WordPress and navigate to the WordPress Admin → Plugins settings.
- Click on Add New.
- Activate it and add the license.
Learn more: Getting Started - Plugin Overview
Installing Payment Plugin (EDD or WooCommerce)
You must choose between either Easy Digital Downloads or WooCommerce.
EDD or WooCommerce? No Difference For The Plugin
As far as Registration Payment add-on is concerned, there is no difference between using either EDD or WooCommerce.
Both are free and provide free and paid add-ons.
We recommend researching about each to find out what's better for your use case. If you already use one of them, it's better to keep using it.
Head to Admin Dashboard → Plugins → Installed Plugins and click Add New.
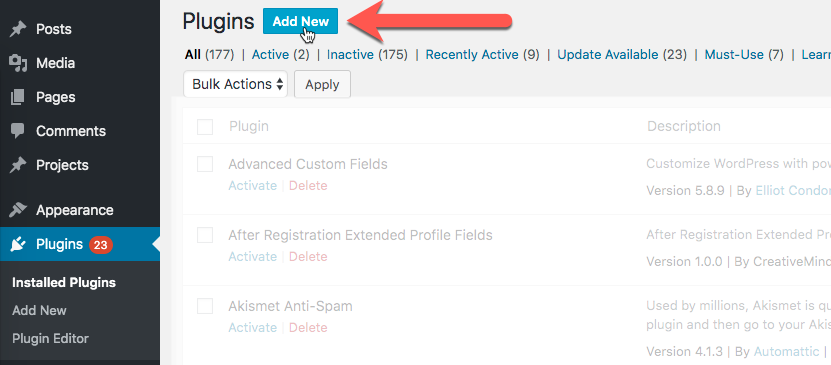
Search for either Easy Digital Downloads or WooCommerce and install it.
Configure Payment Plugins
Don't forget to configure the payment plugin! This way you can connect it to payment providers such as PayPal or credit card companies.
External Resources
Managing User Roles
TIP
Learn more about Roles and Capabilities in WordPress.
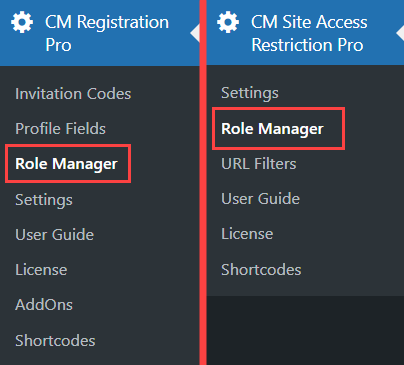
Both plugins, WordPress Registration Form plugin and WordPress Restricted Site Access plugin allow to manage user roles on your site - create, edit their basic capabilities and delete them. To reach these features, navigate to one of these paths:
- Admin Dashboard → CM Registration Pro → Role Manager
- Admin Dashboard → CM Site Access Restriction Pro → Role Manager
There you will find a table with all existing user roles on your site. Both plugins have identical functionality for managing user roles.
The button Add New Role above the table allows you to create a new user role.
Each user role has a list of actions available for managing them:
- View - Clicking on it allows you to see the list of enabled basic capabilities for that user role. Available for the Administrator user role only.
- Edit - Clicking on it allows to edit user role capabilities. Not available for the Administrator user role only.
- Duplicate - Clicking on it creates a copy of a chosen user role.
- Delete - Clicking on it allows to delete any user role except Administrator.
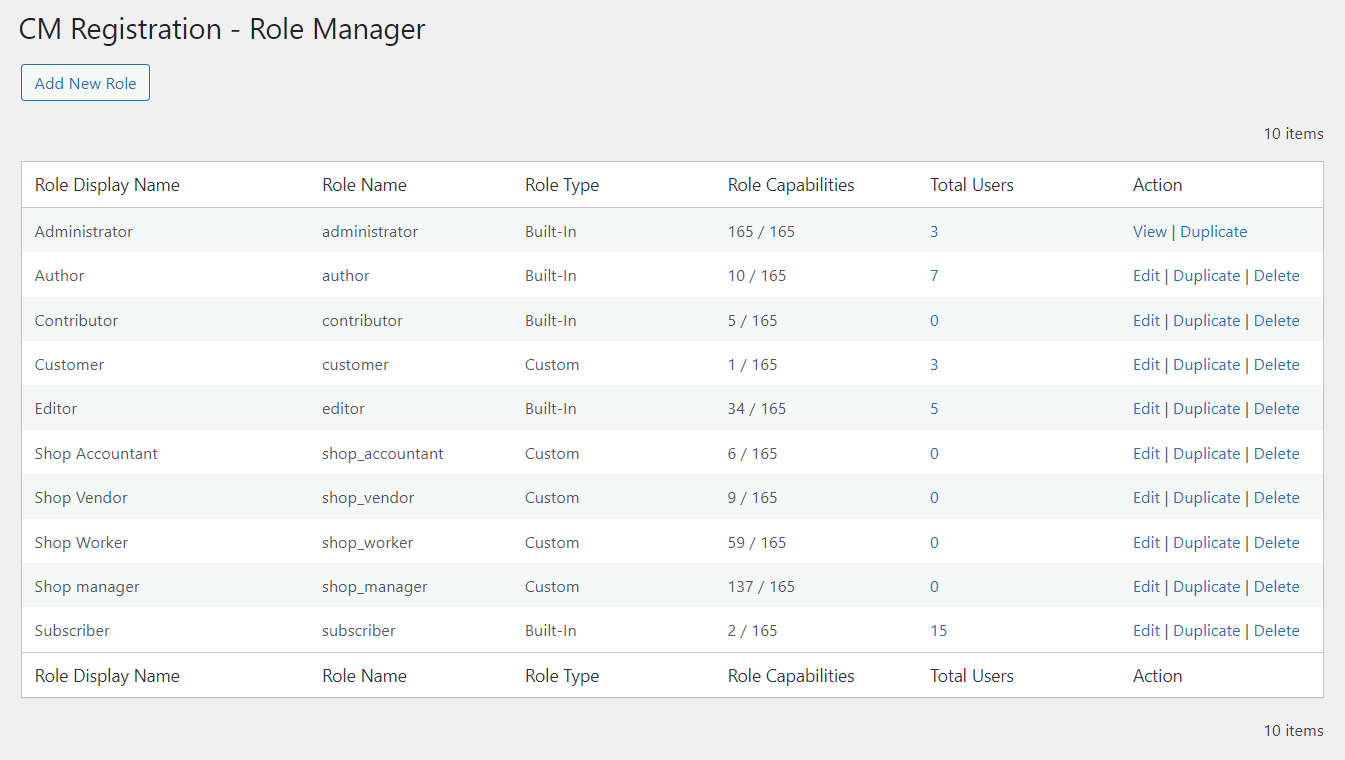
For each user role you can see its type (Built-In or Custom), the amount of enabled capabilities (for example - 35 / 165) and the amount of users for each role.
Clicking on any number in the column Total Users will open a new tab with the list of users of a certain category:

Create New User Role
Let's create a new user role called "Unicorn".
Clicking on the Add New Role button opens a form where you can:
- Enter required Role Display Name
- Enter required Role Name
- Select all available user capabilities at one
- Unselect all available user capabilities at one
- Manually choose needed user capabilities or groups of capabilities.
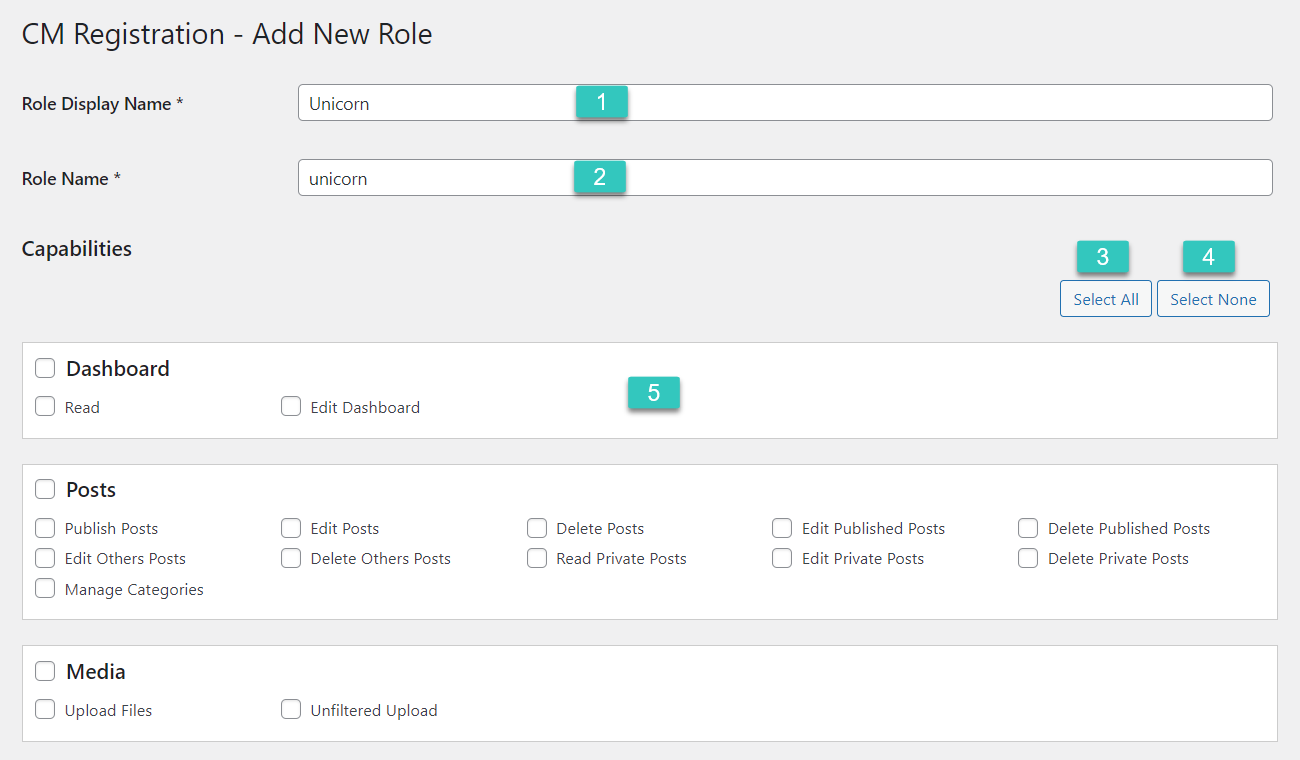
Click the button Select All to check all capabilities at once, and click Select None to uncheck them.
Select Specific Capabilities
All capabilities are sorted into relevant sections. You can select or unselect all capabilities in the section by clicking on the checkbox next to the section name. You can also select or unselect each specific capability.

Finishing Creating a User Role
To finish creating a new user role, click the button Add New Role below the list of capabilities.

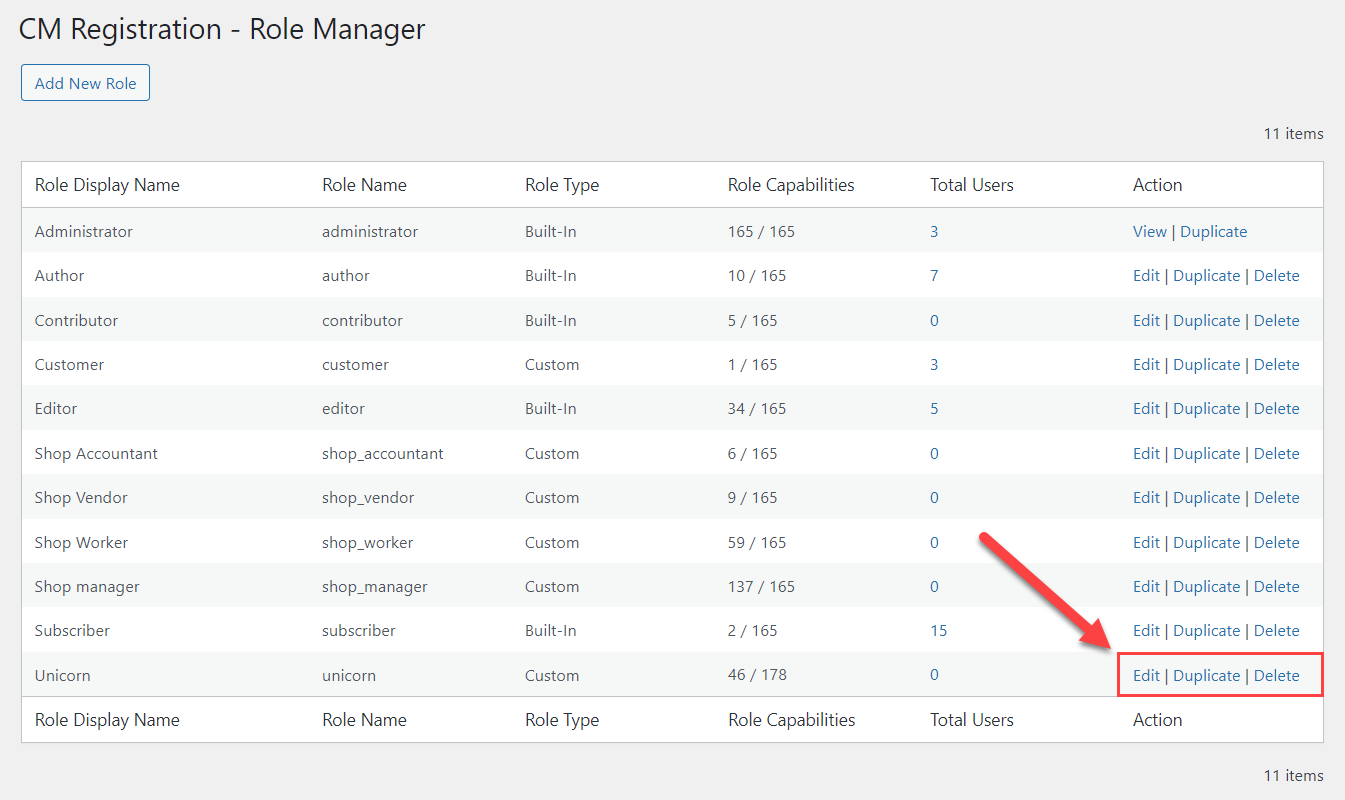
Edit / Duplicate / Delete User Roles
When the user role is created, you can Edit, Duplicate or Delete it, using the button in the Action column.
Edit User Role
The editing page looks almost the same as for creating a new user. The difference is that you can't edit the Role Name. All other actions are the same - you select or unselect needed user capabilities, and then click the button Update Role to save the changes.

Duplicate User Role
When you click Duplicate, it creates a copy of a chosen user role with all selected capabilities. To finish the duplicating process, you need to click the Add New Role button, or edit user role name or capabilities before it.

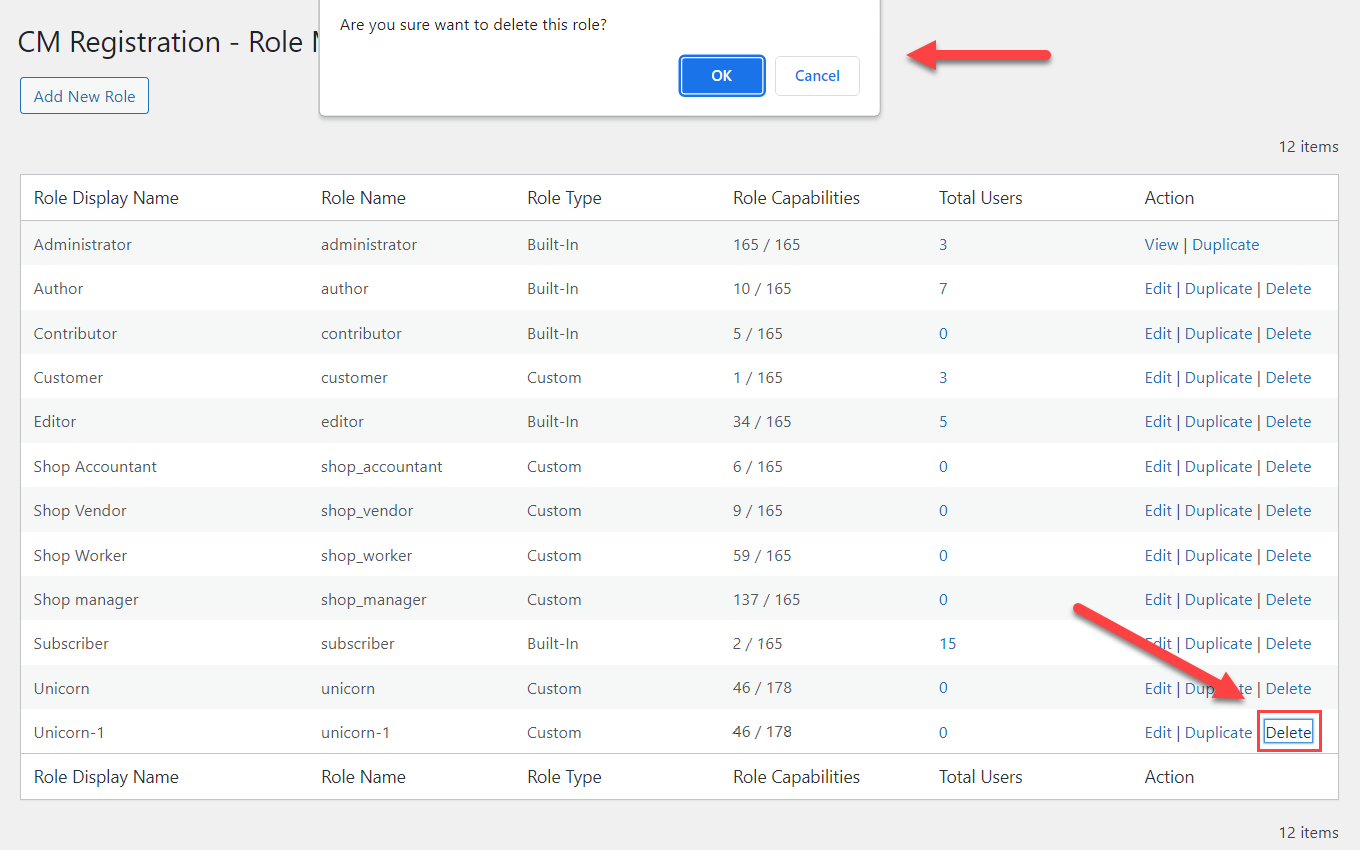
Delete User Role
Clicking on Delete will show you the confirmation message. To confirm the deletion, click the button OK.
Assigning Registration Prices For Each User Role
When we finished setting up user roles on the site, it's time to configure the payment side of the registration process - how to charge users for registration depending on the chosen user role.
Quick Recap
We recommend you first to learn about the basic WordPress Registration Form plugin configuration: WordPress Registration Form Plugin (CMREG) - Use Case - Adding Login and Registration Pop-ups With Invitation Codes
Navigate to Admin Dashboard → CM Registration Pro → Settings → Payments tab.
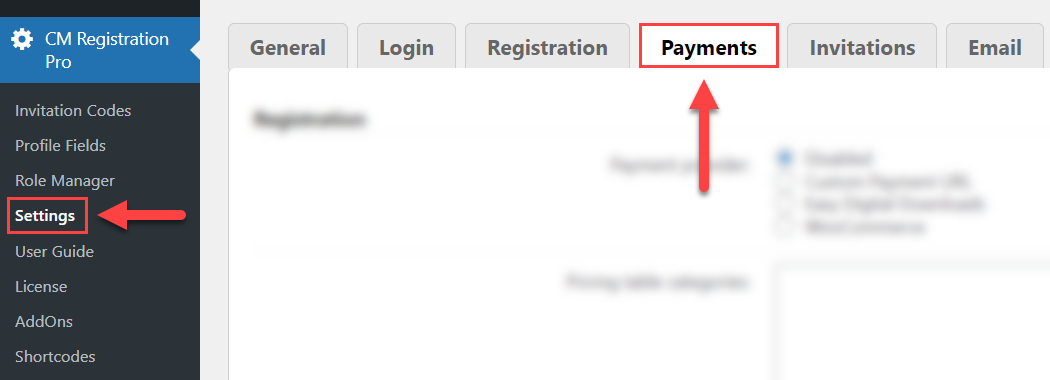
There you can find the following settings:
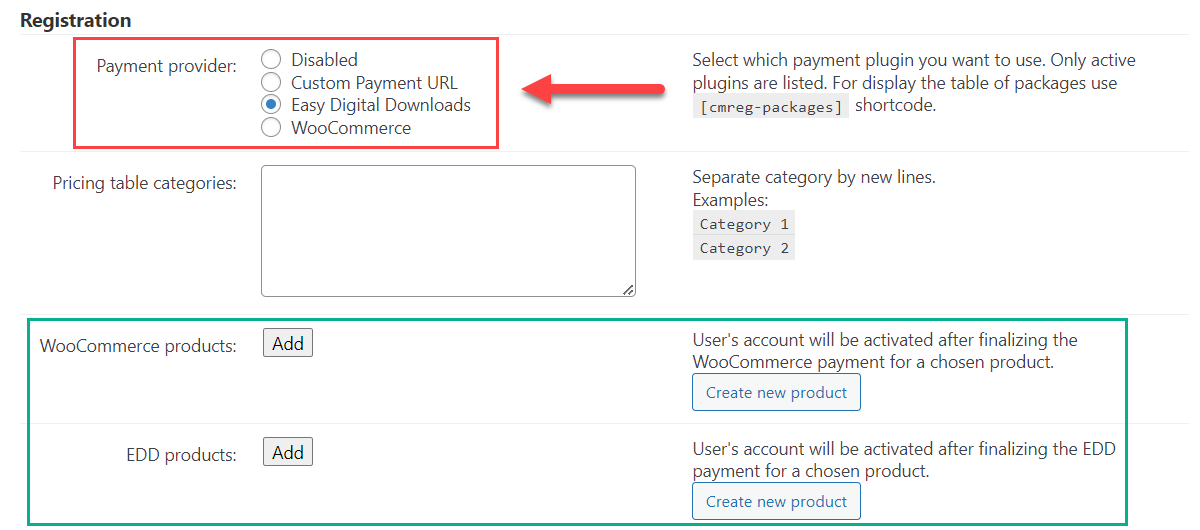
Choosing Between Payment Providers
First thing we need to do is to choose the Payment provider. You need to choose there between Easy Digital Downloads or WooCommerce - depending on which payment plugin you want to use. The option for each payment provider will be displayed only if the corresponding plugin is installed and activated on your site. And below there will be displayed a zone for each activated payment plugin, where we can create and assign products for our registration plans.
Let's choose Easy Digital Downloads for our use case. The process of assigning products will be the same in case with WooCommerce.
Setting Prices
Now let's set prices for registration for certain user roles. Each new pricing item can be added using a button Add.

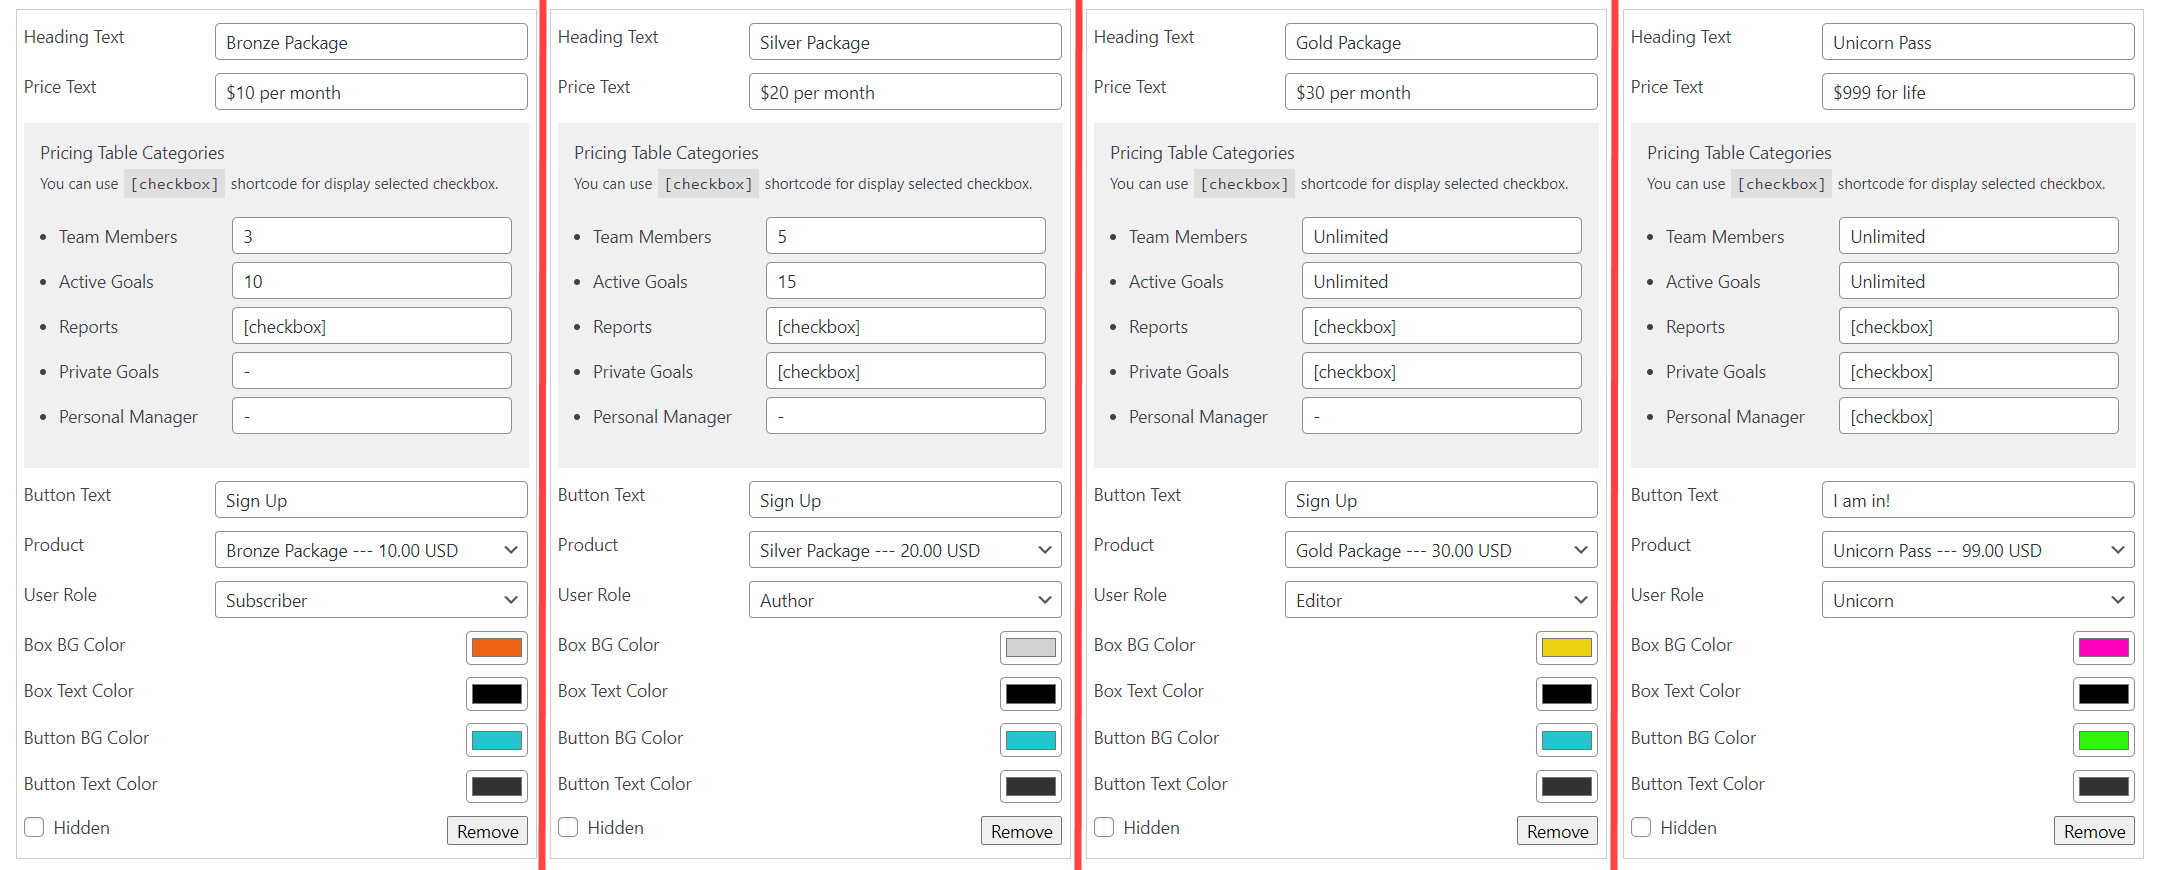
So, the options for setting up each pricing item are:

- Pricing table categories - Define categories for the pricing table. Separate each new category by a new line. When you filled them, click the button Save at the bottom of the page - after that, each pricing option that you create will have a box will corresponding fields.
- Heading text - Define the name of a pricing option which will be displayed in the pricing table.
- Price text - Define how the price will look like on the front-end. This option doesn't define or affect the actual price - the price depends on the chosen product which is specified in the option below.
Pricing Table Categories - This box is displayed only if you specified categories in the option #1 and saved changes. It shows the fields with categories that you defined. You can use a shortcode
[checkbox]if you want to show a checkbox symbol in the table.
Example of the pricing table - Button Text - Change text which will be displayed in the button for signing up.
Product - Define a price for a pricing option by choosing a pre-made product in a chosen payment plugin. If the product has a description - it will be displayed in the pricing table.

Adding info about the membership plan - User Role - Choose a user role that a user will have after paying for a chosen pricing option.
- Box BG Color - Specify the background color for a box that shows the pricing option information.
- Box Text Color - Specify the text color for a box that shows the pricing option information.
- Button BG Color - Specify the background color for a sign up button.
- Button Text Color - Specify the text color for a sign up button.
- Remove - Click it to remove chosen pricing option.
- Hidden - Check this box, if you don't want to display chosen pricing option in the pricing table on the front-end.
- Add - Click it to add new pricing option.
Create new product - Clicking on this button will direct you to the page for creating a new product in a chosen payment plugin.


Don't forget to click the button Save at the bottom of the page after setting up the payment settings.
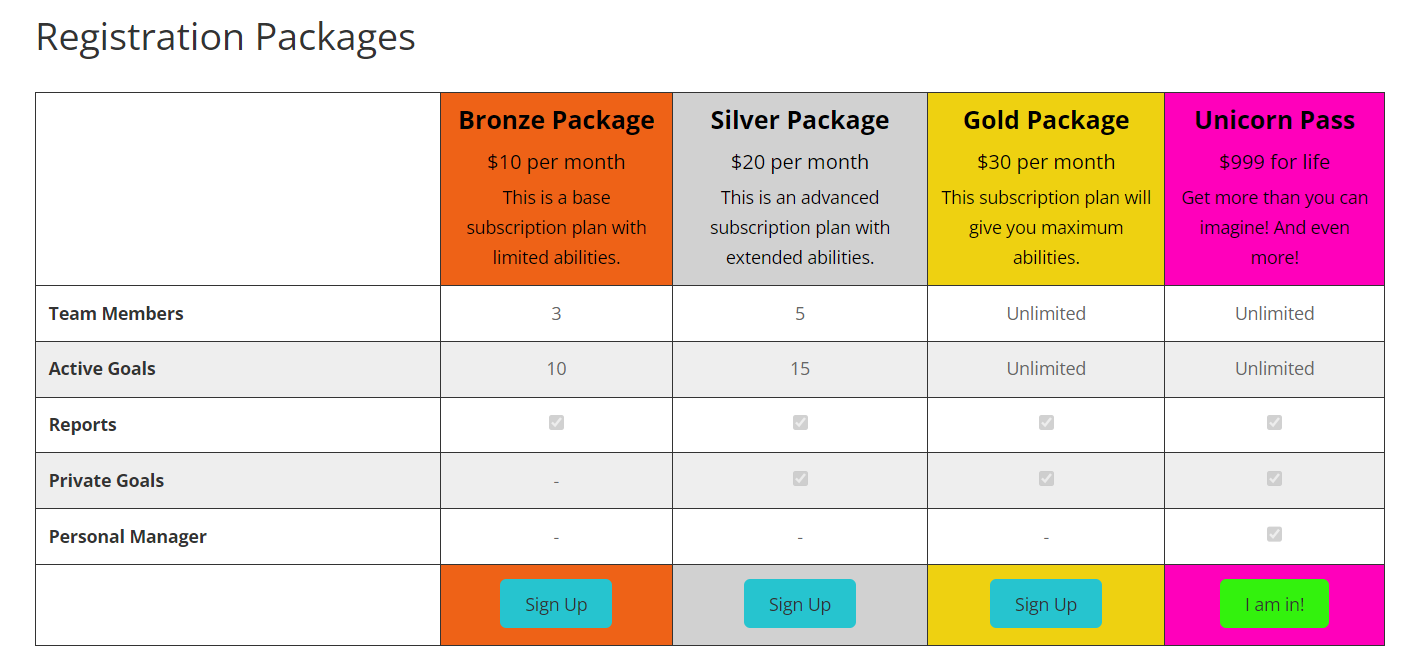
This way you can create multiple pricing options. Here are our pricing items:
And here is how these pricing items will look like on the front-end:

Subscription Model
By default, the payments plugins EDD and WooCommerce can commit only one-time purchases. If you want to make the registration based on subscription model, you need to install and activate add-ons for recurring payments for either EDD or WooCommerce:
- Recurring Payments - Subscriptions with Easy Digital Downloads (paid)
- WooCommerce Subscriptions - WordPress Subscription Plugin (paid)
TIP
- Learn how WooCommerce Subscriptions work: Introduction to WooCommerce Subscriptions
- Learn how EDD subscriptions work: Recurring Payments - Overview
This way, users will be automatically charged for using their accounts each specified period of time, for example: once a month or once a week. If the payment wasn't committed, the user account will be deactivated and the user will not be able to login to the site.
When the needed add-on is installed and configured, you will see new options while creating/editing products.
EDD
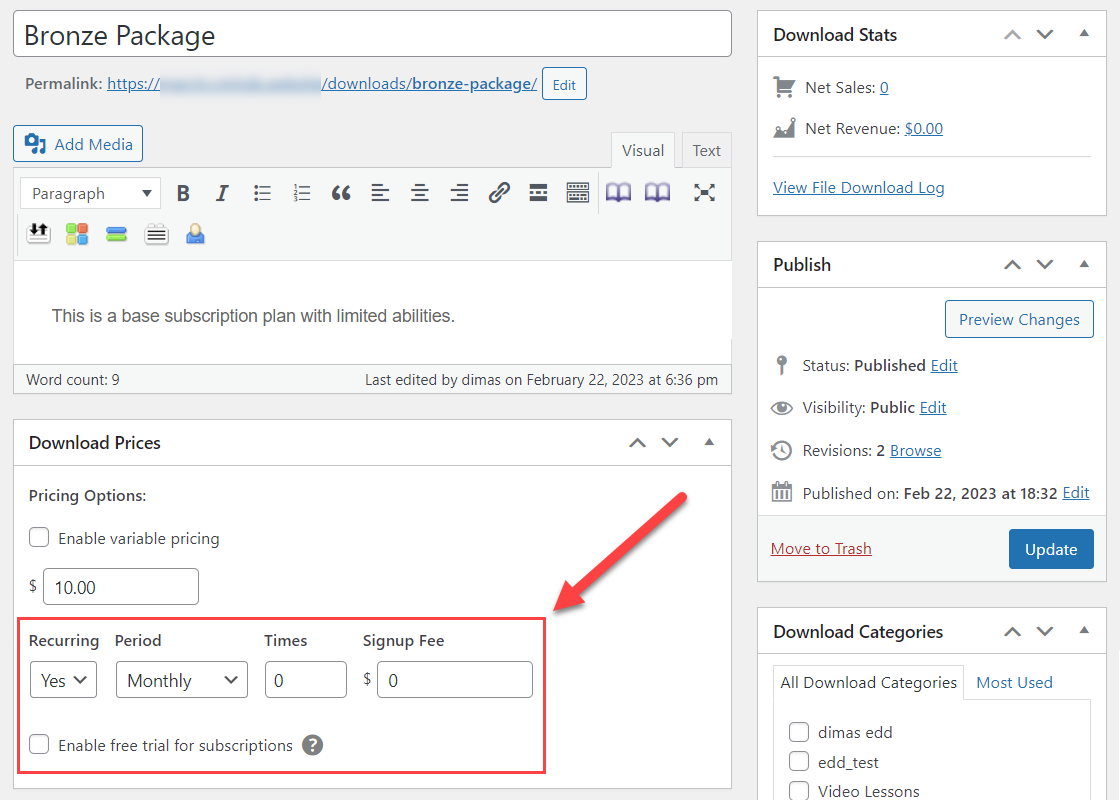
When using Recurring Payments for EDD, the section Download Prices will have new options:
- Recurring - Enable it, if you want this product to be recurring.
- Period - Define how often the user will be charged - every day, month, year, etc.
- Times - Define how many times the user will be charged. For example, if you specified Monthly in the option Period, and 12 in the field Times, then the user will be charged each month during 1 year. Then his subscription will be automatically stopped and account will be deactivated. To continue using his account, the user will need to subscribe again. You can set the value "0" to make it unlimited, until the user cancels his subscription on his own.
- Signup Fee - You can define a one-time price for a subscription in addition to recurring payments.
- Enable free trial for subscriptions - You can enable free trial.
Learn more about how EDD subscriptions work: Recurring Payments - Overview
WooCommerce
When using WooCommerce Subscriptions for WooCommerce, in the pricing section you can switch a type of Product data to a Simple subscription. You will see new options for setting up recurring payments which are similar to the options in EDD:
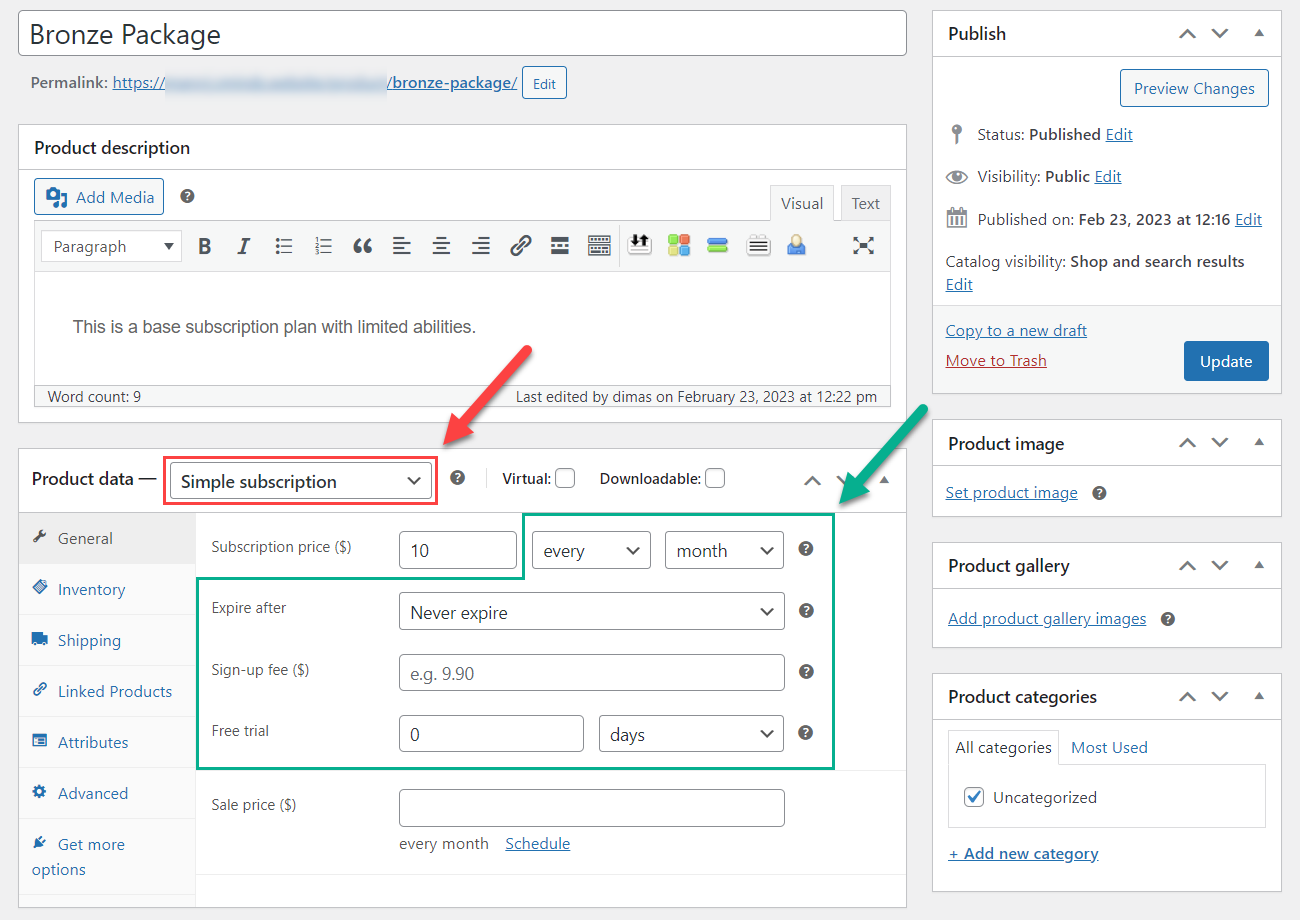
Learn more about how WooCommerce subscriptions work: Introduction to WooCommerce Subscriptions
Checkout Page With Subscription Model
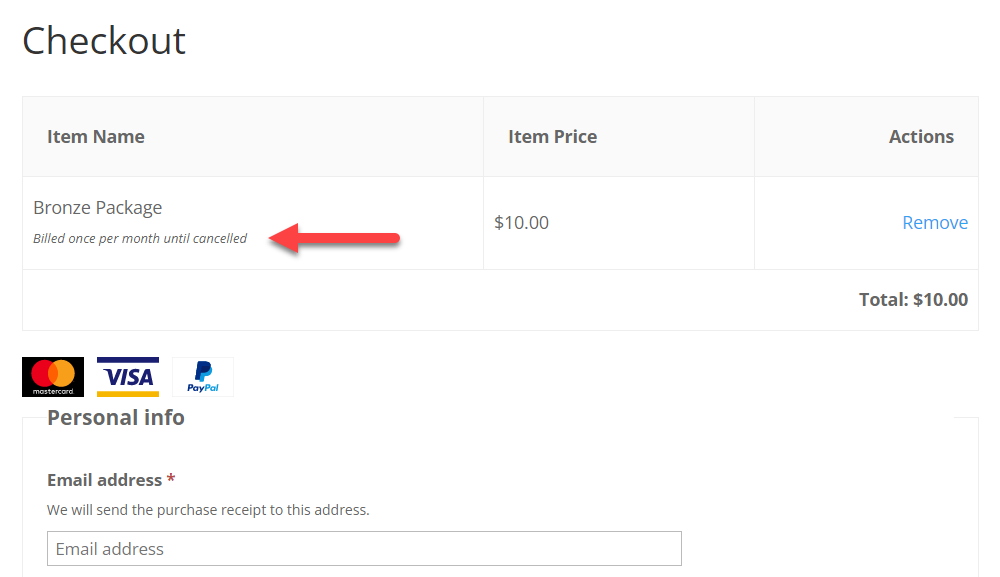
When the user chooses a plan based on a subscription model, he will see a corresponding note on checkout page. He will be informed how often he will be charged.
Checkout Page Example (EDD):
Displaying Registration Plans on the Front-End
When the registration plans are configured, we need to display them on the front-end.
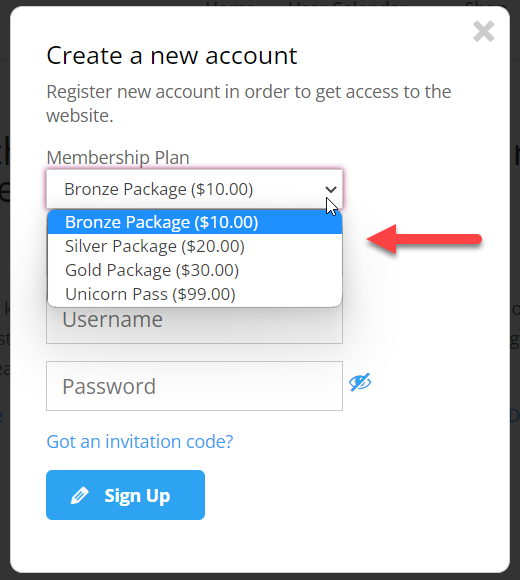
First, the registration plans will be automatically displayed in the Registration Form, under the Membership Plan dropdown.

Second, you can prepare a separate page, where the table with subscription plans will be displayed.
It can be done with the help of a shortcode [cmreg-packages] - just place it in any place of the needed page.

Result on the Front-end:
Payment Reminders
When the user chooses a registration plan and clicks Sign Up, he will be redirected to the checkout page. His user account is already created, but has the status Inactive - so, the user can not login to the site until the payment is not committed. After he paid, the status of his user account automatically will be changed to Active, and the user will be able to login.

What to do if the user hasn't finished the payment process?
The plugin has 2 additional options which can be found in plugin settings under the same tab Payments:
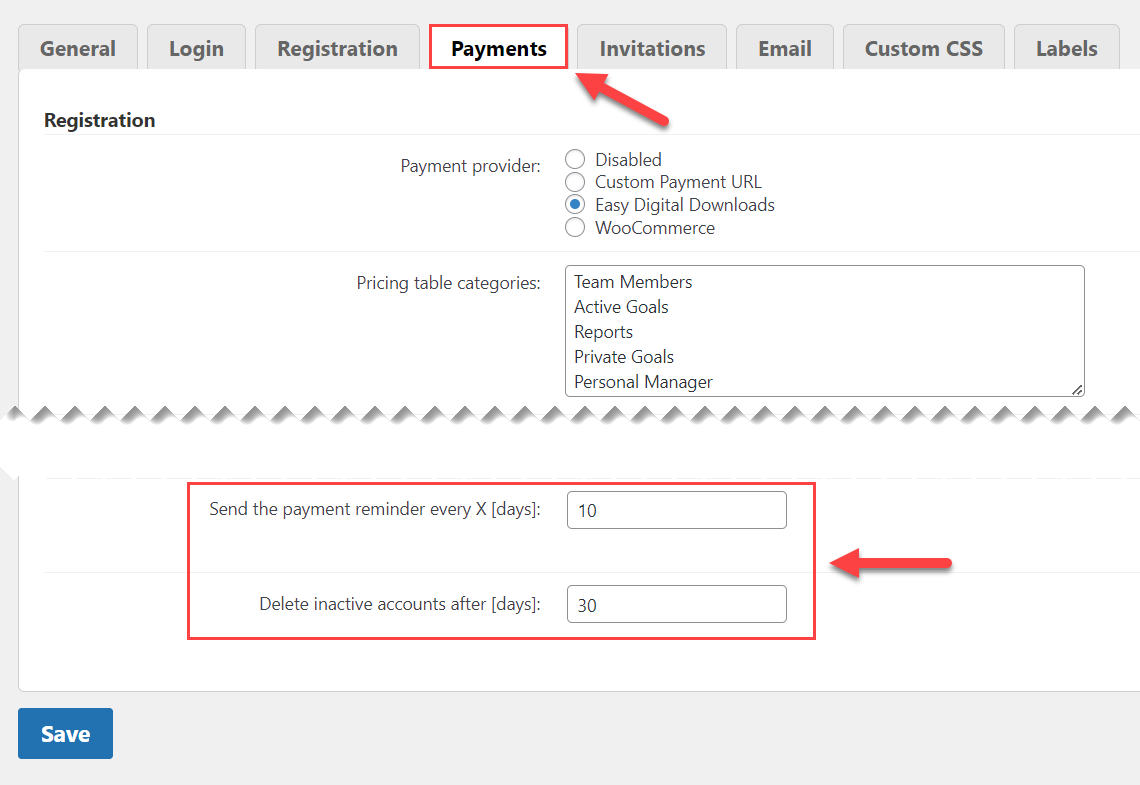
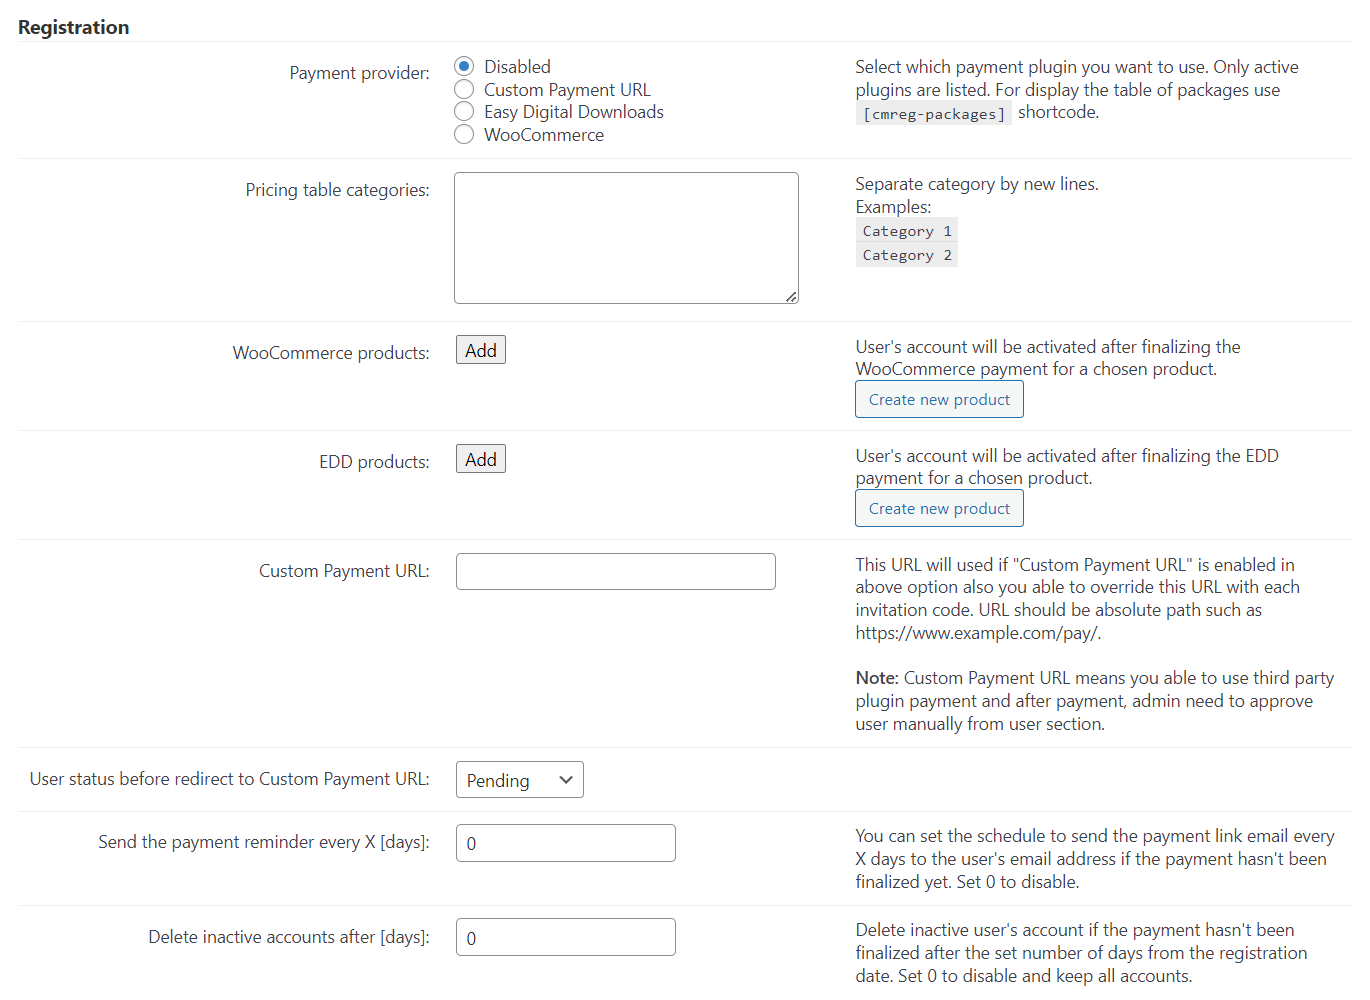
- Send the payment reminder every X [days] - You can send email reminders to users which haven't completed the payment process. Specify the interval in days for sending the emails.
- Delete inactive accounts after [days] - This option allows the system to delete inactive accounts, which haven't completed the payment process within certain period of time. Specify the amount of days, when to delete inactive accounts.
Edit Email Reminder
You can customize the email content of the payment reminder in plugin settings under the Email tab:
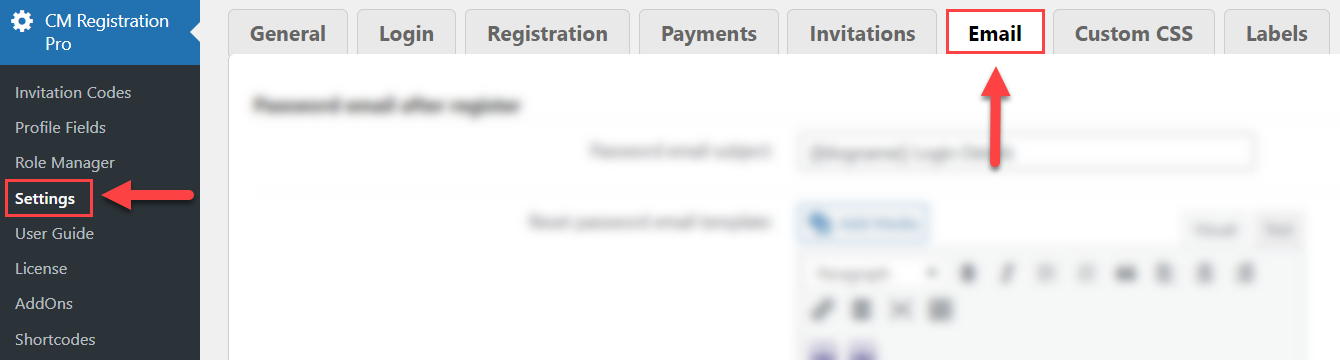
Find the email template under the section Payment reminder:
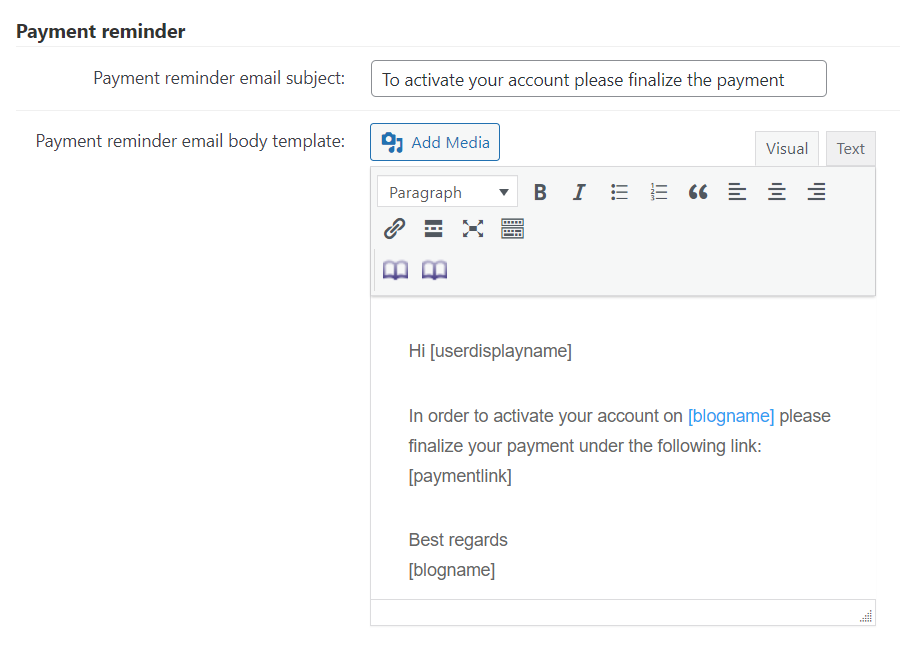
Here you can:
- Payment reminder email subject - Customize the email title.
- Payment reminder email body template - Customize the email body.
Both fields accept the following shortcodes for adding dynamic content:
[blogname][siteurl][userdisplayname][userlogin][useremail][registrationdate][paymentlink]
Blocking Content and Areas On the Site Based On User Roles
The WordPress Restricted Site Access plugin allows you to restrict access to content and areas on your site based on different parameters, including restriction based on user roles.
TIP
In this use case guide we will consider only how to restrict the access to certain user roles. So, we recommend you first to configure the plugin settings according to your needs. You can learn more about it in this guide: WordPress Restricted Site Access (SAR) - Plugin Settings
Restricting Admin Dashboard and Admin Bar
Let's start with locking the access to the admin dashboard and admin bar.
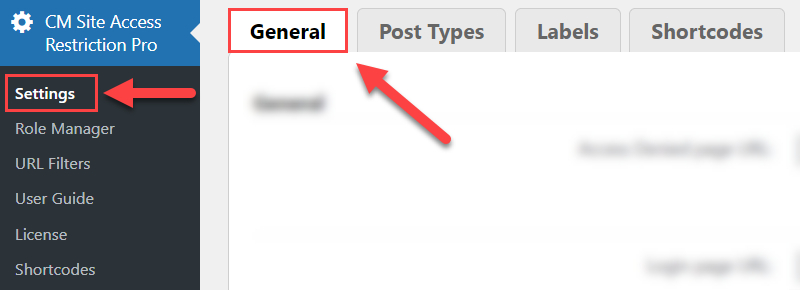
Navigate to Admin Dashboard → CM Site Access Restriction Pro → Settings → General tab.
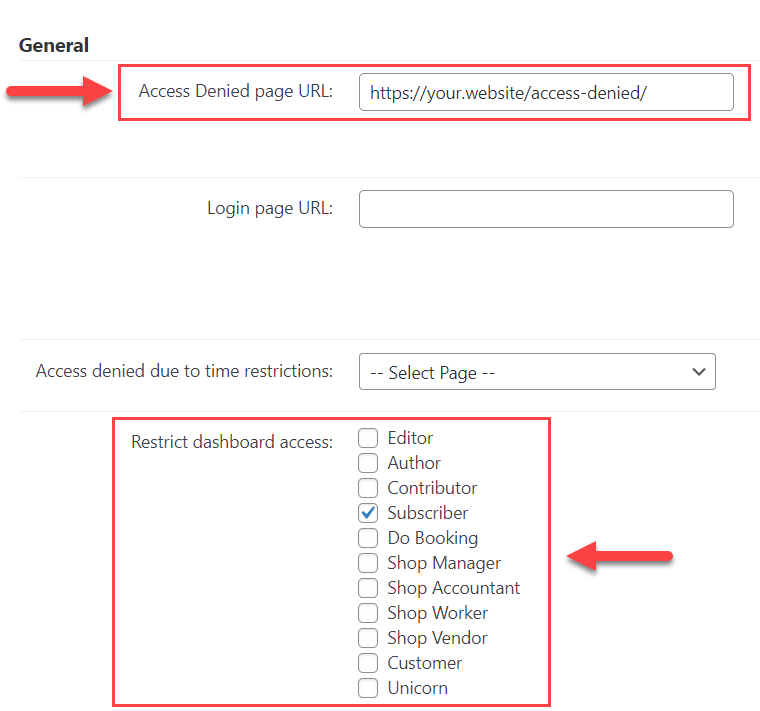
Admin Dashboard Access
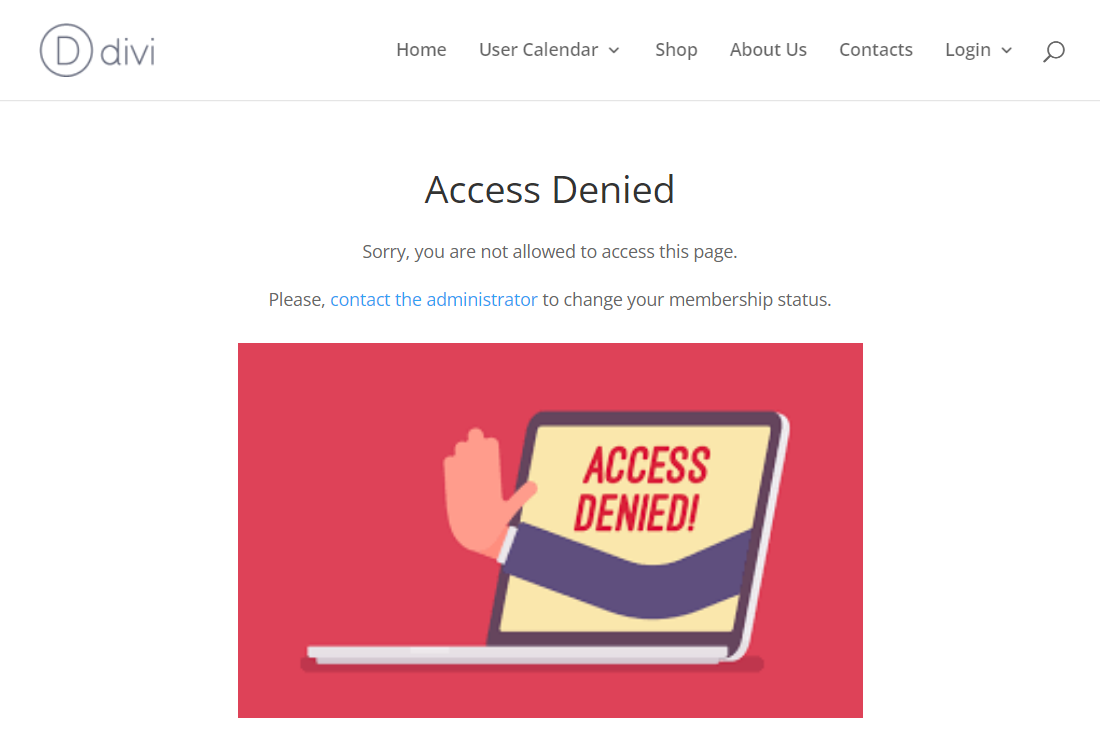
For restricting the back-end of your site, find the option Restrict dashboard access. Select user roles which you don't want to access the admin dashboard. Also, we recommend you to specify a page, where the user will be redirected to when trying to access forbidden content or area - you can do it using the field Access Denied page URL. You can prepare a page with a message that the user is not allowed to visit the page he wanted.
Example of redirecting the user who attempts to visit restricted area:

Admin Bar Access
To lock the access to the admin bar, scroll down and find the following options:
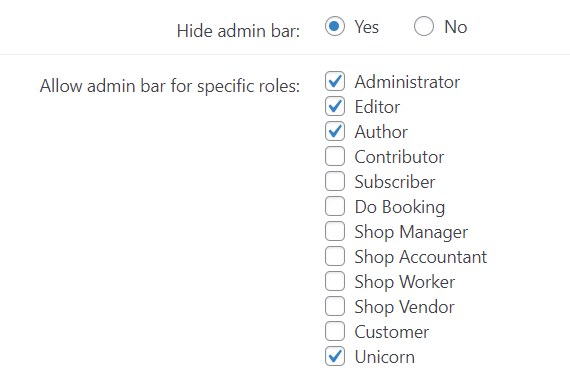
- Hide admin bar - Choose yes to hide the admin bar on the front-end.
- Allow admin bar for specific roles - Choose user roles which will be allowed to see the admin bar.
Don't forget to click the button Save after changing the settings.
As a result, only selected user roles will be able to see the admin bar on the front-end:

Restricting Specific Post Types
To restrict the access to certain post types, navigate to Admin Dashboard → CM Site Access Restriction Pro → Settings → Post Types tab.
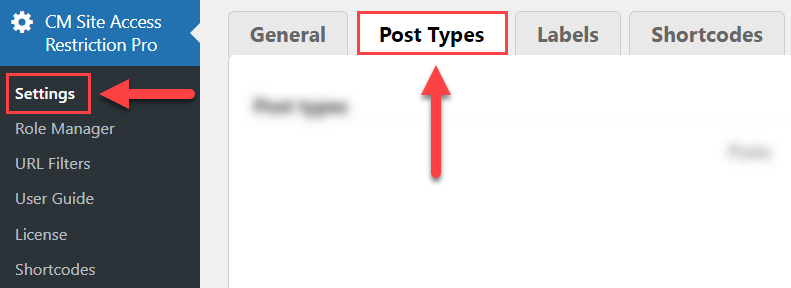
You will find there a long list of built-in and custom post types, including post types provided by third-party plugins. You can specify the global access to each of them and it will be applied to each post which belongs to the restricted post type.

Choose the post type which you want to restrict and select the option Access restricted by role. There will appear a list of user roles. Select the ones that you want to have access to the chosen post type. The user roles which are not selected, will not be able to access the content.
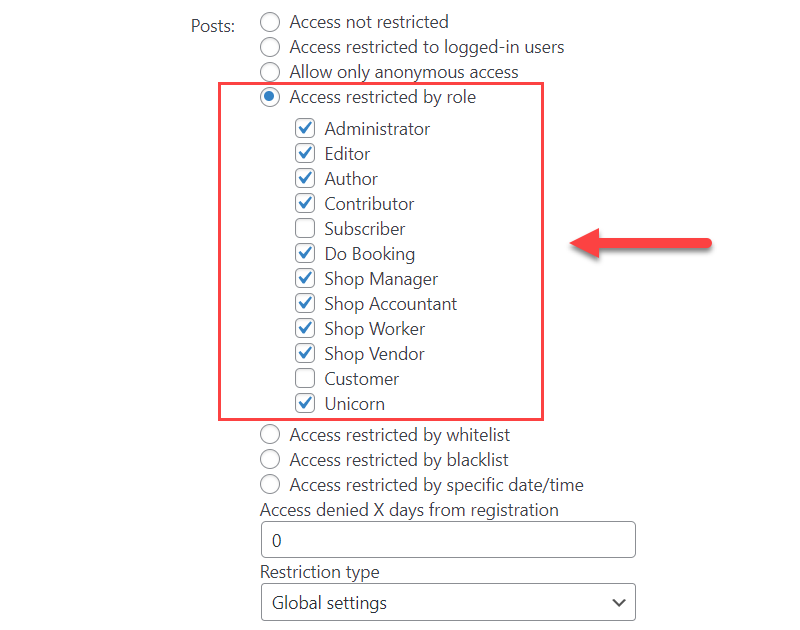
After setting up restrictions to post types, click the button Save at the bottom of the page.
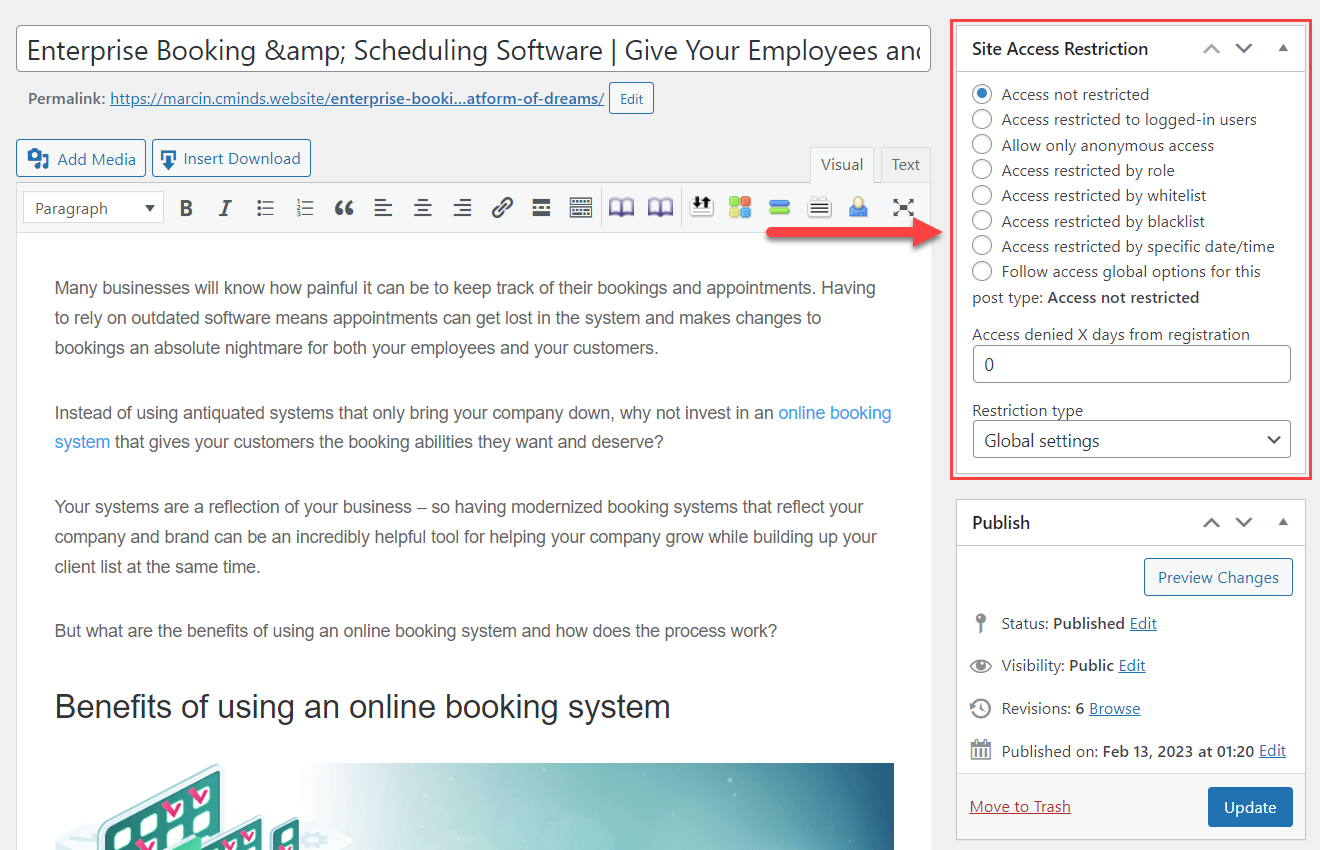
Restricting Specific Posts/Pages
You can control the access to specific pages, posts or any custom post types using a metabox Site Access Restriction located on each page or post once editing it. This metabox has the same options as for global post type restrictions in plugin settings.
Choose the option Access restricted by role. There will appear a list of user roles. Select the ones that you want to allow to have access to the post/page. The user roles which are not selected will not be able to access the content. The access restriction which you specify here overrides the global settings defined for this post type.
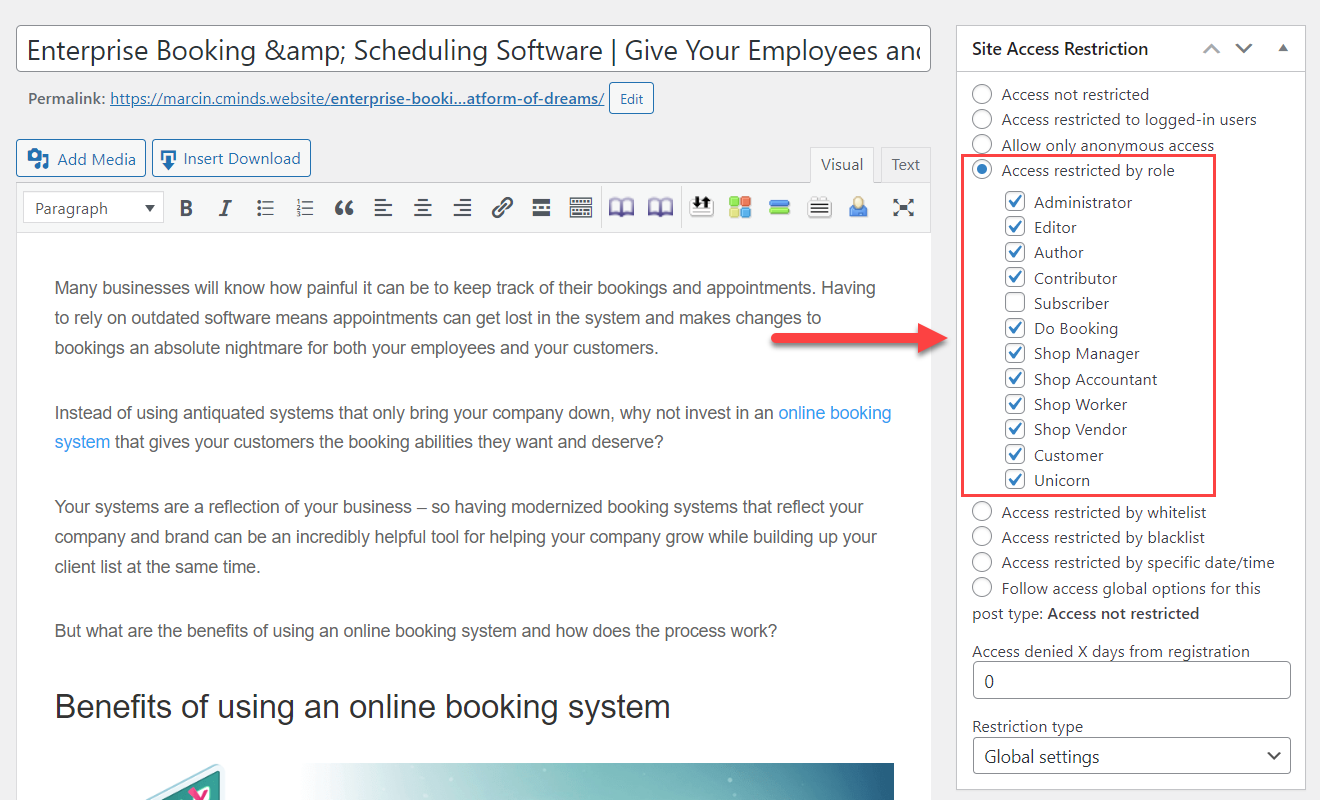
Click the button Update to apply the changes.
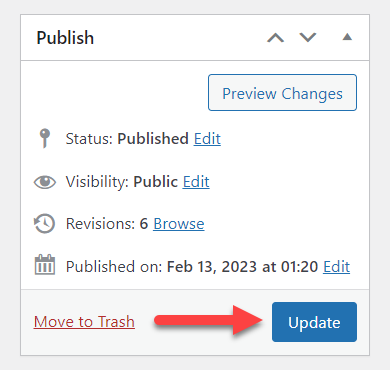
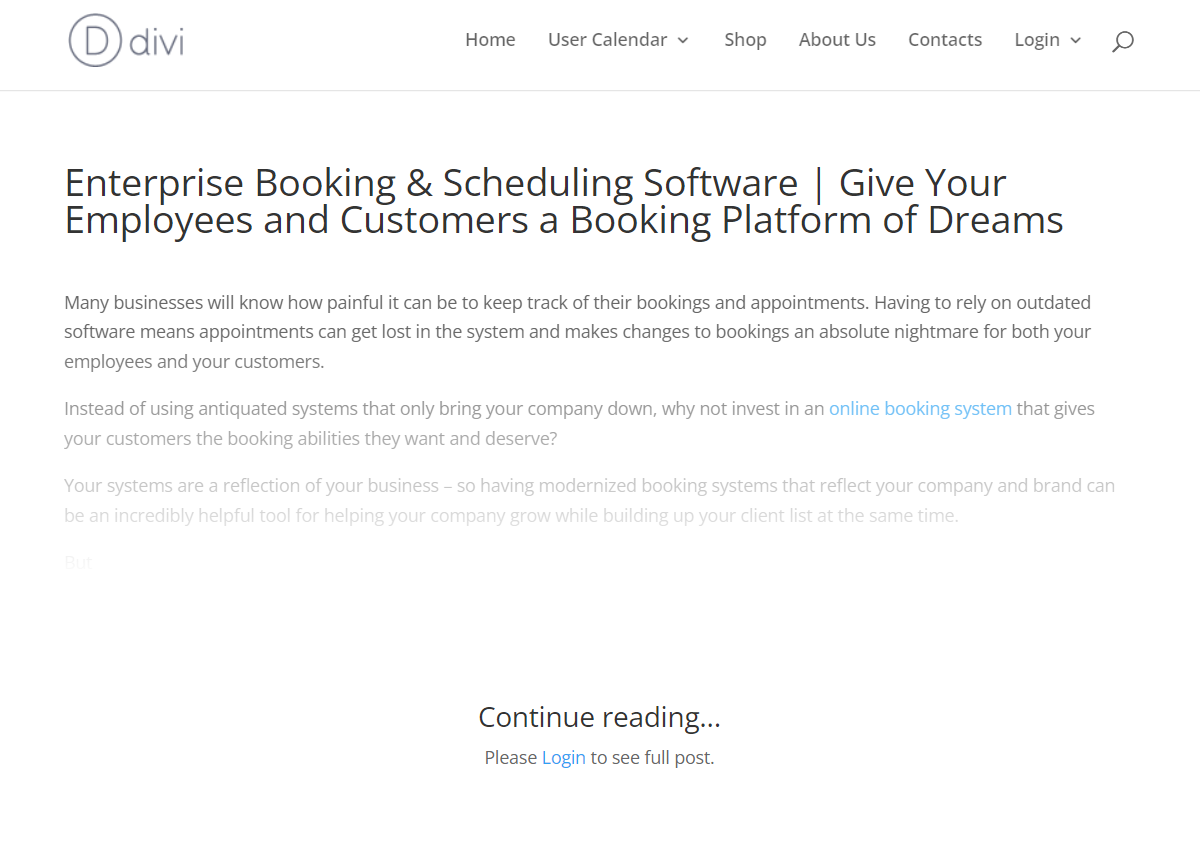
Example of how the restricted page can look like for not allowed user:

Restricting Specific Post Categories
Another way to restrict access to certain content is URL filtering. You just specify the restriction for a specific URL. For example, this method can be useful if you need to lock the access to a certain post category.
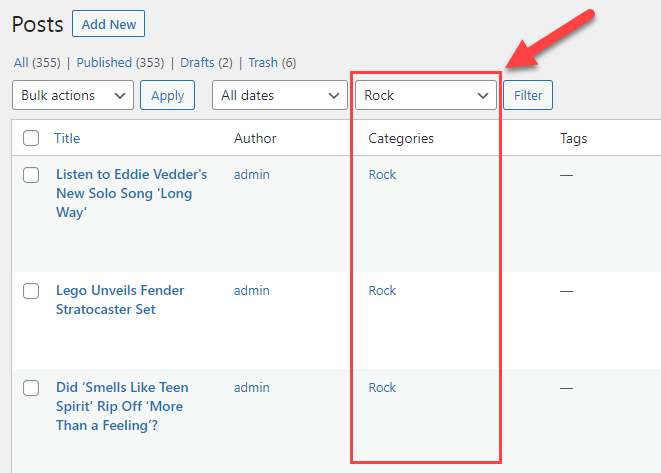
Let's consider this use case on the example of restricting a category about Rock music.
Permalinks Settings
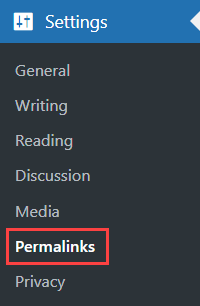
First, to restrict some definite post categories, you need to make sure that your permalinks have the right structure for this. Navigate to Admin Dashboard → Settings → Permalinks.
You will see there the following settings:
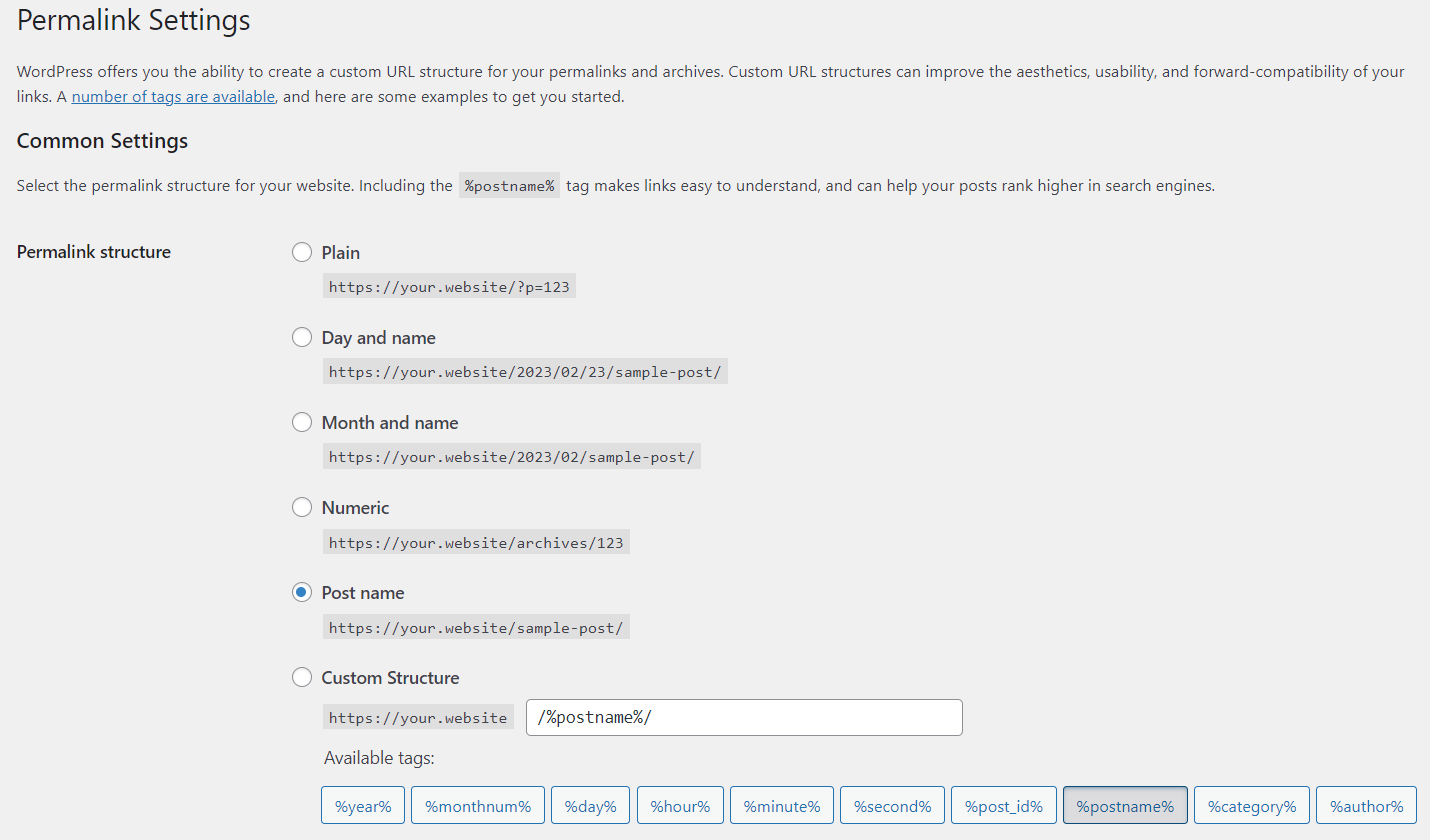
There you need to choose Custom Structure of permalinks and set Available tags in the following consequence: %category%, then %postname%.

As a result, every post will have the following format: your-site.com/category/post

It will help us to restrict all posts that belong to the definite category.
Restricting by URL Filter
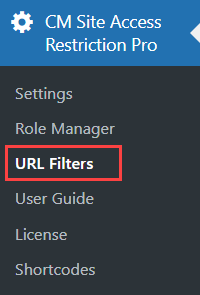
To add a URL filter, navigate to Admin Dashboard → CM Site Access Restriction Pro → URL Filters.
Click the Add new filter button.
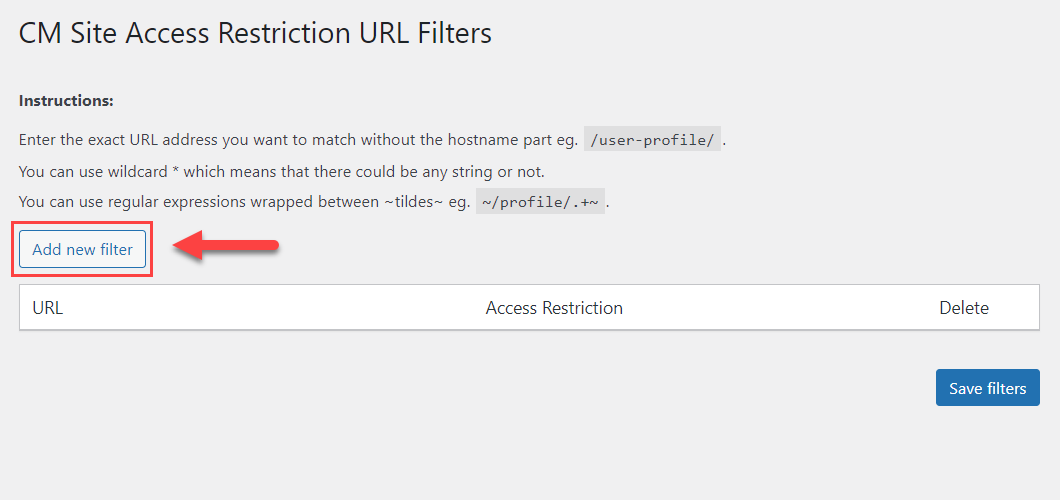
There you can see a field where you can put needed URL. You need to enter the exact URL address you want to match without the hostname part. And in our use case we need to add a wildcard * to restrict all posts that belong to this category, like you can see on the screenshot below.
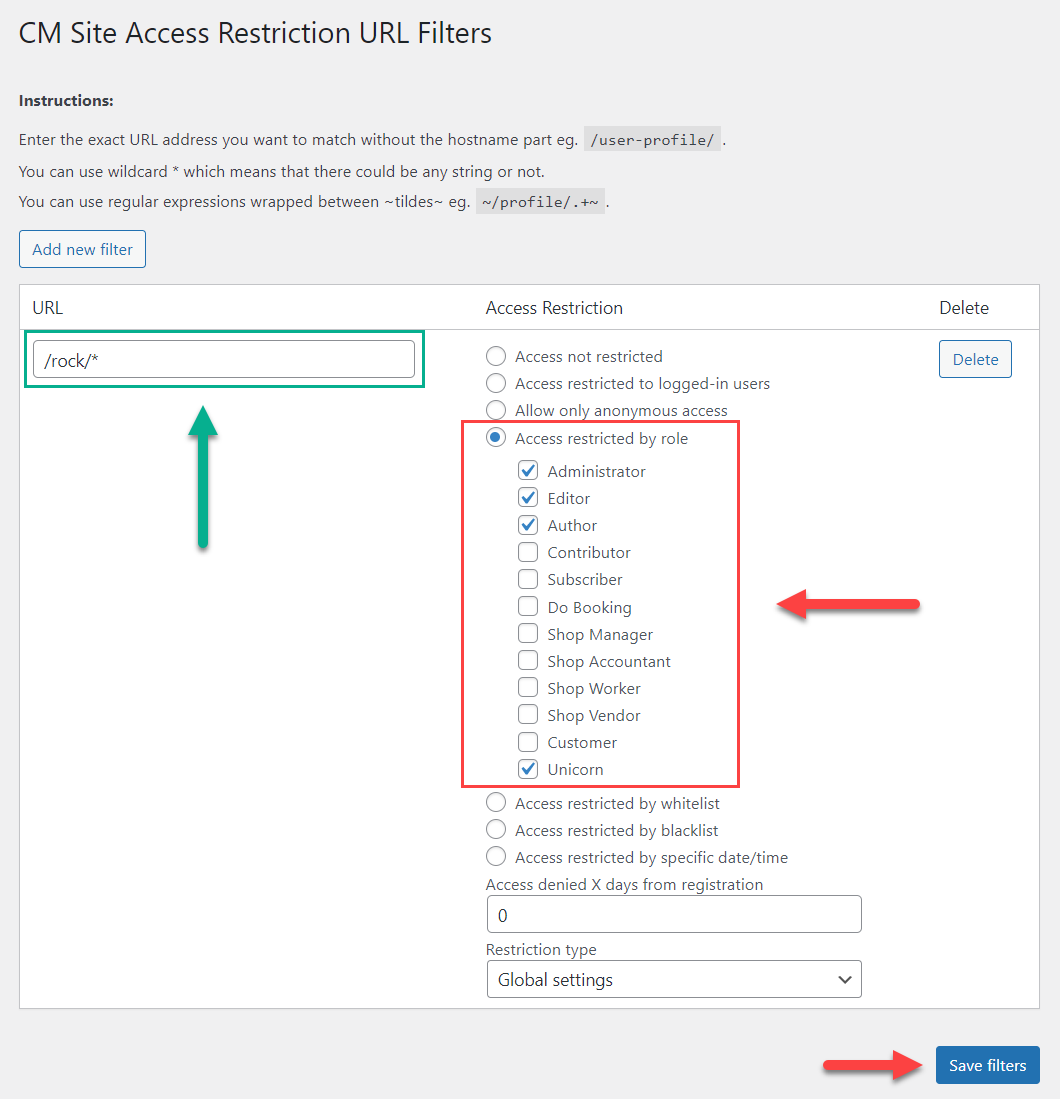
The Access Restriction settings for URLs are the same as in the previous cases and they override global settings. So, we choose the option Access restricted by role and select user roles which will be able to access the content.
You can add as many URL filters for restricting as you need using the Add new filter button, and don't forget to click the button Save filters to save them. You can also remove not needed filters using the button Delete.
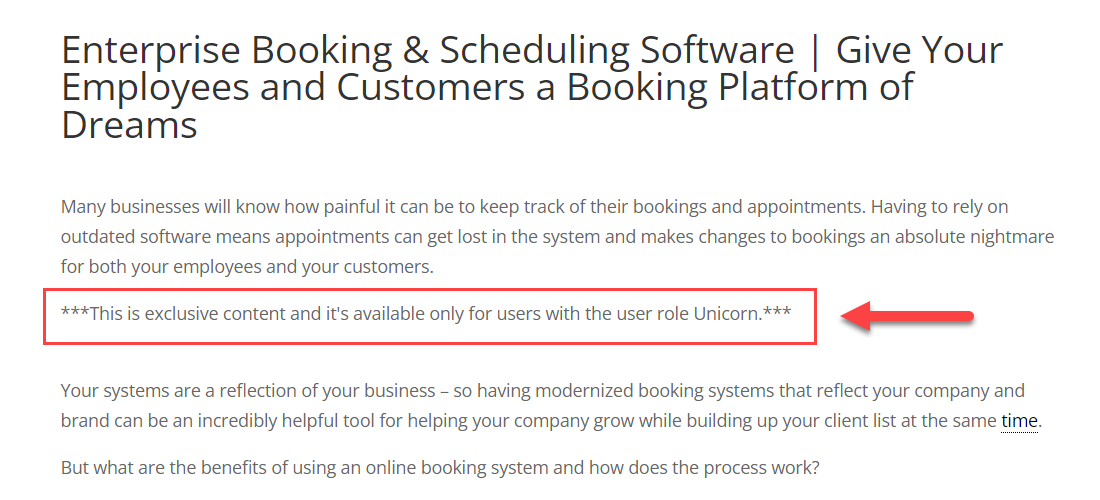
Restricting Specific Parts of Content
You can lock specific parts of content within post or page. It can be done by wrapping needed content with a shortcode [access] . It has lots of parameters which allow to configure restrictions, and one of them is for restricting content to certain user roles. The shortcode also has a parameter to insert a text instead of locked content.
So, using the shortcode will look like this:
[access role="user-role" deniedtext="Text to displayed instead of locked content"] Content that we want to restrict [/access]
Let's apply this shortcode in our post to restrict one specific paragraph:

Result on the Front-end:

TIP
Learn more about other shortcode parameters: WordPress Restricted Site Access (SAR) - Shortcodes
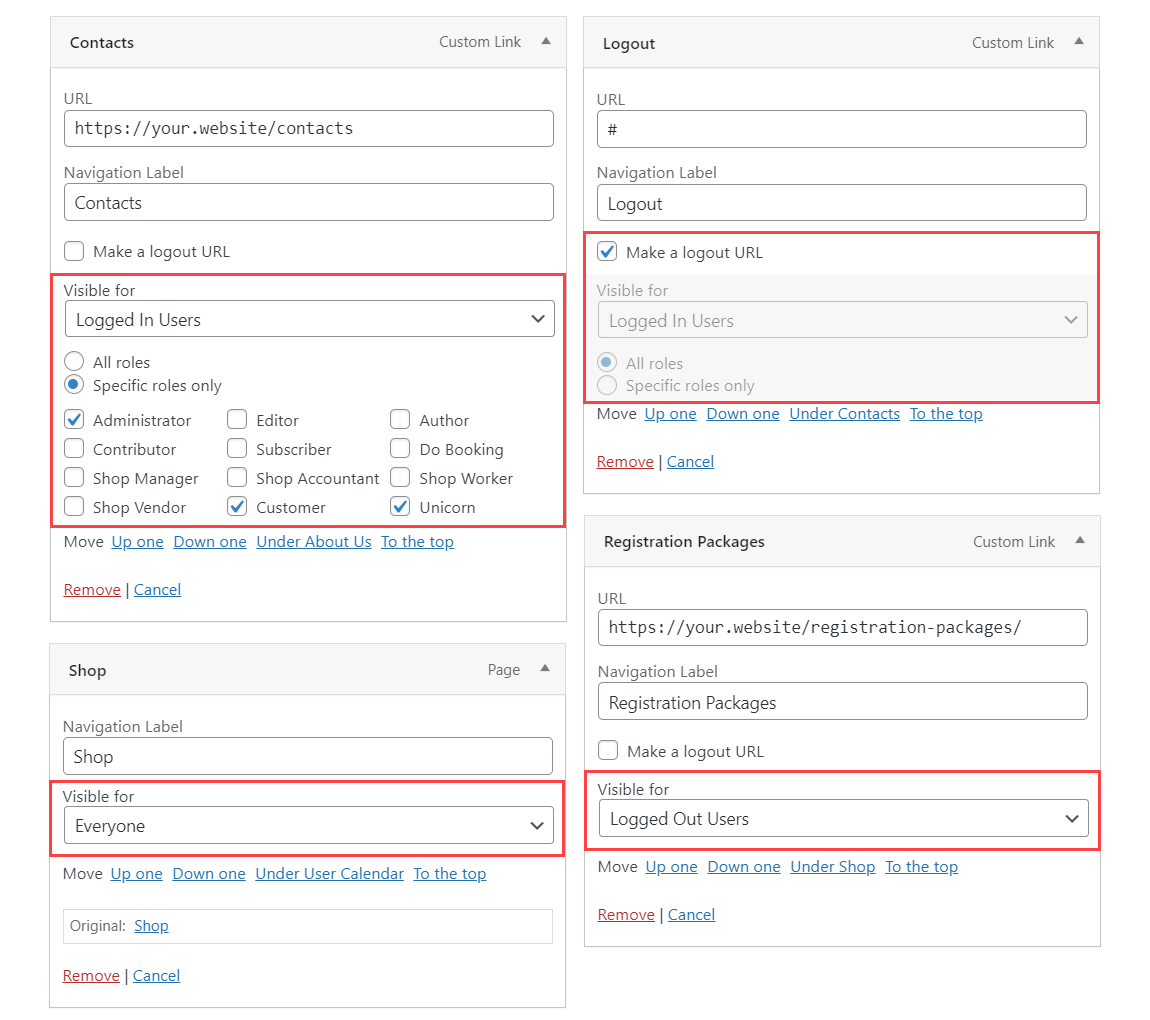
Restricting Site Menu Items
The WordPress Restricted Site Access plugin also allows you to control site menu visibility - you can decide, which menu items can be visible for whom - for everyone, for logged-out users, for logged-in users, for certain user roles. You can also turn a menu item into a logout link.
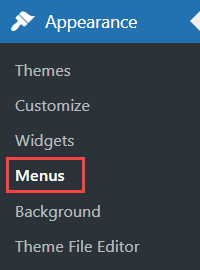
All these settings can be accessed by navigating to Admin Dashboard → Appearance → Menus.
Here are examples of setting up the menu items visibility:
Other Features of the WordPress Restricted Site Access plugin
The plugin has lots of other options to restrict the content. Learn more about them in the following use case guides:
- WordPress Restricted Site Access (SAR) - Use Case - Blocking Site Access to Certain User Roles or to Guest Users Only
- WordPress Restricted Site Access (SAR) - Use Case - How to Build Drip Content Posts
- WordPress Restricted Site Access (SAR) - Use Case - How to Limit the Access to Specific Post/Page On Specific Day
- WordPress Restricted Site Access (SAR) - Use Case - How to Control Your Site Menus By the User Role and Type
Creating Restricted User Dashboard
Note: the feature covered in this chapter was introduced in both plugins since the following versions:
- WordPress Registration Form Plugin - This document uses Pro version 3.7.1
- WordPress Restricted Site Access - This document uses version 1.7.4
Both plugins allow you to create a user dashboard with multiple custom tabs, where each tab can be visible either for all logged-in users or to specific user role only.
The options for configuring it are almost identical. Below there will be an explanation of configuring the dashboard using the WordPress Restricted Site Access plugin.
To create and configure the user dashboard, navigate to Admin Dashboard → CM Site Access Restriction Pro → Settings → Dashboard tab.
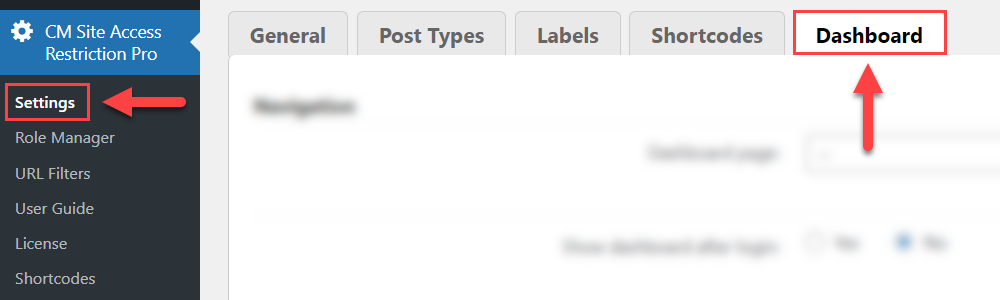
You can find there the following settings:
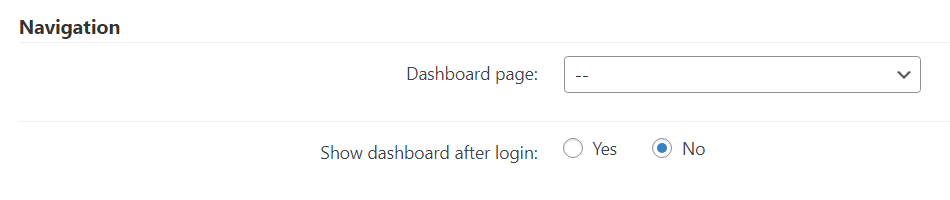
- Dashboard page - Choose here the page where the user dashboard should be displayed. It should be a premade page which contains the shortcode
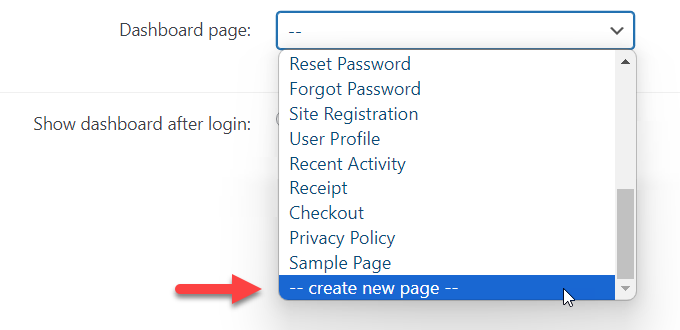
[cmsar-dashboard](or[cmreg-dashboard]if you're doing this with the WordPress Registration Form plugin). Alternatively, you can choose the option -- create new page --, and after clicking Update the page with the shortcode will be created and chosen automatically:
- Show dashboard after login - Enable it, if you want to automatically redirect users to the dashboard page after they login to your site. Note: if you use some plugin for custom login process, and they are configured to redirect users to specific page after login, then they will have higher priority than this option.
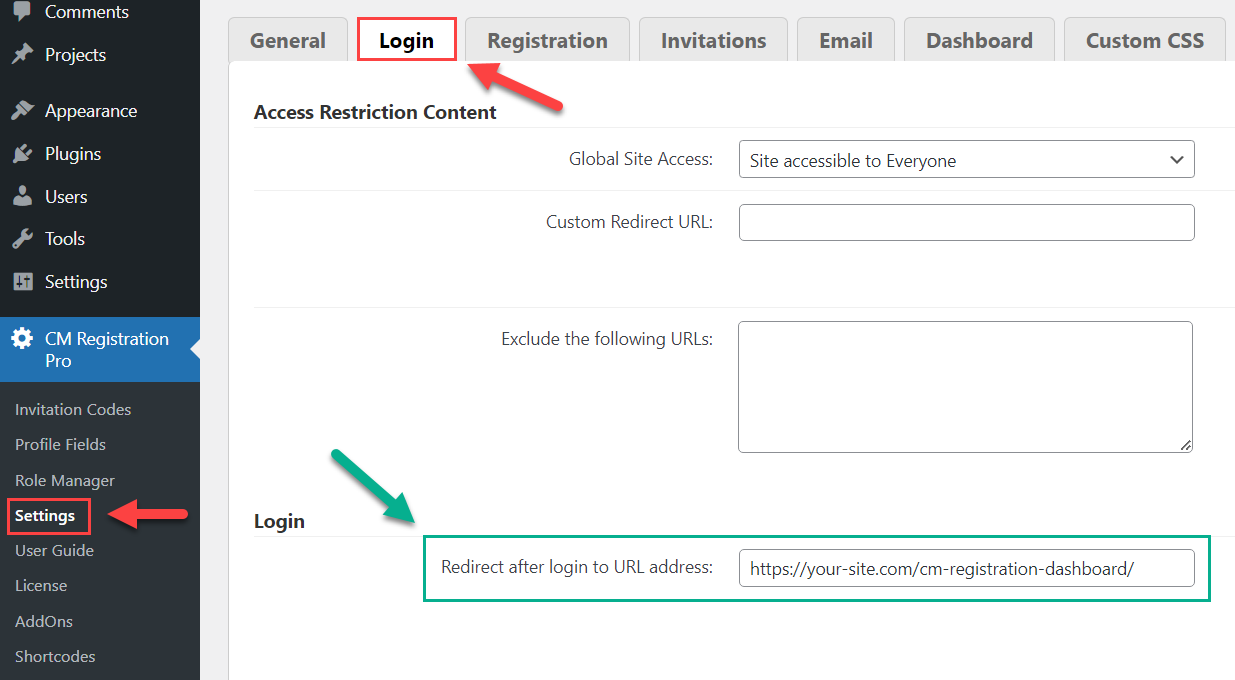
Custom Redirection
The option Show dashboard after login is available only in the WordPress Restricted Site Access plugin. For the WordPress Registration Form plugin, you can automatically redirect users to the dashboard page after login by the specifying the dasboard URL in the Login settings. Learn more about it in this guide:
The Appearance section has the following option:
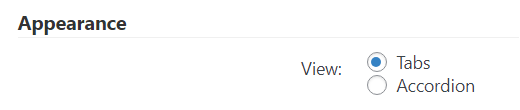
- View - This option allows you to choose the dashboard view between 2 types:
- Tabs
- Accordion
TIP
You can also override the view defined in this setting by using a shortcode parameter view on the needed page. It accepts one of the following values:
- tabs
- accordion
Examples for WordPress Restricted Site Access plugin:
[cmsar-dashboard view="tabs"]
[cmsar-dashboard view="accordion"]
Examples for WordPress Registration Form plugin:
[cmreg-dashboard view="tabs"]
[cmreg-dashboard view="accordion"]
One more section is Dashboard Tabs. Here you can add custom tabs for the dashboard. It has the following fields and options:
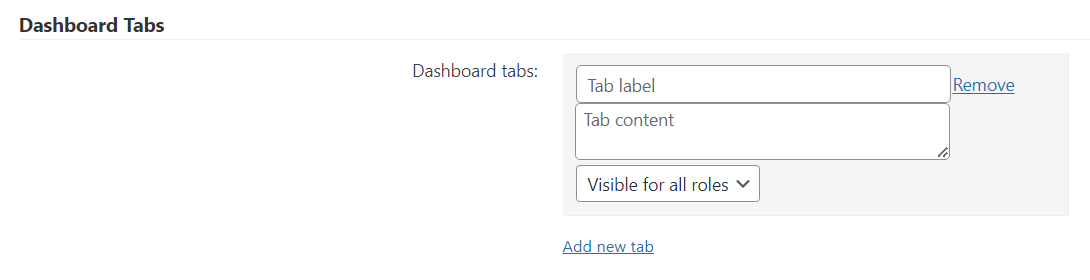
- Tab label - Add here the name of the tab.
- Tab content - Add here the content that will be displayed on the tab. This area accepts simple text, HTML and shortcodes.
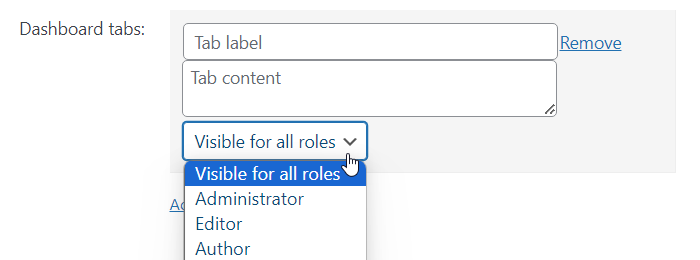
- Visibility - Choose here which user roles will be able to see this tab: either all user roles or only the specific one.
- Remove - Click it to remove the tab.
- Add new tab - Click it to add new tab.
You can also easily change the order of tabs using the drag-and-drop feature:
When configuration is done, click the button Save at the bottom of the page.
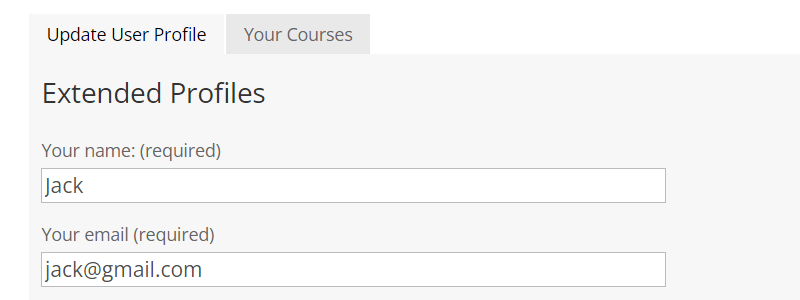
Example
As an example, we created 3 tabs:
- Update User Profile - Here we added a shortcode from third-party plugin for configuring the user profile.
- You Courses - Here is added HTML formatted text with the list of courses.
- Book a Lesson - This tab contains a shortcode from third-party plugin which allows to book meetings. This tab is visible only for user roles with the user role Student.

Front-end result for the user with the user role Student:
Users with other user roles will see only 2 tabs:
End Result
Following instructions found in the plugin and guides, you should be able to build a membership system on your site, create user roles and charge users for registration on your site.
Use Case Front-End
Example of membership registration packages:
Choosing the membership level while registration:
Example of limiting access to the restricted area:
Example of restricting the post:
Example of restricting a certain part of the content:
 |
More information about the WordPress Registration Form Plugin Other WordPress products can be found at CreativeMinds WordPress Store |
 |
Let us know how we can Improve this Product Documentation Page To open a Support Ticket visit our support center |