WordPress Invitation Code - Use Case - How to Create Invitation Codes In Bulk
Use Case – How to create invitation codes in bulk
Note: This guide requires:
- WordPress Invitation Code plugin - This document uses version 1.5.3
Introduction
This WordPress Invitation Code plugin allows you to create and sell a series of personalized temporary access codes. Each code grants limited access to a selected page only. When creating codes, you assign them to a post, a page, a URL or a file. It will automatically be locked and, when accessing it, visitors will be prompted to input the code.
Use Case Front-End
Generating a sequence of codes:
Accessing the post using a code on the front-end:
Use Case Assumptions
In this example use case guide we will consider how to create invitation codes in bulk. In can be done in a few ways:
- Generate a sequence of codes
- Import codes from a CSV-file
Important
Currently, the plugin does not support assigning prices while creating invitation codes in bulk. You can either edit each code manually to make it paid or you can create a template code that will generate a new code for each new customer. Learn more about this method in this guide: WordPress Invitation Code - How To - Sell the Access Codes Directly From the WooCommerce Shop
We consider that you have already bought the WordPress Invitation Code plugin, but not installed it yet.
Note: the following instruction works the same for restricting URLs/Pages, Posts, Content inside Page/Post, File Upload and File Link. In our example we will consider restricting a post.
It follows:
- Installing the plugin
- Initial setup
- Generate a sequence of codes
- Import codes from a CSV-file
- End result
Installing the Plugin
The process is the same for all CM plugins and add-ons.

- Download the plugin from your customer dashboard.
- Log in to WordPress and navigate to the WordPress Admin → Plugins settings.
- Click on Add New.
- Activate it and add the license.
Learn more: Getting Started - Plugin Overview
Initial Setup
Before starting, WordPress Invitation Code plugin has to be properly set up.
If you still haven't configured:
- General settings for codes.
- Notifications - email notifications for admins and users.
- Labels - configure/translate messages that the user will see in front-end.
Also, we consider that you've already have existing posts that you need to restrict with the codes.
Generate a Sequence of Codes
Let's start with the first method of creating codes in bulk - generating a sequence of codes.
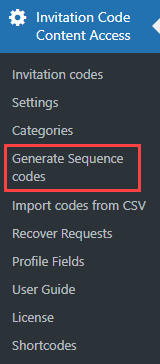
To do this, navigate to Admin Dashboard → Invitation Code Content Access → Generate Sequence codes.
There you will see a form that consists of a few sections.
Sequence Parameters
First section contains the general settings for generating a sequence of codes.
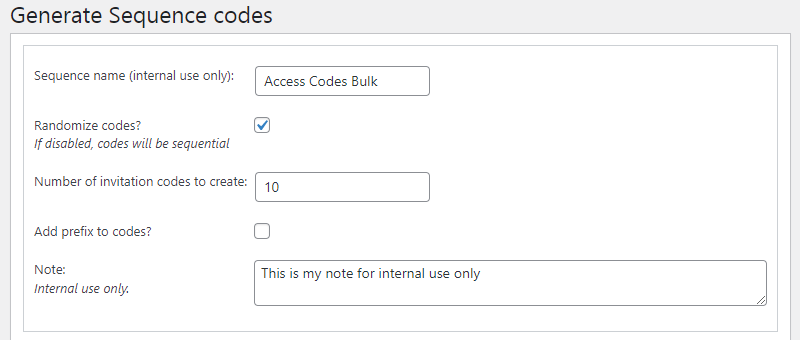
- Sequence name (internal use only) - Write down the name of the sequence (for internal use only).
Randomized codes? - If enabled, codes will be randomized. If disabled, they will be sequential.
Example
- Sequential Codes - code_001, code_002, code_003...
- Randomized Codes - FJTA, AKWW, SU8R...
- Number of invitation codes to create - Define how many codes will be created.
- Add prefix to codes? - Enable to append a prefix to all codes. Some examples: "code_", "2019sale_". If the option is enabled, one more options appears:
Prefix - Write down a prefix.

Code prefix settings
- Note - Add a note (can only be seen by the admin).

Important: Prefix Settings
It's possible to change the format of the invitation code to a four-symbol format. It can be done in plugin settings under the General tab by turning on the option Enable four digits invitation code. If you did it and want to generate a sequence of four-symbol codes in bulk with a prefix, then make sure to enable the option Show prefix before four-digits codes.
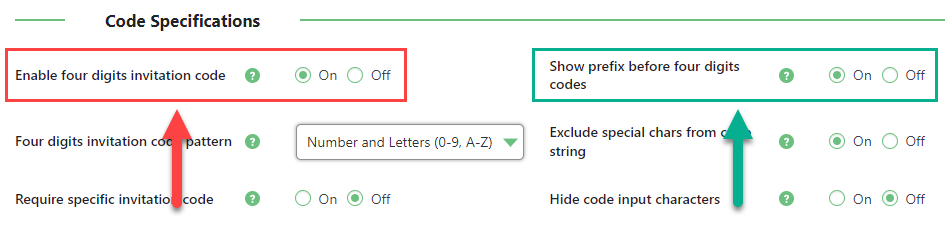
Learn more about these options in this guide: WordPress Invitation Code - How To - Limit Codes to Four Digits
What is restricted
In the next section you define the type of restricted content.
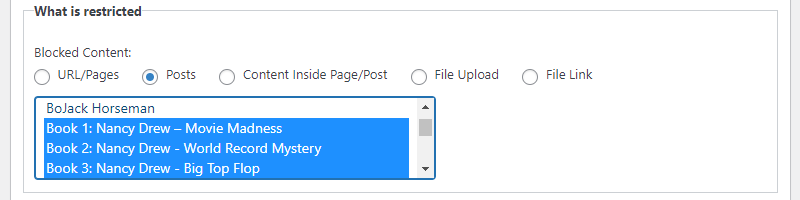
You can choose between:
- URL/Pages - Enter one or more URLs that you need to restrict. It is possible to restrict even categories of pages. Learn more: WordPress Invitation Code - How To - Hide multiple URLs or URL Paths
- Posts - Choose one or more posts that you want to restrict from the list. We choose this option for our use case. Using an invitation code for accessing one of the chosen posts will automatically give an access to other posts from this list. This way, the user doesn't need to enter an invitation code for each of the posts from the list - only to one of them.
- Content Inside Page/Post - You can restrict part of the content inside a page or post using a shortcode. Learn more: WordPress Invitation Code - How To - Hide Partial Content on Page/Post
- File Upload / File Link - You can upload and restrict a specific file on your site or restrict an external file. Learn more: WordPress Invitation Code - How To - Hide a File
How and When Code Expires
Next section defines the behavior of the invitation code.
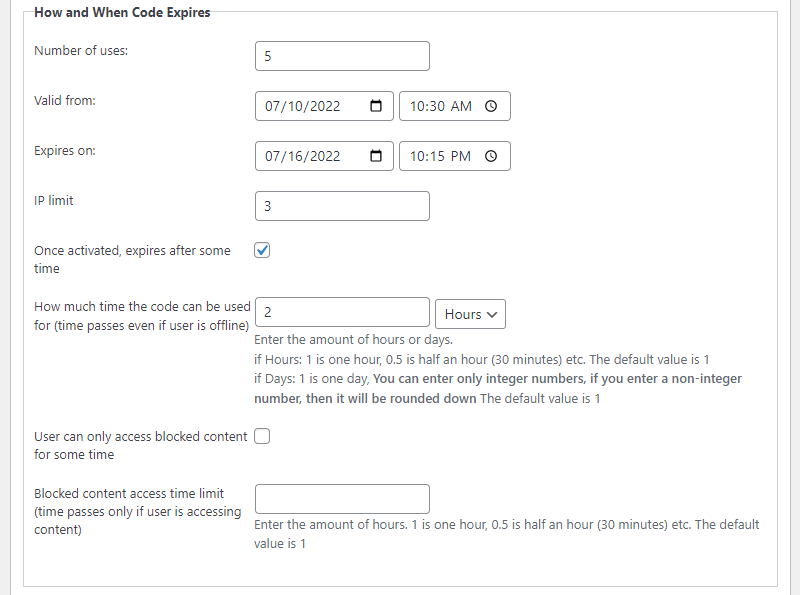
- Number of uses - Set how many times each code can be used (Set it to "0" to make it unlimited).
- Valid from - Define the activation date and time for codes. Leave empty to activate the code right away (respects the website time zone).
- Expires on - Define the expiration date and time for codes. Leave empty to never expire (respects the website time zone).
- IP limit - Set the number of unique IP-addresses that can use the same invitation code. Everyone who used the code - their IP's will be saved for this code, and they can continue use it until it expired. But all other people will not be able to use the same code. Leave empty to keep it unlimited.
In the following options you need to choose one of the expiration types for codes and define an expiration time for it.
- Once activated, expires after some time - The code expires a certain amount of time after the user used it for the first time. Time passes even if the user is not watching the content.
- How much time the code can be used for - Enter the amount of hours or days. 1 is one hour, 0.5 is half an hour (30 minutes) etc. The value for days can be only integer. The default value is 1.
- User can only access blocked content for some time - The code expires after the user spent a certain amount of time on your site. Time passes only if the user is accessing the content.
- Blocked content access time limit - Enter the amount of hours. 1 is one hour, 0.5 is half an hour (30 minutes) etc. The default value is 1.
Categories
Next section contains only one option for assigning codes that will be generated to a certain category.

Classifying the codes can make your work with them simpler. Learn more about creating categories: WordPress Invitation Code - Code Categories
Security and Privacy
Last section allows you to show a disclaimer to your site visitors that use access codes.
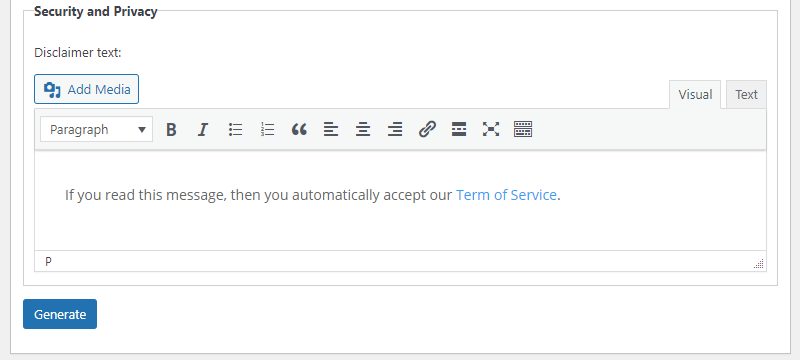
This field overrides the default disclaimer text that is defined in plugin settings. Learn more about configuring the default disclaimer: WordPress Invitation Code - Settings - General (Configuring Access, Privacy)
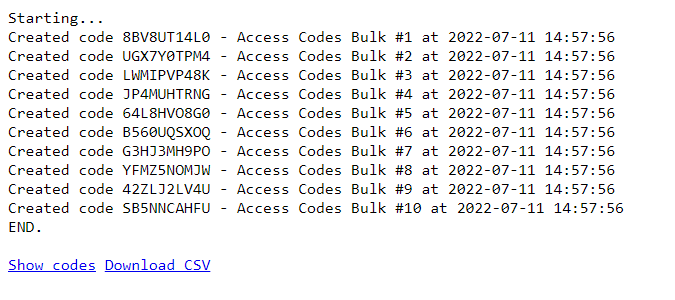
When everything is configured, click the button Generate. You will see the list of generated codes. You can either download a CSV file with these codes by clicking on the relevant link or click Show codes to the list in the admin dashboard.
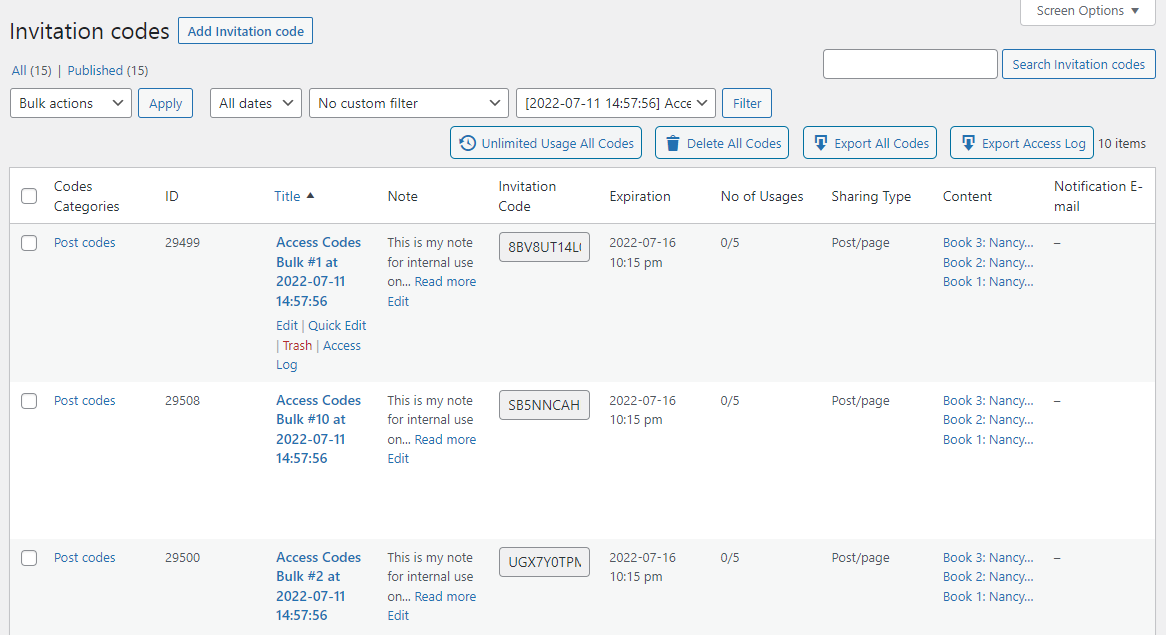
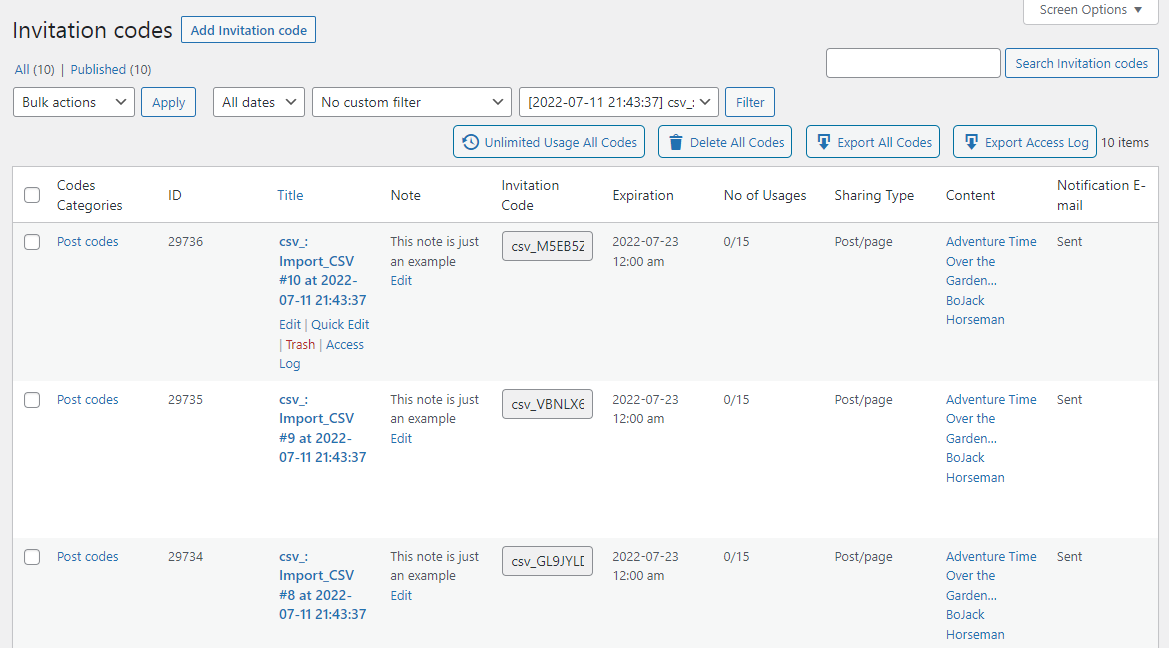
In the admin dashboard you can:
- See all base information about each code in the table: category, ID, title, note, the code itself, the expiration date and time, number of usages, restriction type, list of restricted content and if there was send an email notification.
- Apply bulk action to codes: edit, delete or make them all unlimited.
- Filter codes by dates, categories and sequences.
- Search for certain codes.
- Export to a CSV file all codes and access log.
Result On the Front-end
Now let's see the result on the front-end.
Import Codes From a CSV-File
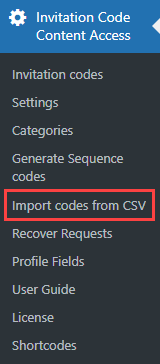
Another way of creating invitation codes in bulk is to import them from a CSV-file. You can either prepare a list of your own codes in advance or use the list of email addresses. Codes can be generated automatically for each email address or email addresses can be used as invitation codes. To do this, navigate to Admin Dashboard → Invitation Code Content Access → Import codes from CSV.
There you will see a form that is almost the same as in the previous method for generating a sequence of codes. The difference is only in the first section. The options are:
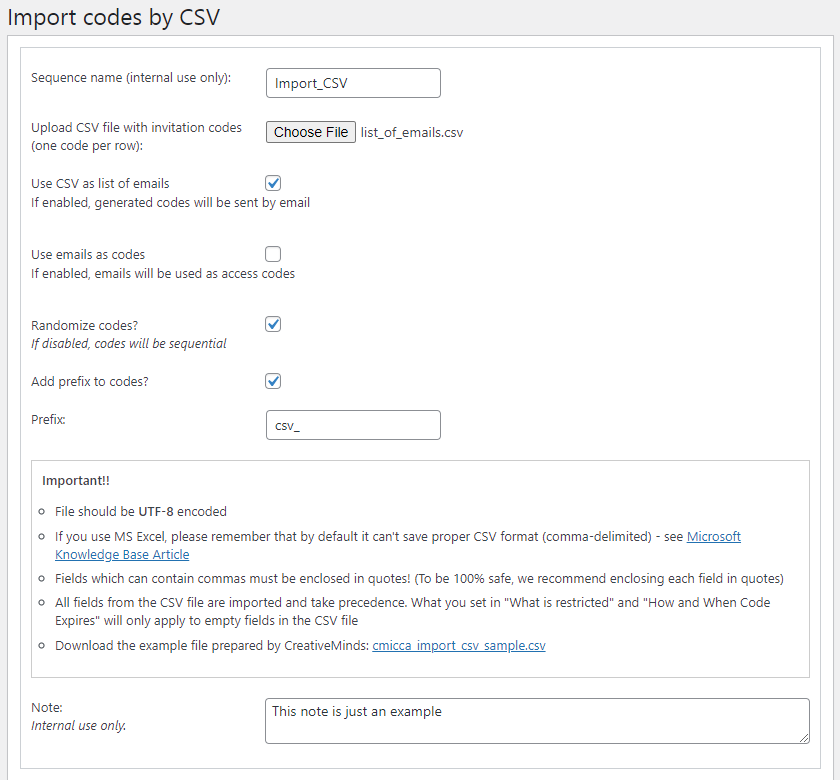
- Sequence name - Write down the name of the sequence of codes that will be created (for internal use only and will not affect the codes).
Upload CSV file with invitation codes - Choose here a CSV file that you want to import data from.
Example of a CSV file with emails

Example of a CSV file with emails list - Use CSV as list of emails - Enable it if you want to send generated codes to email addresses from a CSV-file. Let's turn it on for our use case. A few more options will appear below.
- Use emails as codes - If enabled, email addresses will be used as invitation codes. We will not enable this option for our use case.
- Randomize codes - Enable this option to randomize codes, otherwise they will be sequential. Let's turn it on, to create randomly generated code for each email.
- Add Prefix to code - Enable this option if you want to add prefix to the generated codes. Let's enable it. One more option will appear below for entering a prefix.
- Prefix - Write here a prefix that will be used for the generated codes.
- Note - Add a note (can only be seen by the admin).

The options in other section can be fill the same as the previous method. After everything is filled, click the button Import below the form.
You will see the report about generated codes and that they were sent to email addresses. The same as in the previous method, you can download a CSV with generated codes or see the list in the table where you can manage them.
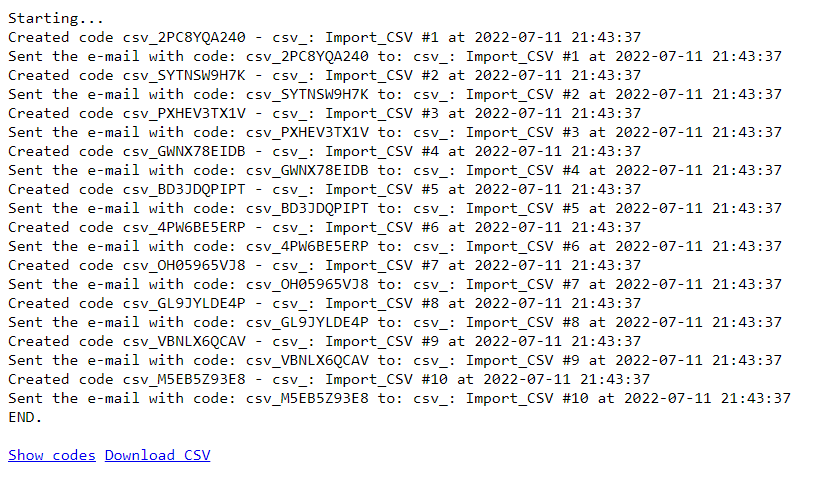
This time you will see a status "Sent" in the column Notification E-mail for relevant codes, as the codes were sent to corresponding email addresses.
Email Template
You can customize the template of email with codes that will be sent to users. To do this, navigate to Admin Dashboard → Invitation Code Content Access → Settings → Notifications tab.
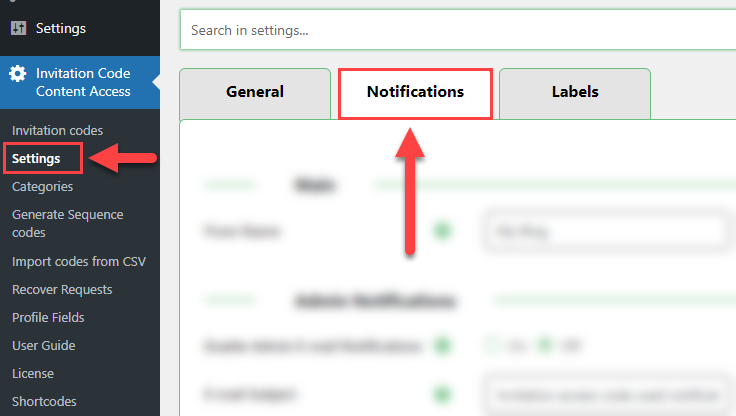
Find there the section Template for "Use CSV as list of email" option.
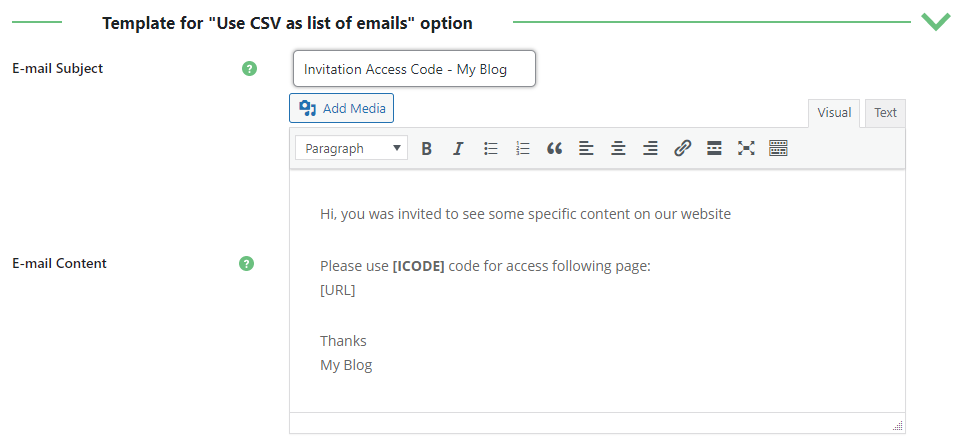
You can customize E-mail Subject and E-mail Content. For customizing the content of the notification email you can use the following shortcodes:
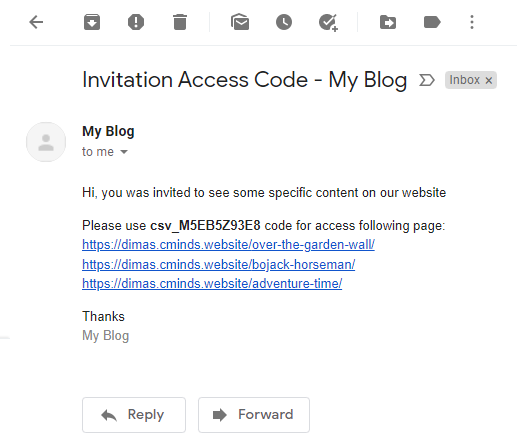
[ICODE]- The code itself. This shortcode must be in the email template.[URL]- Link to the restricted page.[EDATE]- Expiration date of the invitation code.[EMAIL]- User's email.[NOTE]- Note (internal note).
After changing the email template, click the button Save Changes at the bottom of the page.

Example of the email notification:
End Result
Following instructions found in the plugin and guides, you should be able to create invitation codes in bulk.
Use Case Front-End
Generating a sequence of codes:
Accessing the post using a code on the front-end:
 |
More information about the WordPress Invitation Code Plugin Other WordPress products can be found at CreativeMinds WordPress Store |
 |
Let us know how we can Improve this Product Documentation Page To open a Support Ticket visit our support center |