This document uses version 1.4.0 of the WordPress Client Zone.
Video Use-Case
Introduction
The WordPress Client Zone add-on creates a safe portal to transfer files to and from your customers.
Use Case Front-End
Example of the index page
Use Case Assumptions
In this example use case guide, we'll cover how to create a secure client download zone from bottom up. You can apply the same idea to the topic of your site, be it finances or kid toys.
We consider that you have already bought the plugin, but not installed it.
You also need to go to the plugin widgets area and add both the Client and Admin widgets to your defined sidebar container.
Both widgets are needed as they includes the client zone navigation tools.
There are two ways to do this.
First option (Front-End)
From the admin bar, click on Theme Customizer.
Theme customizer
Add the sidebar widgets.
Setting up the widgets in the theme customizer
Second Option (Back-End)
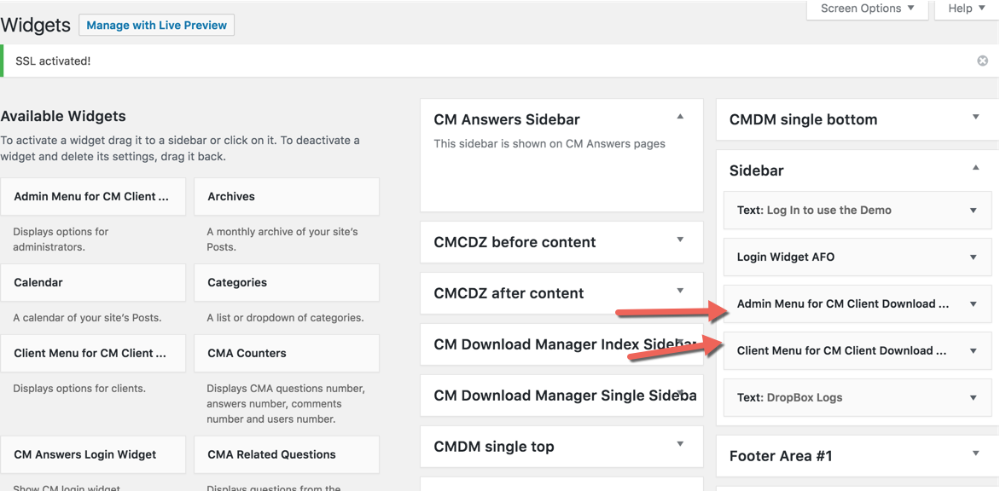
Head to WP Admins → Appearance → Widgets. Add the widgets to the sidebar
Adding Client Download Zone widgets
With the plugin ready to go, it's time to start creating content.
And What If My Theme Doesn't Have a Sidebar?
Some themes may not provide a sidebar to place widgets on.
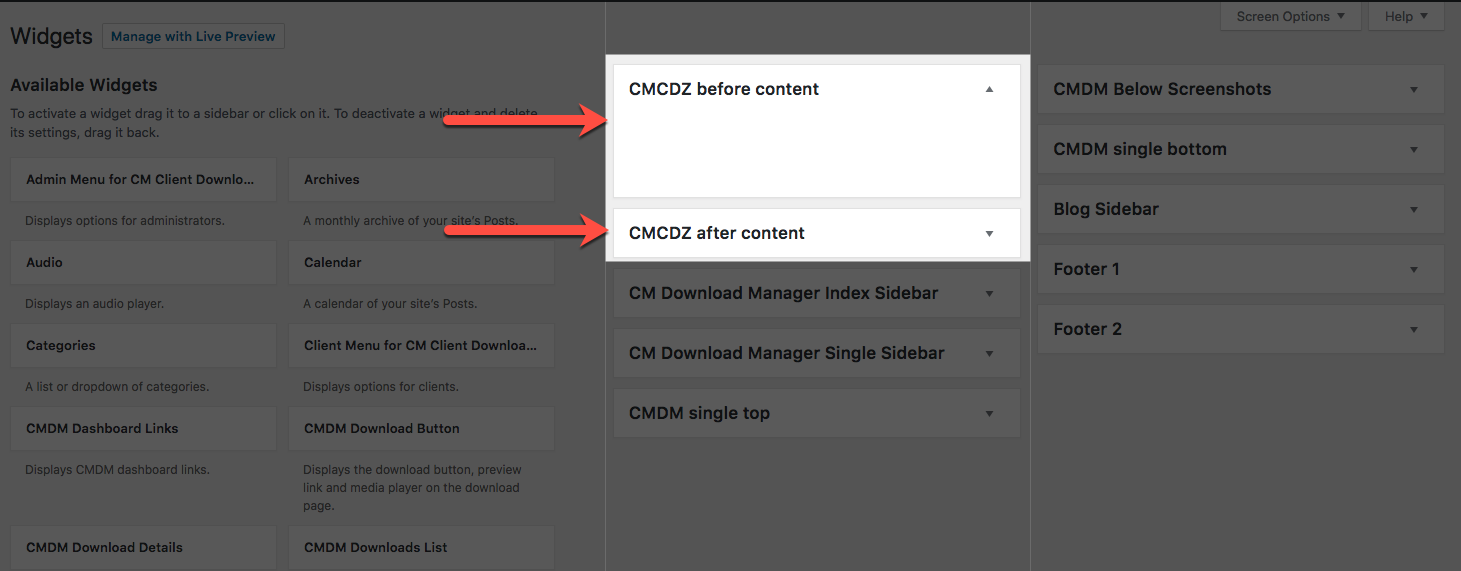
That is not a problem. The WordPress Client Zone add-on provides new widget areas called CMCDZ before content and CMCDZ after content so, even if there's no sidebar, the admin can add those widgets to these areas in order to display the upload options.
Users can have access to their own dashboard, where they can upload files and manage files that have been shared with them or with user groups to which they belong.
Setting up and Accessing the User Dashboard
Users can access their dashboard at the permalink setting that you define in the plugin settings. First, navigate to the General tab of the WordPress File Manager plugin settings.
Navigation to the plugin settings
General settings
Under the Navigation section, the admin can define the permalink at which logged-in users can access their user dashboard.
Setting up the dashboard page permalink part
Using the User Dashboard
On their dashboard, users can search, view, preview, download and delete files that have been shared exclusively with them, or that have been shared with user groups to which they belong. Users can also manage and edit their own uploads.
Example
Index page example
All files will appear directly on their dashboard, where users can easily download them by clicking on the "open" button and then the "download" button.
'Download' button
Users can also upload files to share exclusively with the admin directly from their dashboard by clicking on "upload file."
Create groups to easily distribute downloads among group of users. He can also assign upload permission based on user groups.
Creating User Groups
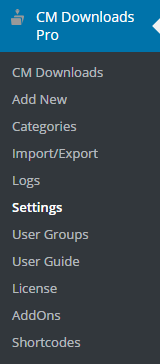
First, navigate to User Groups from the CM Downloads dashboard.
Managing user groups
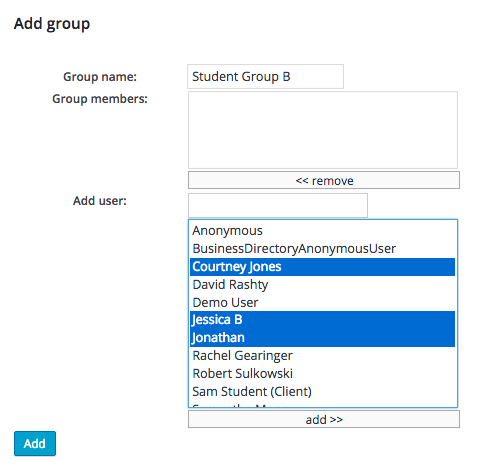
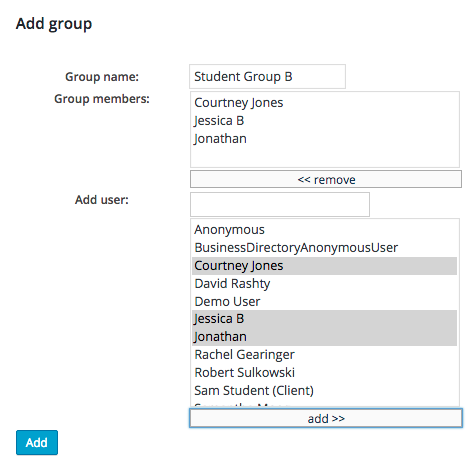
Under Add group, the admin can create a new user group by giving it a name and assigning group members. To add existing users to the group, you can either search by their name or show all existing users and select which ones you would like to join the new user group.
Creating a user group
Remember to click the add>> button to make sure the users you selected appear as group members.
Adding users to the group
Finally, click the blue "Add" button at the bottom of the form to create the new user group.
'Add' button
You will receive a message indicating that your group was added successfully and you will be able to view the group you just created in the list of User Groups. The list includes the name of the user group. the number of users in the group, and action buttons that let you easily edit or delete the group.
List of user groups
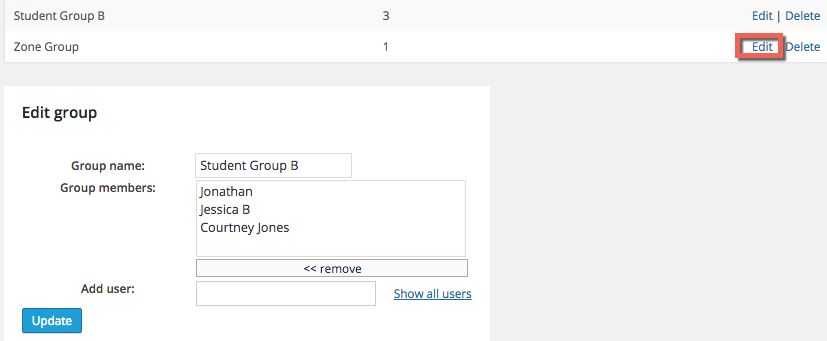
When you click on the "Edit" link, you can easily change the group name and add or delete users from the group. Make sure you click the blue "Update" button when you are done making changes.
Editing the user group
User Group Settings
After creating user groups, admins can then set the permissions for each of these groups. The admin can decide which user groups have permission to upload their own files.
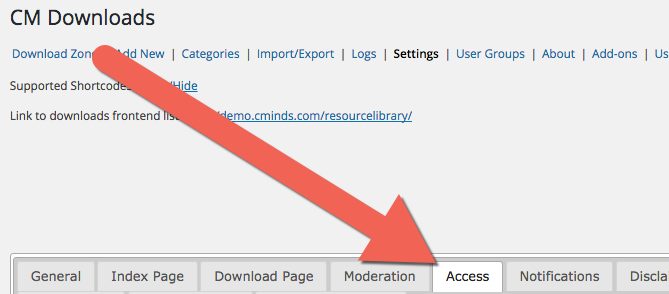
Navigate to the Access tab under the plugin settings.
Navigation to the plugin settings
Access settings
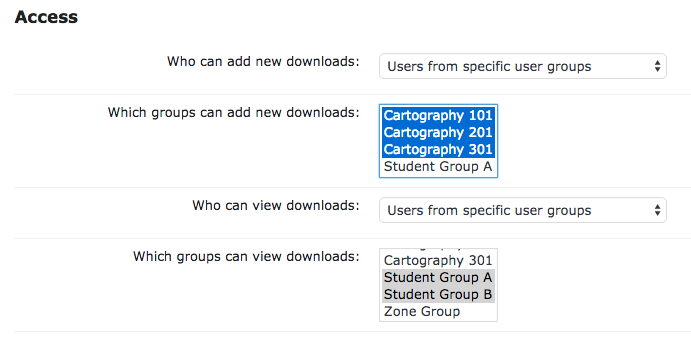
The admin can restrict adding and viewing downloads to specific user groups. If you choose this option from the dropdown menu, you can then select which user groups have that specific permission.
Setting up the permissions for user groups
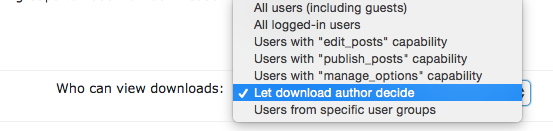
Administrators can also grant download authors the option to define which groups are allowed to view individual downloads.
Letting download authors decide who can view downloads
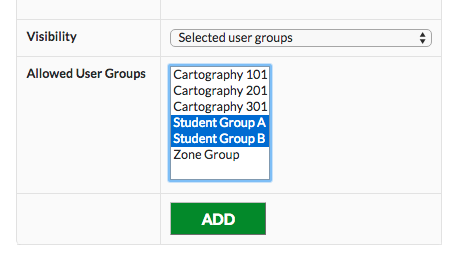
In this case, the download author can set the visibility of the download to specific user groups on the "New Download" form.
Choosing user groups that are allowed to download files
When a client uploads a file, by default it is only viewed by the admin.
There are two ways to assign a download to a specific user:
1. From the admin dashboard, simply click on the upload sign next to the name of the user you would like to send the file to.
Sending files to the specific user
2. From the Download Manager dashboard, click on Add New. On the New Download form, change thevisibility settings to specify the users you would like to transfer the download to. You can select users from a list of all users or search for users.
Adding new download from the back-end
Adding new download
Choosing users that are allowed to download files
Enabling Notification for New Downloads
To adjust the notification settings, first navigate to the Notifications tab under the plugins settings.
Notifications settings
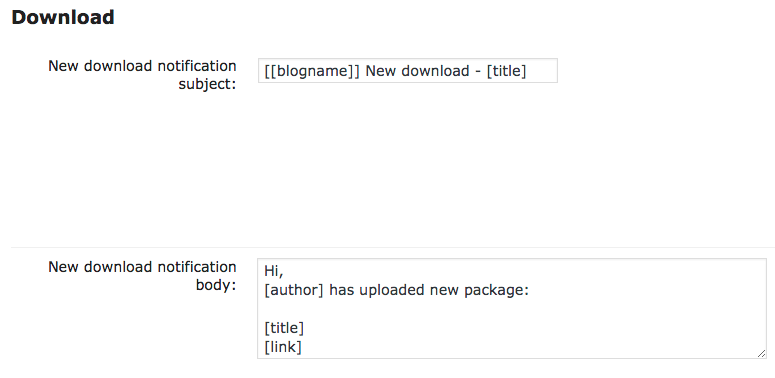
Under the Download section, the admin can create the email template for notifications about new downloads using our supported shortcodes.
Email template for notifying about uploading new files
Here are several examples of shortcodes that you can use to customize an email message’s content:
New Download Email Notification Shortcodes:
[blogname] - name of the blog
[title] - new download title
[link] - link to download page
[author] - uploader name
TIP: Who will Receive New Download Notifications?
Next, the admin can choose who will receive email notifications about new downloads. If the new download has access restricted to chosen groups, chosen users, or the download's category has restricted access to some groups, then you can notify these users about the new download.
Choose "Groups' members" if you want to notify the restricted groups members.
Choose "Users assigned directly" to notify users assigned directly to downloads.
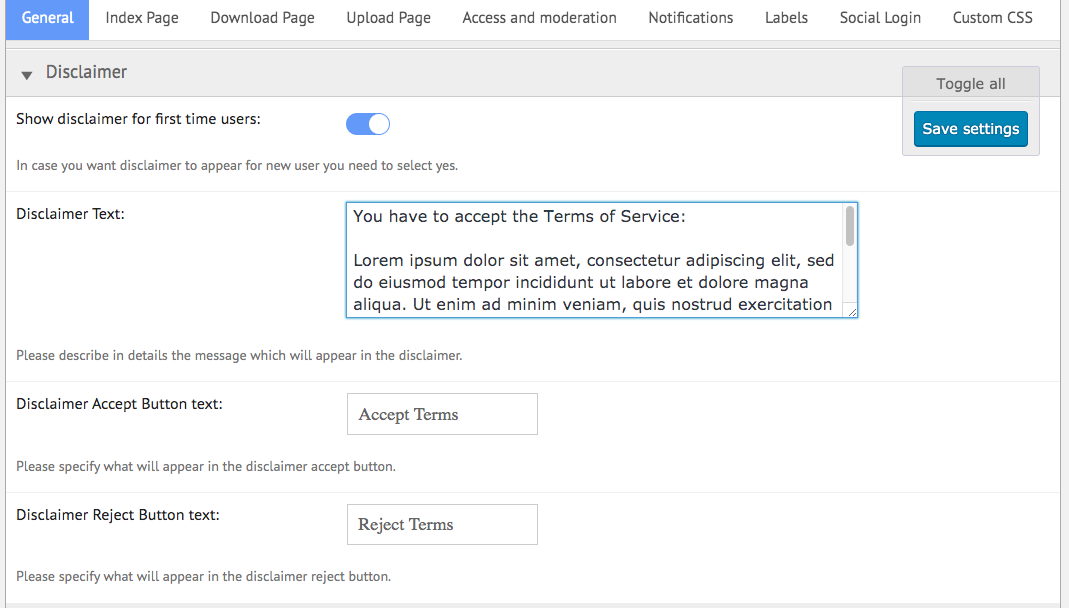
A download disclaimer is a short text that states the terms and conditions for using your site’s download area.
The admin can control the visibility and functionality of their WordPress download area disclaimer, and add the text of both the disclaimer itself and the accept/reject buttons.
A download area disclaimer is a short text that states the terms and conditions for using your site’s download area. Users need to accept your terms before downloading files.
You can include terms of use information, and also additional information about the type of information you provide and collect in your download area. It's important to use a clear language to ensure your audience understands all the implications of utilizing your service.