WordPress Travel Map Plugin (CMMRM) - Settings - Index Page
Settings - Index Page
To configure the index page in the WordPress Travel Map plugin, navigate to the Admin Dashboard → CM Maps Route Manager Pro → Settings. Click on the Index Page.
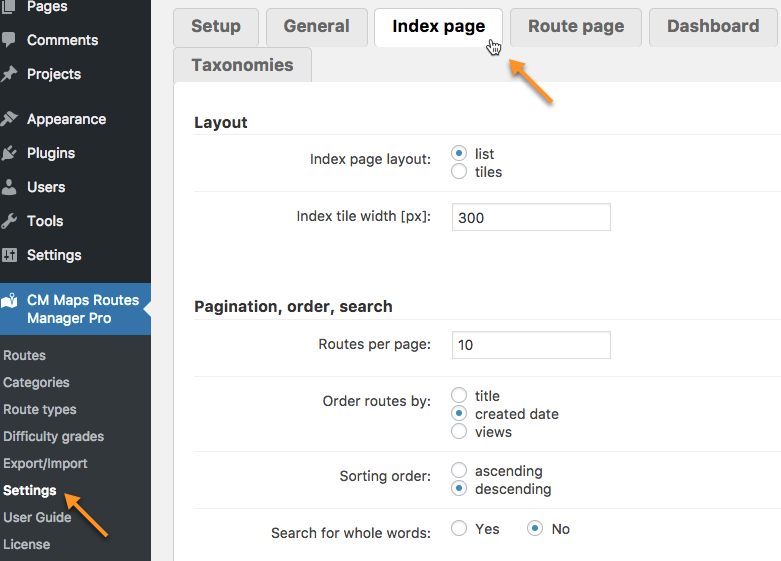
Layout
- Index page layout - Sets the Index page appearance as a list or as tiles.
-
Index tile width [px] - Sets the width of tiles that appear on the index page if the "tiles" layout is chosen.

Layout settings

Pagination and order
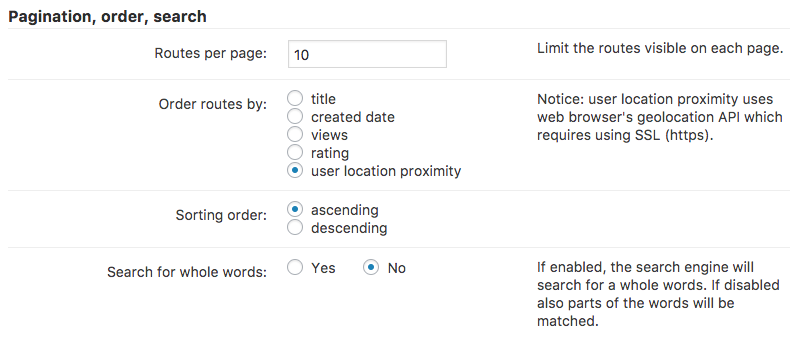
- Routes per page - Limits the routes visible per page.
- Order routes by - Sets routes order by:
- title
- created date
- views
- rating
- user located proximity (this last option uses the web browser's geolocation).
- Sorting order - Sets the order of sorting to either ascending or descending.
- Search for whole words - Toggles whether to search for partial words or only to search for whole words.
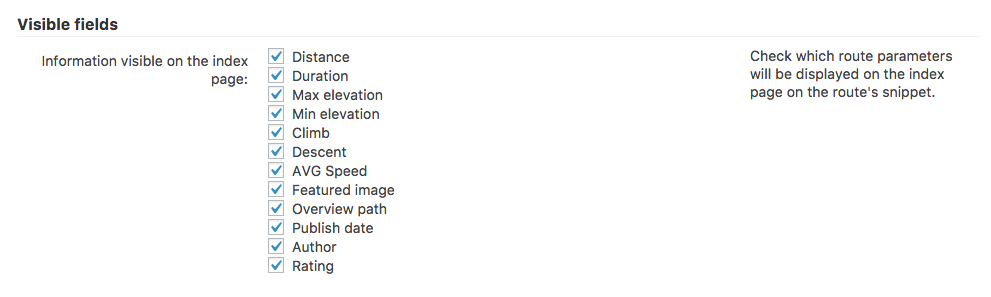
Visible Fields
- Information visible on the index page - Determines snippet information seen on the index page.
Appearance
- Text on top - You can enter text which will be displayed on the top of the index page, below the page title.
- Apply the route's color to its snippet background - Connects the snippet to the route by giving the snippet the same background color and the color chosen for the route.
-
Show category description on the top - If disabled, the default "text on top" will be displayed.

Appearance settings

Map
- Show map with all routes on the index page - Toggles whether or not to display the map including all the routes on the index page.
- Index map default latitude - The latitude of the default view on the index page map if no routes to show.
- Index map default longitude - The longitude of the default view on the index page map if no routes to show.
- Index map default zoom - The greater the number in the drop-down menu, the closer the zoom will be.
- Embed the map script in footer - Enabling this option can solve some JavaScript issues.
- Enable marker clustering - Toggles marker clustering on and off. Clustered markers display more clearly than overlapping markers.
-
Enable info window on marker - Shows a tooltip when clicking on a clustered marker, listing each route

Example of the info window on marker -
Trails stroke weight - Define the stroke's weight for the trail, in pixels. Comparison with 3 and 6:

Different trails stroke weight -
Show fullscreen mode button - If enabled, the button shown below will appear in the top right corner of the map, allowing the route embed to occupy the whole window.

Displaying a buttong for fullscreen mode - Integrate with CM Map Locations plugin - In order for this feature to work, it requires the WordPress Interactive Map plugin to be activated.
- Merge CM Map Locations plugin categories - If enabled, the locations will comes as per selected route category if route and location category slug is same. This option will work if you will enabled above option.
- Enable full route on map - If enabled, then full route (polyline) will be show on index map.
- Starting point for a route - You can choose which point will be shown as the starting point for the route displayed:
- First pathway point
- First location
- All locations
- Clicking on the map marker will:
- None
- Open the route's page
- Show tooltip with information about the location
- Open the linked location URL
- Route featured image - Sets the route featured image.
- Route default image - The web address of the route's default image.


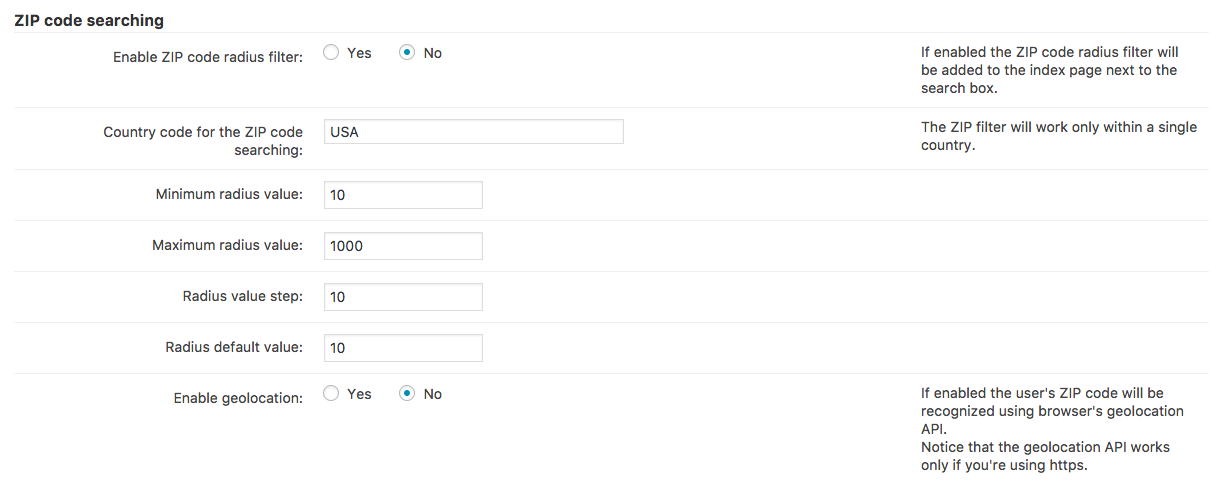
ZIP Code Searching
This feature allows the user to search routes based on a given zip code plus a defined radius. Example from the front-end:
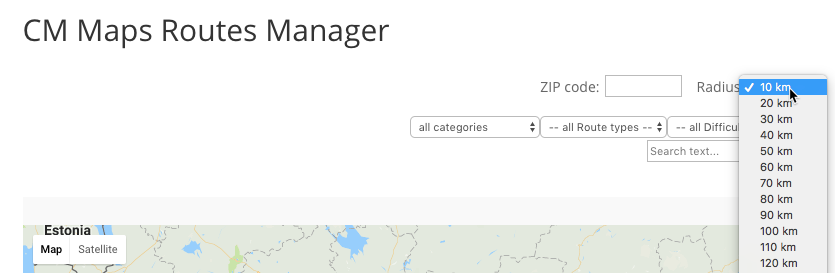
The settings are:
- Enable ZIP code radius filter - Enables or disables the ZIP code search bar
- Country code for the ZIP code searching - The ZIP filter works only within a single country.
- Minimum / Maximum radius - These two options configure the range of the ZIP search.
- Radius value step - The increments present in the search.
- Radius default value - The standard value in the index page.
- Enable geolocation - Fetches the zip code from the user's browser. It only works with https.
Geolocation
- Show user's position using browser's geolocation - Toggles whether or not to display the user's location using geolocation. Requires HTTPS.
-
Enable find user location button on map - Displays the "Find Me" button. Requires the previous setting to be enabled.

Geolocation button - Center map to user's location - Uses the web browser's geolocation API to center the map in the user's location.

 |
More information about the WordPress Travel Map Plugin Other WordPress products can be found at CreativeMinds WordPress Store |
 |
Let us know how we can Improve this Product Documentation Page To open a Support Ticket visit our support center |