WordPress Table of Contents Plugin (CMTOC) - Use Case - How to Create a Table of Content for Articles on Your Site
Use Case - How to create a table of content for articles on your site
Note: This guide requires:
- WordPress Table of Contents plugin - This document uses version 1.4.11
Video Use-Case
Introduction
The WordPress Table of Contents plugin is one of the best table of contents WordPress plugins. It helps users easily navigate your WordPress posts. The TOC plugin can automatically generate and insert an easy to use, user friendly navigation section to the post headers.
Use Case Front-End
Use Case Assumptions
In this use case you will get to know how create a table of content for the article on your site.
We consider that you have already bought the plugin, but not installed it.
It follows:
- Installing the plugin
- Choose post types to display the Table of Contents
- Adding Tables of Contents to posts/pages
- Manually Placing Table of Contents Using the Shortcode
- Style
- End result
Installing the Plugin
The process is the same for all CM plugins and add-ons.

- Download the add-on from your customer dashboard.
- Log in to WordPress and navigate to the WordPress Admin → Plugins settings.
- Click on Add New.
- Activate it and add the license.
Learn more: Getting Started - Plugin Overview
Choose Post Types to Display the Table of Contents
The main function of the WordPress Table of Contents plugin is to comb through pages and posts, particularly long ones. Tables of contents are automatically generated based on their header contents. The generated table of contents will get its hierarchy from the type of header h1 < h2 < h3 etc.
It is possible to set the WordPress post types that will display the Table of Contents from the plugin settings. It is even possible to display a Table of Contents on a Custom Post Type.
You can enable the TOC on all pages automatically and then choose which pages should not have it.
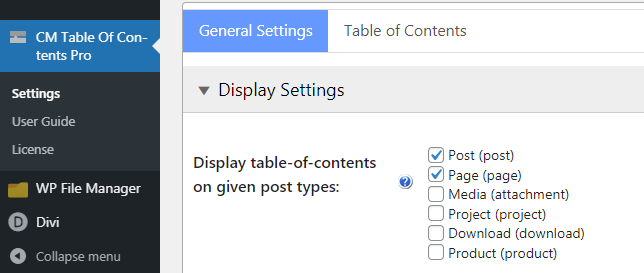
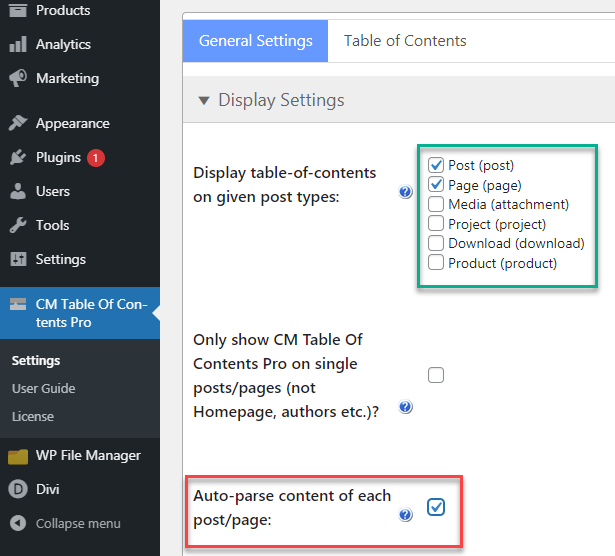
Navigate to Admin Dashboard → CM Table of Contents Pro → Settings → General Settings → Display Settings section. There you can see the option Display table-of-contents on given post types. Check the boxes to choose posts or pages, or any other custom objects where you want to display the Table of Contents.
Scroll to the bottom of the page and click Save Changes to save your changes. Or you can use the following floating window for saving the changes:

You can also use this floating window to toggle all sections in Settings.
Adding Tables of Contents to Posts/Pages
Now, you're able to add the Table of Contents to each page or post. Let's navigate to the editing our prepared post and enable it.
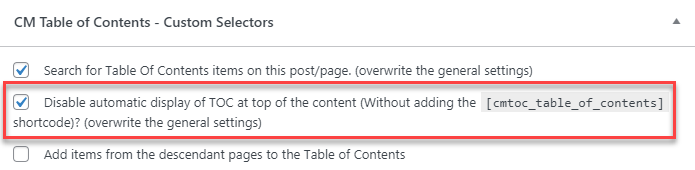
Scroll to the bottom of the page - there you will find the metabox called CM Table of Contents - Custom Selectors. You need to enable the option Search for Table of Contents items on this post/page.
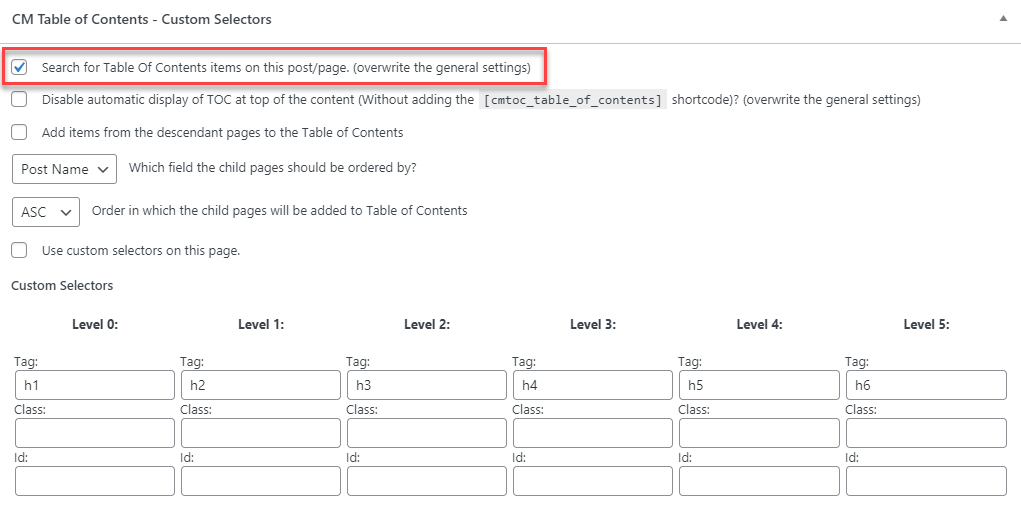
Then you need just click the Update button on the top of the page (or the Publish button, if you have just created the post):

Result
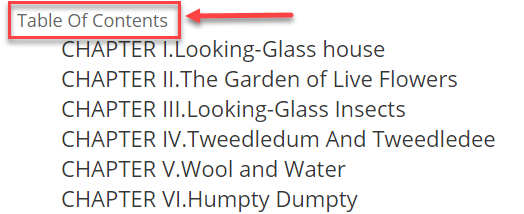
The plugin automatically detected all standard headings in the content and generated the Table of Contents.
TIP 1: Auto-adding TOC
You can enable the Table of Contents for all chosen posts/pages at once automatically. To do this navigate to Admin Dashboard → CM Table of Contents Pro → Settings → General Settings → Display Settings section and enable the option Auto-parse content of each post/page.
It means that the table of contents will be turned on by default on all posts/pages. If you don't need TOC on some posts/pages - you can disable them manually.
TIP 2: Change the name of TOC
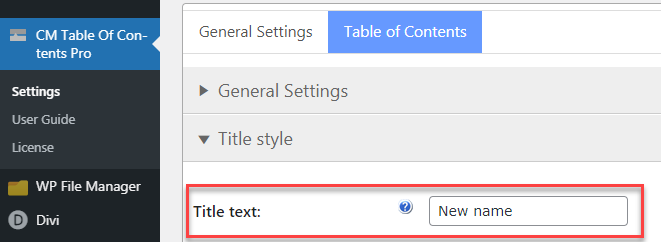
You can change the standard name of the Table of Contents:
Navigate to Admin Dashboard → CM Table of Contents Pro → Settings → Table of Contents → Title Style section and change the name in the Title text field.
Result:

Learn more about basic functionality: WordPress Table of Contents Plugin (CMTOC) - Getting Started - Basic Functionality
Manually Placing Table of Contents Using the Shortcode
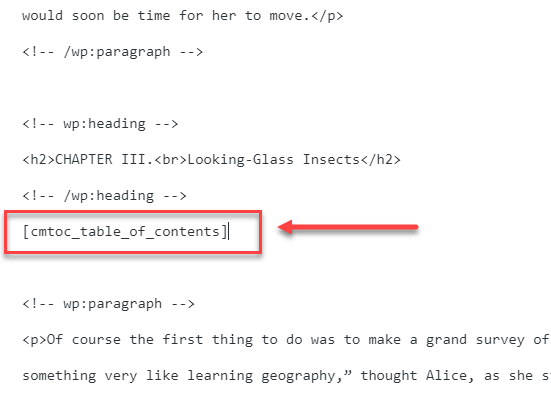
By default the Table of contents is placed at the very top of the Page or Post where it is displayed. There are some cases when you might prefer to place it somewhere else on the page as well as or instead of at the top. To do this you can use the following shortcode: [cmtoc_table_of_contents]
TIP: Disable default TOC placing at the top
You can always disable automatic display of the TOC at the top of the content using the respective option in the CM Table of Content - Custom Selectors zone, and put the TOC only in the places you want to using the shortcode.
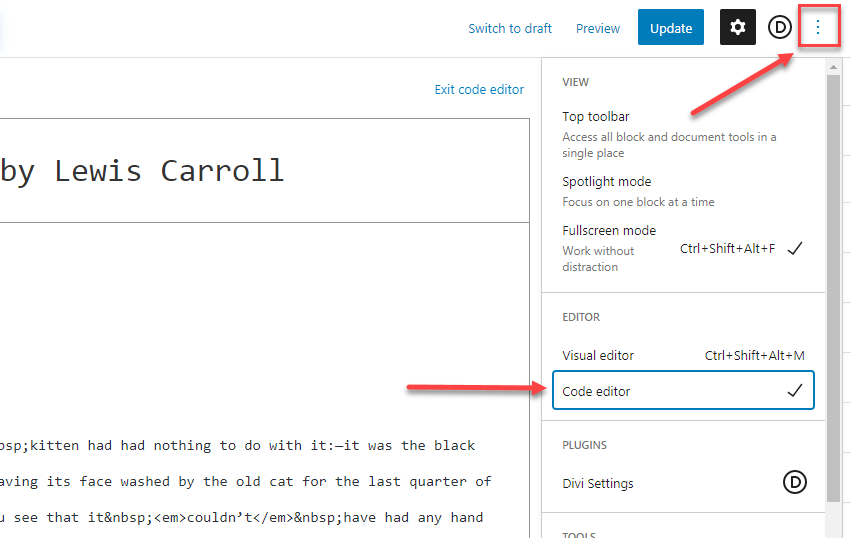
Although placing this shortcode in the content using the Visual editor will normally work it is advisable to switch to the plain Code editor before attempting to use this.
For example, we want to put the Table of Contents under every chapter title. Here's how we can do it:
The same we can do for every chapter title. And don't forget to click the Update button to save the changes.
Result

Style
There are a lot of settings for changing the style of Table of Contents. In this use case we'll consider just a few of them, but you can find much more information about the styling in our detailed guides:
- WordPress Table of Contents Plugin (CMTOC) - Style - Changing the TOC Appearance and Placement
- WordPress Table of Contents Plugin (CMTOC) - Style - Modifying TOC Button (Floating TOC, Show/Hide)
- WordPress Table of Contents Plugin (CMTOC) - Style - Highlighting the current TOC element
- WordPress Table of Contents Plugin (CMTOC) - Style - CSS Adjustments
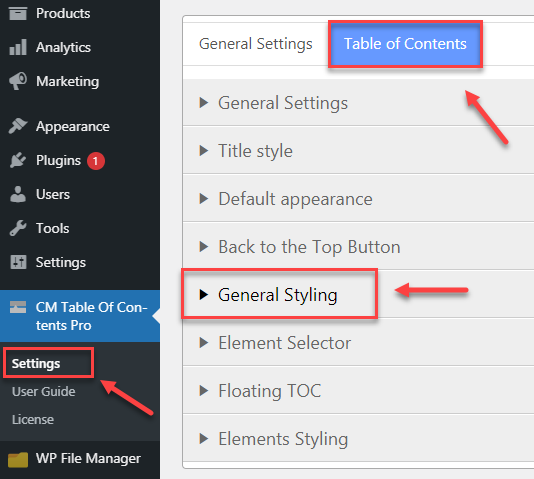
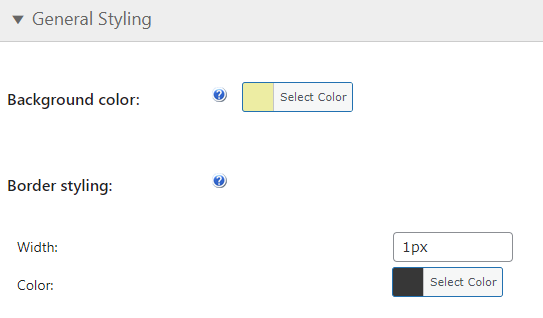
General Styling
Let's add the border for the Table of Contents and change the background color. Note: the size of the border width must be set in px format, for example: 1px.
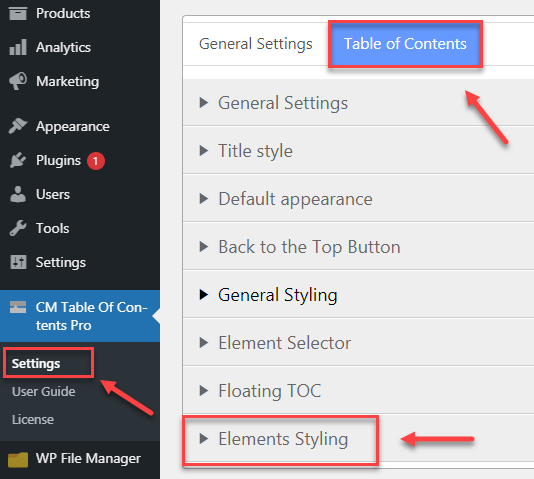
And let's change the color and font style. Navigate to the Elements Styling section.
As in our example we don't have any sub-levels in the Table of Contents, it's enough to change the settings only for Level 1:
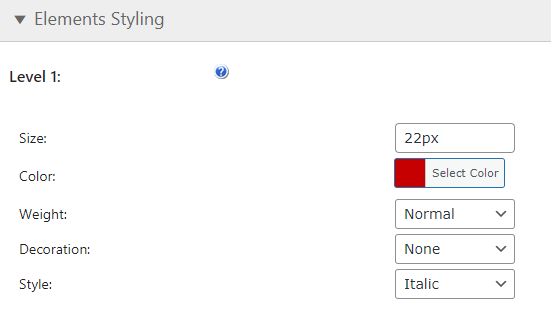
After changing the settings click the Save Changes button to save the result.
Result

Add "Back to the Top" Button
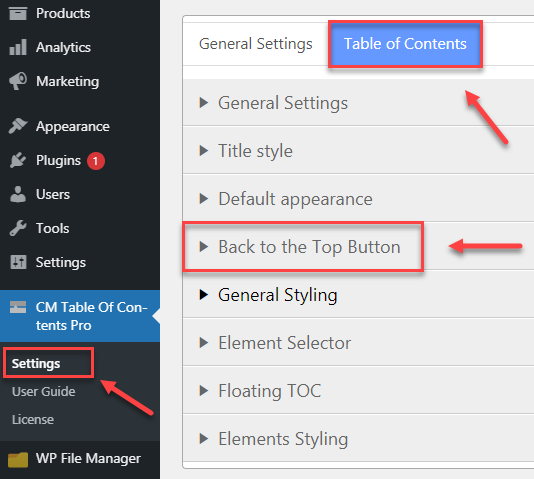
Learn more about it in this user guide: WordPress Table of Contents Plugin (CMTOC) - How To - Add "Back to the Top" Button
Floating TOC
The WordPress Table of Contents plugin has another option to make the navigation easier for the user - a floating TOC option. This persistent button will be seen while the user navigates the content.
To enable it navigate to Admin Dashboard → CM Table of Contents Pro → Settings → Table of Contents → Floating TOC section.
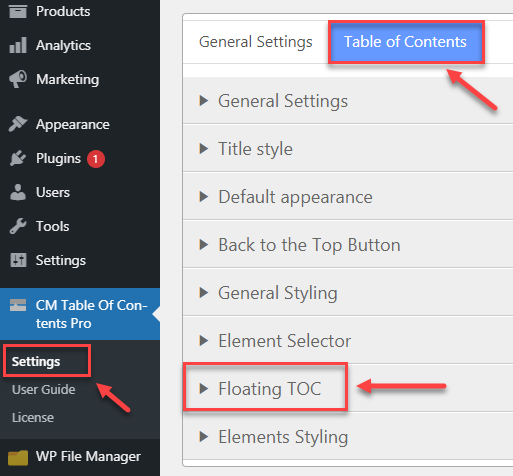
To enable floating TOC enable the option Show button, and then click the button Save Changes.

There are a lot of more options for the style customization of Floating TOC. Learn more about it in our detailed guide: WordPress Table of Contents Plugin (CMTOC) - Style - Modifying TOC Button (Floating TOC, Show/Hide)
Result

End Result
In result we have created the Table of Contents that can be visible at the beginning of the page and easily accessible at any point of the page, so the user can navigate through the content without any difficulties.
Using the WordPress Table of Contents plugin you can make user's experience much easier by simplifying the navigation on the pages with a lot of information, and make your web-site more attractive.
Use Case Front-End
 |
More information about the WordPress Table of Contents Plugin Other WordPress products can be found at CreativeMinds WordPress Store |
 |
Let us know how we can Improve this Product Documentation Page To open a Support Ticket visit our support center |