Appointment Booking Calendar - Setup Step 3 - Modify the Form
Setup Step 3 - Modify the Form
Appointment Booking Calendar Initial Steps
Step 1- Create a Calendar | Step 2 - Add Calendar to Website | Step 3 - Modify the Form
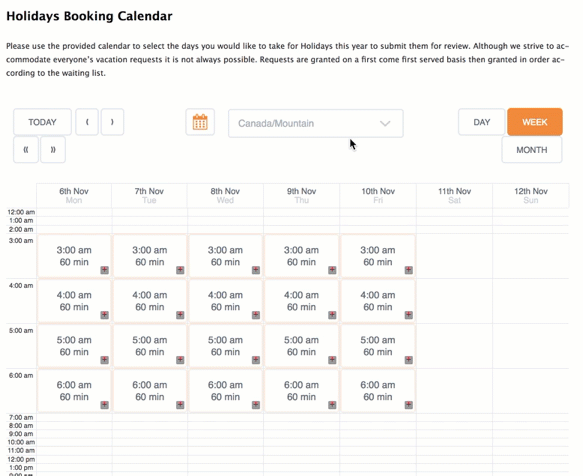
After the Calendar has been added to a page that is accessible on the website site visitors will be able to make bookings and these will begin to appear in the Bookings tab of the Appointment Booking Calendar plugin.
Upon clicking on a time slot on the Appointment booking calendar the customer will be automatically directed to the Calendar's booking form.
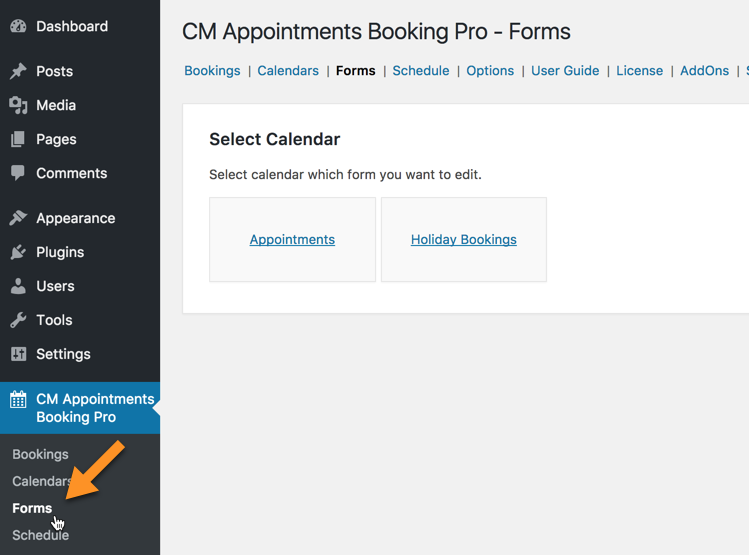
You may require more information from customers who are making appointments. On the WordPress dashboard navigate to CM Appointments Booking Pro → Forms.
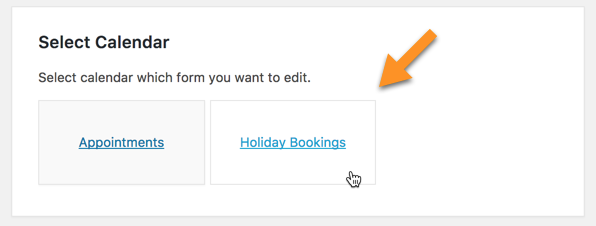
Select the calendar that you would like to make a contact form for.
The form builder will open and the form can be modified as you need. For a more in depth guide about modifying forms see This Article.
 |
More information about the Appointment Booking Calendar plugin for WordPress Other WordPress products can be found at CreativeMinds WordPress Store |
 |
Let us know how we can Improve this Product Documentation Page To open a Support Ticket visit our support center |