WordPress Pay Per Post Plugin (CMPPP) - Settings - Choosing How To Charge Users (By Post, By Group, By Category)
Pricing Settings
What is This Feature?
With the WordPress Pay Per Post plugin, posts can be paywalled in few parallel ways.
- Individually - You set a specific price separately for each post/page.
- By pricing groups - You create pricing groups, and add selected posts and pages to the needed groups.
- By post category - You can set up a specific price for chosen category.
Tip: One Post, Multiple Prices
A post can have multiple pricing options at the same time. In the example below, the same post has three paywalls:
First comes from the pricing group (1), seconds comes from te category pricing (2), and the thirds one comes from the individual post price (3).
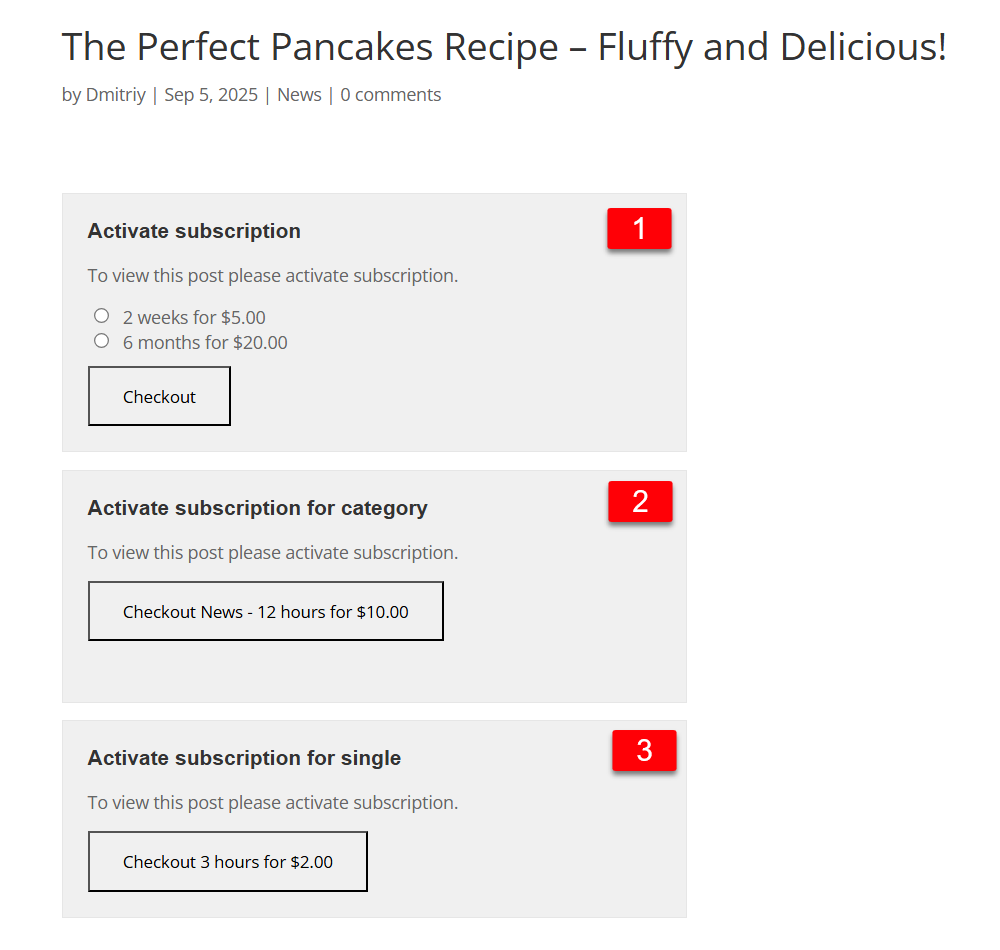
Paying either will grant access to the content.
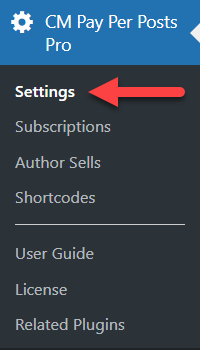
Settings
Navigate to Admin Dashboard → CM Pay Per Posts Pro → Settings.
Defining the Subscription Model
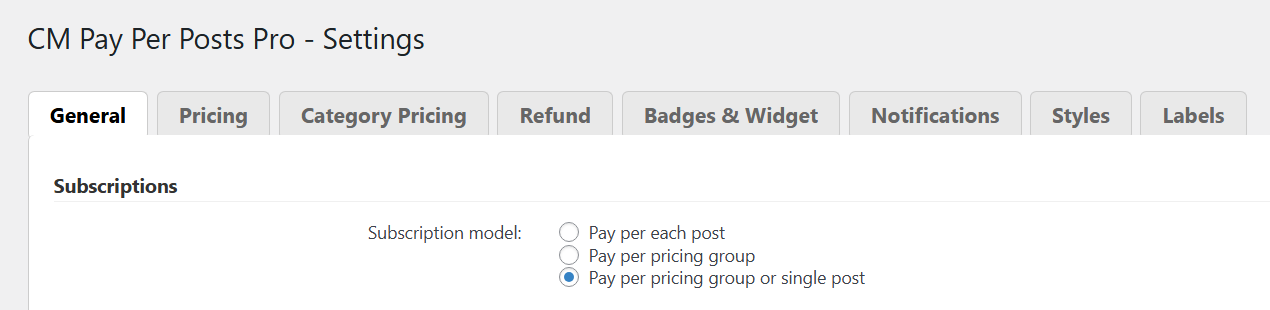
In the General tab → Subscriptions section, click the appropriate box for the Subscription model you want.
- Pay per each post - Targets only specific posts and does not support setting subscriptions for a group of posts.
- Pay per pricing group - Lets you cluster a group of posts while setting a price for viewing any of them during the subscription period.
- Pay per pricing group or single post - Both options at the same time.
Choosing What is Shown Before Purchase
In the next setting, you can choose what the user sees before purchase:
- Show only part of the content (more options) - Specify how much of the content is hidden.
- Hide only content - Hides the complete content.
- Hide full page - Hides the full page, including content, header, and footer.
- Hide specific page elements (more options) - Specify which elements of the page are hidden.
Check details: Settings - What Should Be Hidden
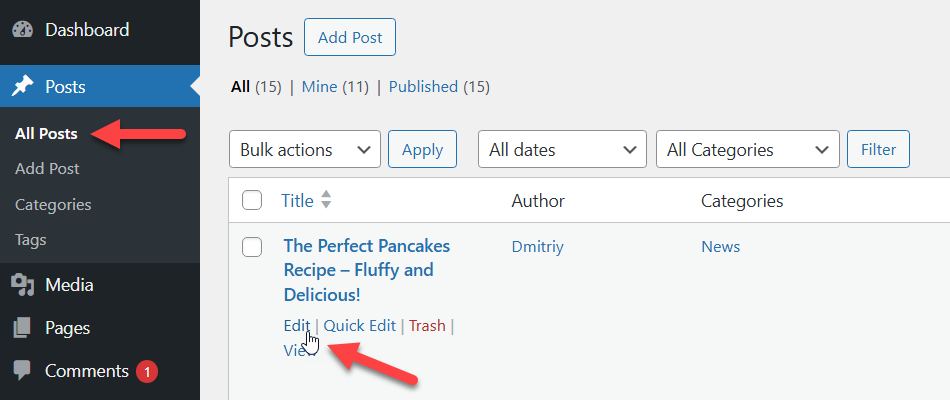
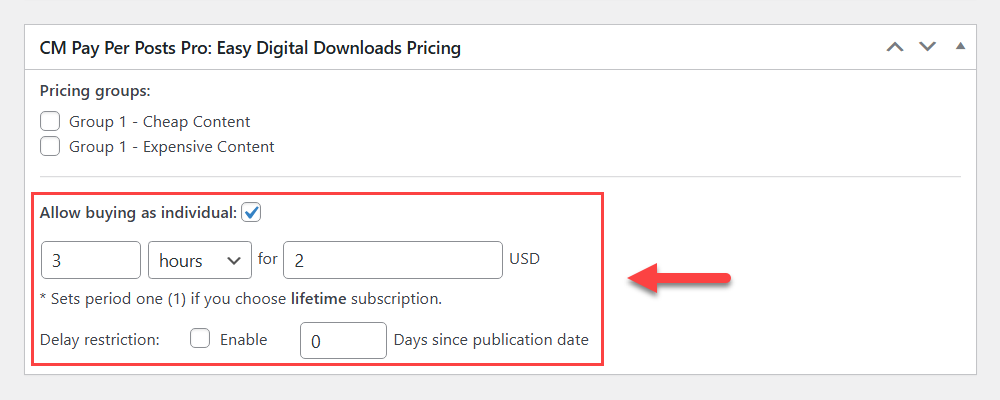
Setting Up Individual Price for a Post/Page
To define a price for a post or page, you need to start editing it. For example, to edit a post, navigate to Admin Dashboard → Posts → All Posts, hover on the needed post and click Edit.
Find the Pay Per Post metabox, enable the option Allow buying as individual, define the access period and price, then save the changes.
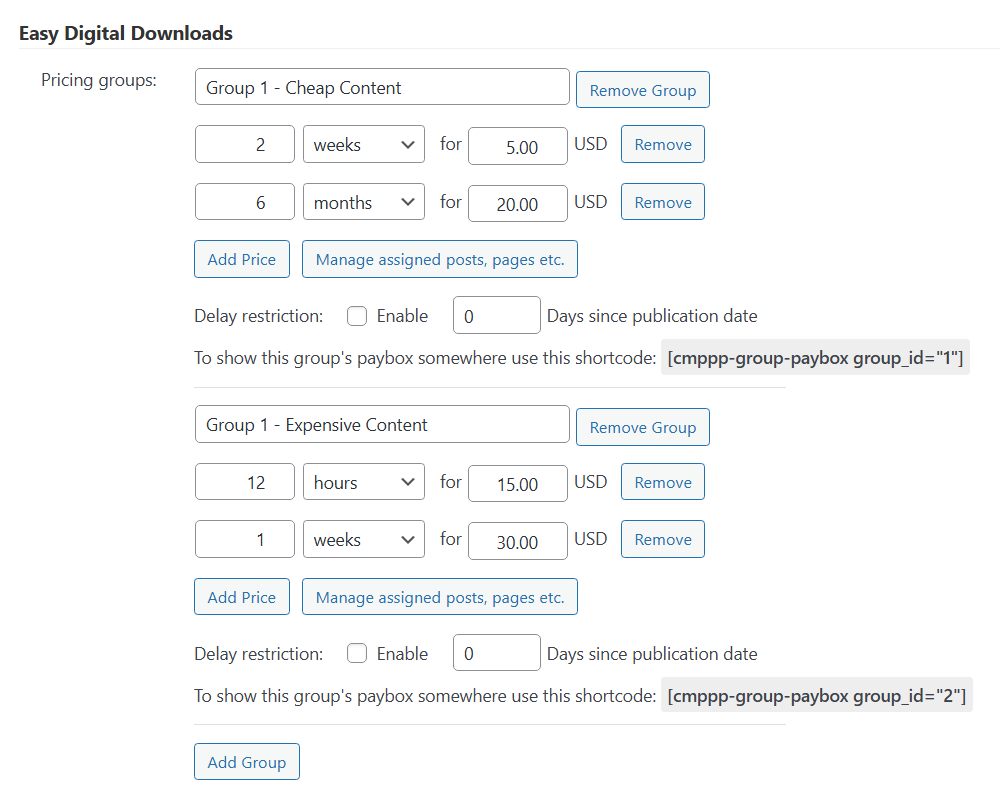
Create Pricing Groups
Navigate to the Pricing tab of the plugin settings.

Here, you can create pricing groups. Once defining the group name, you can also set the time and the value options for this group. The time options are:
- minutes
- hours
- days
- weeks
- months
- years
- lifetime (added in version 2.1.3)
Example
Below we have defined two groups, each with it pricing tiers.
TIP: Allow Users To Buy Groups From Anywhere
You can add the subscription box for groups anywhere on your site.
Learn more: WordPress Pay Per Post Plugin (CMPPP) - How To - Let Users Pay For Subscription Groups
There are two ways to assign a post or page to a group.
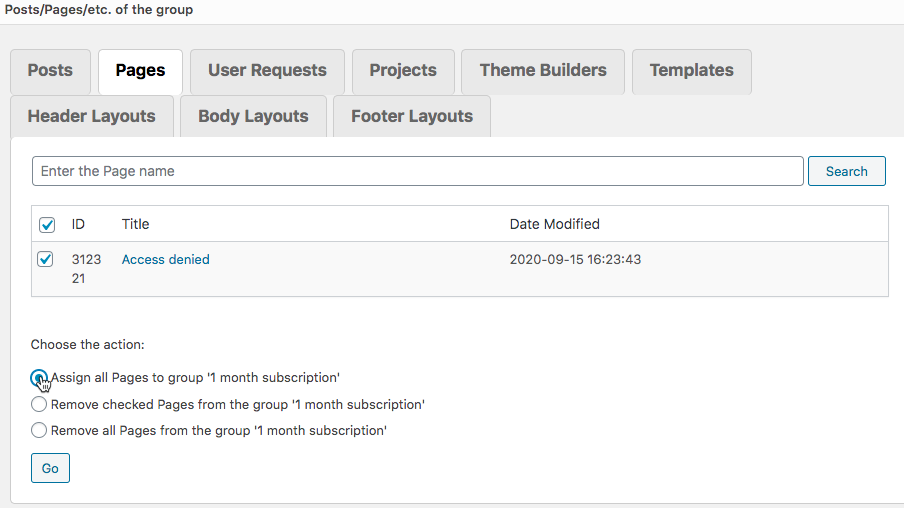
- In the pricing group, click the button Manage assigned posts, pages etc.
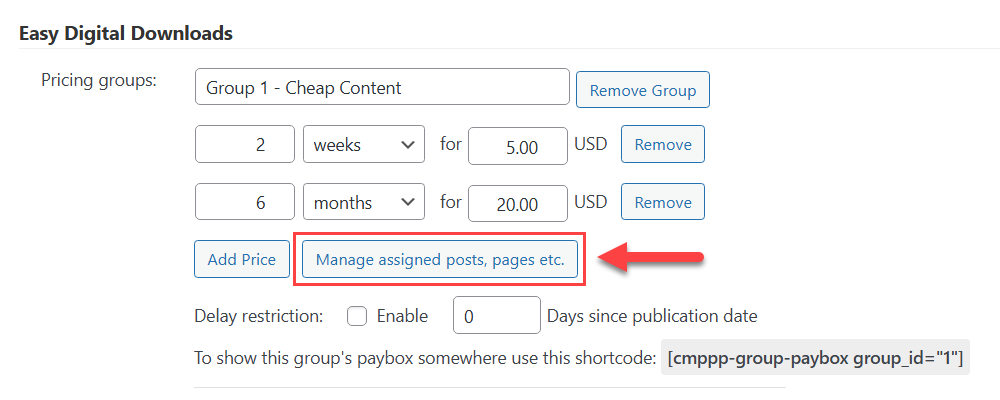
This will trigger a management screen where you can choose different content and easily assign or deassign them to the specific pricing group.
- When editing a specific post or page, you can select one or more pricing groups this post belongs to:
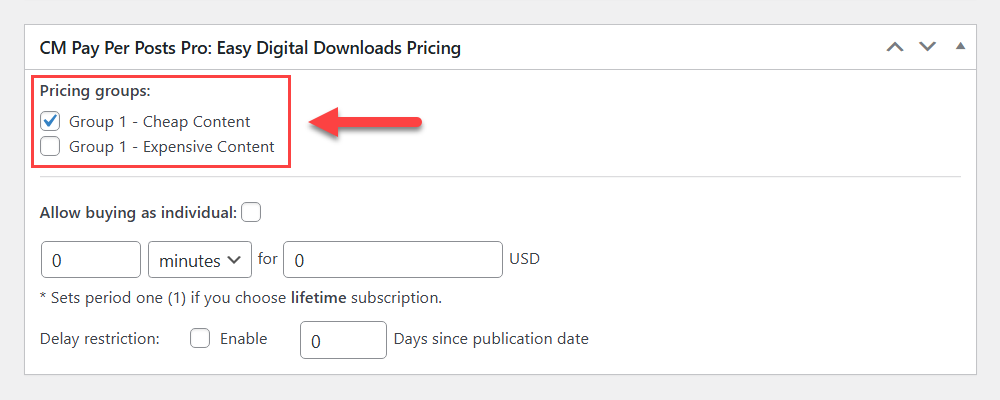
For more information on this step, please refer to the guide Assigning a Post to a Price/Subscription.
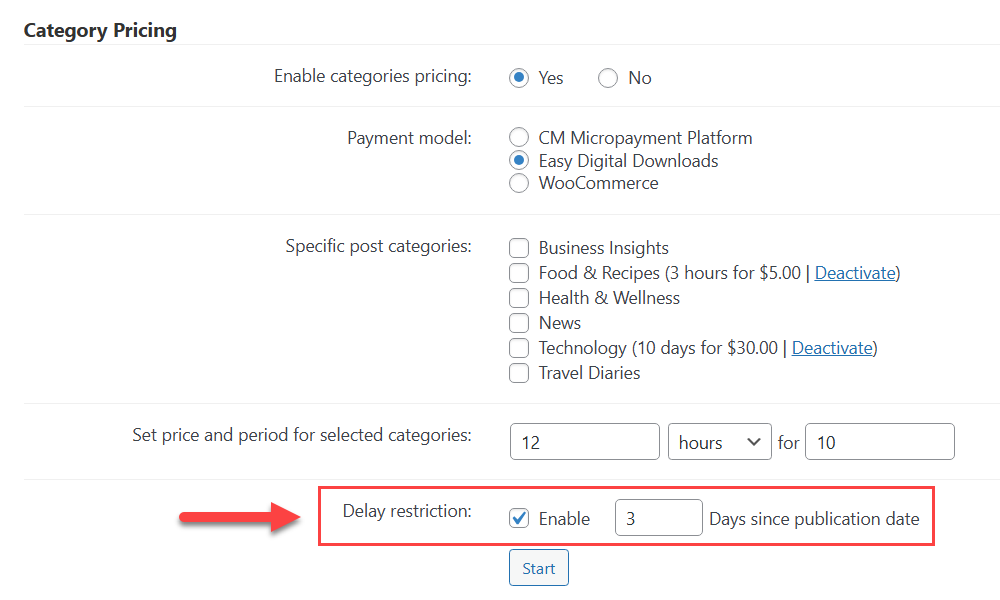
Setting Up Prices for Categories
Enable: Since version 2.7.0, besides Easy Digital Downloads, the category pricing feature also supports WooCommerce and WordPress MicroPayments plugin.
Navigate to the Category Pricing tab.

Here you need to turn on the option Enable categories pricing, choose the Payment model you want to use, select needed categories in the option Specific post categories, and define the access period and price, then click the button Start.
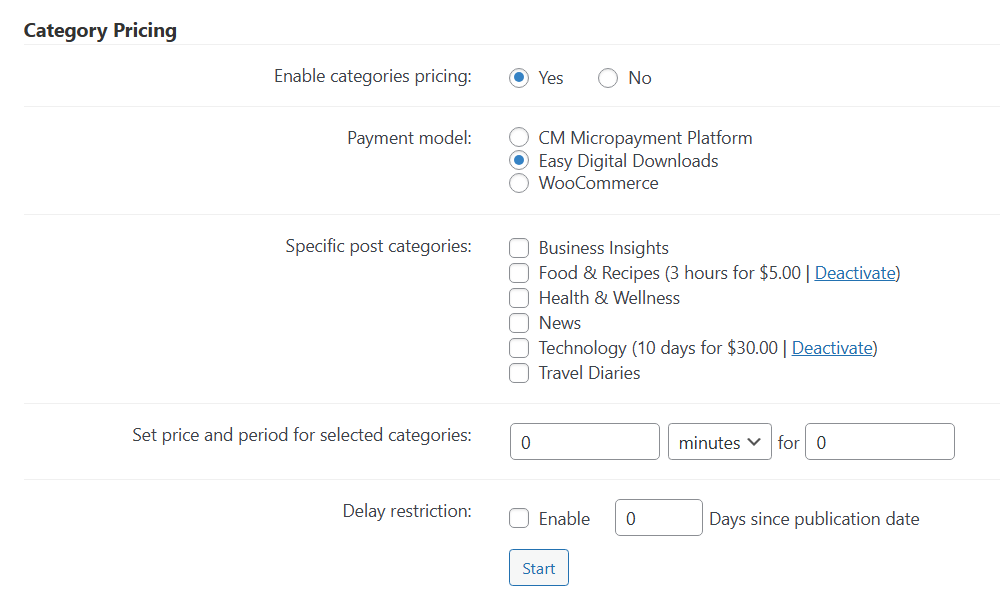
After refreshing the page, you will see the restriction details next to chosen categories. To disable pricing for a certain category, click the button Deactivate next to it. Note: this option was introduced in version 2.6.8.
Delay Restriction
Note: this feature was introduced in version 2.7.0.
This feature allows you to make new posts and pages available for free for a limited time after publication. You can apply it either to all items in a pricing group, category pricing or when setting an individual price for a specific post or page.
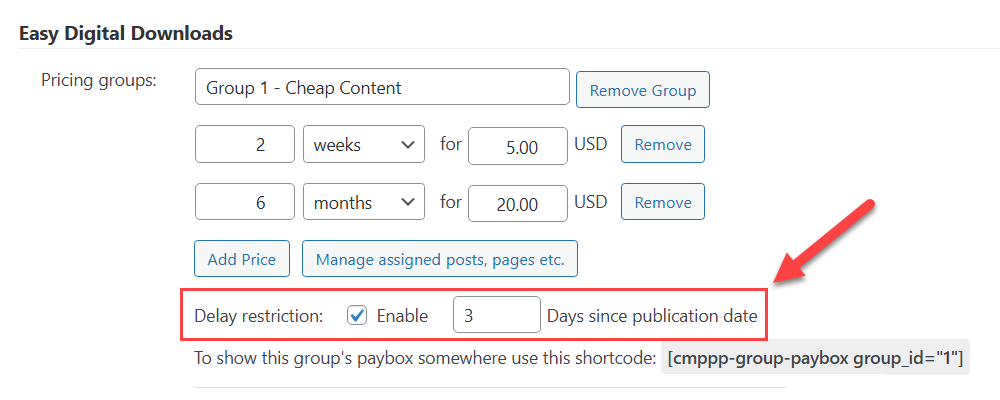
For example, if you set a delay restriction of 3 days, the post or page will be accessible for free during the first 3 days after it is published. Once this period ends, users will need to pay to view the content.
To enable it for a pricing group, find the option Delay restriction and check the box Enable, then set the number of Days since publication date.
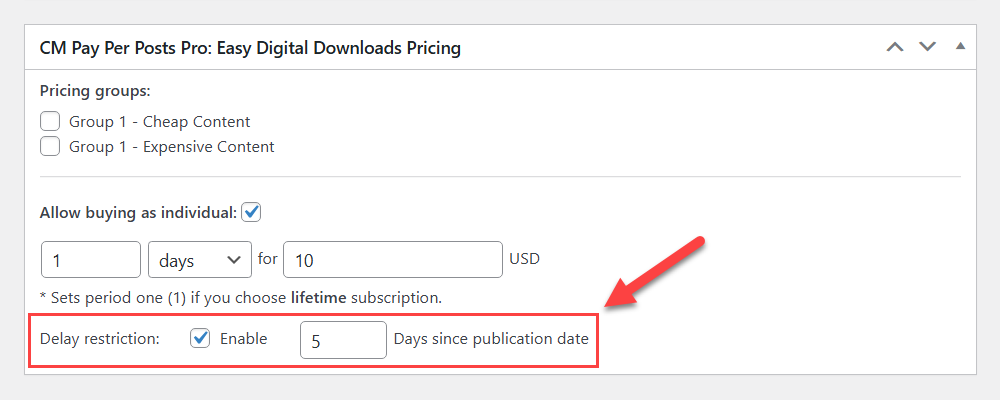
The same applies to individual posts or pages: when editing the content, open the pricing metabox, find the option Delay restriction and check the box Enable, then set the number of Days since publication date.
The same for category pricing:
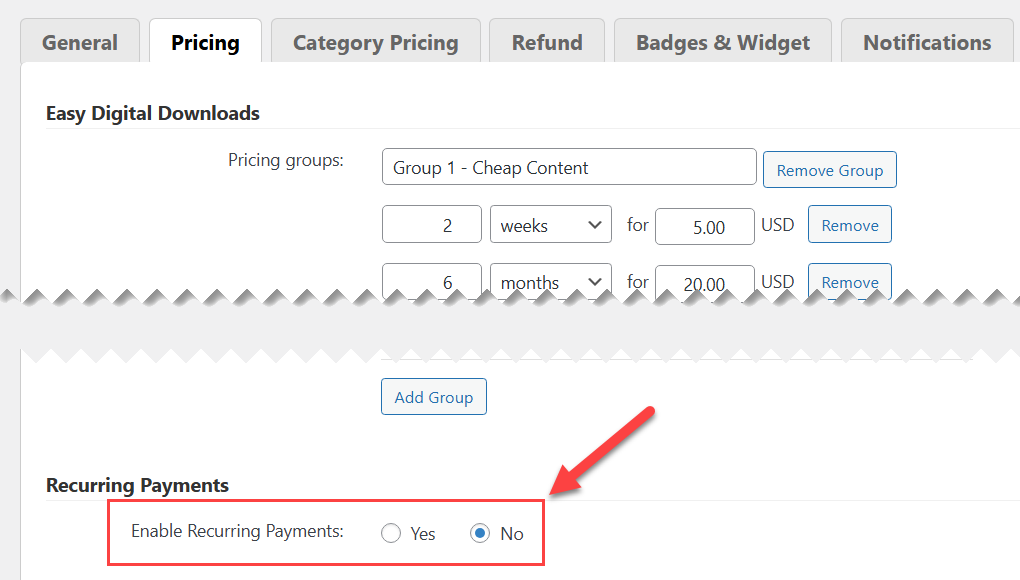
Recurring Payments
Note: this feature was introduced in version 2.7.0. It is supported for individual post prices and pricing groups.
By default, the payment method works as a one-time purchase: when a user buys access to content, it eventually expires, and they need to purchase it again manually.
As an alternative, you can create recurring pricing plans, where users are charged automatically to maintain access.
To use recurring payments with EDD or WooCommerce, you must install and activate the relevant add-on
Once you installed and activated needed plugins, head to the Pricing tab, scroll down to the section Recurring Payments and turn on the option Enable Recurring Payments, then save the changes.
Once it's done, the each price option in the pricing group will have a checkbox Recurring Payments.
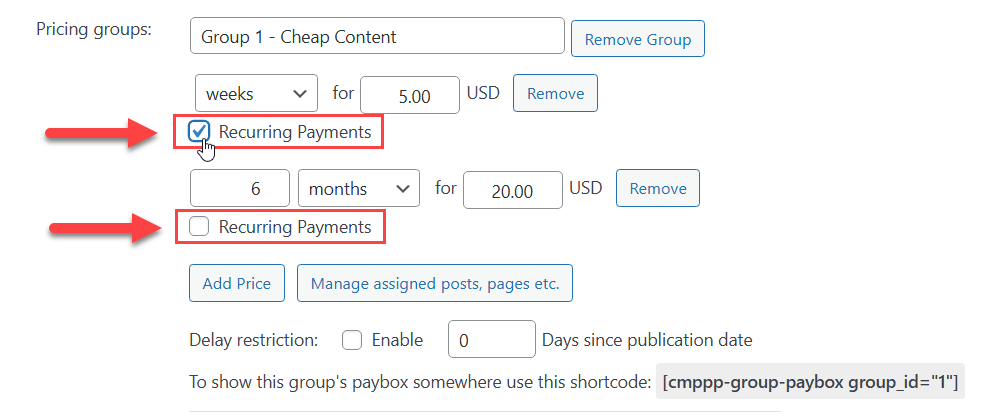
If it is checked, the admin can choose how often the user will be charged. The available options are:
- days
- weeks
- months
- years
Recurring prices are clearly marked in the paybox on the front-end:
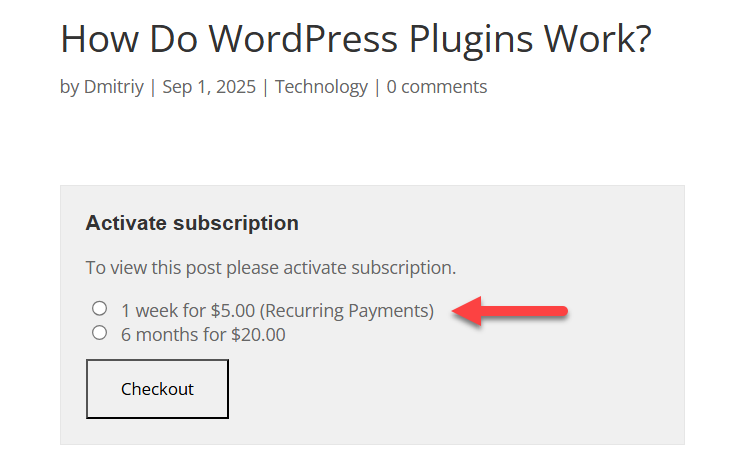
The same it works when setting up an individual price:
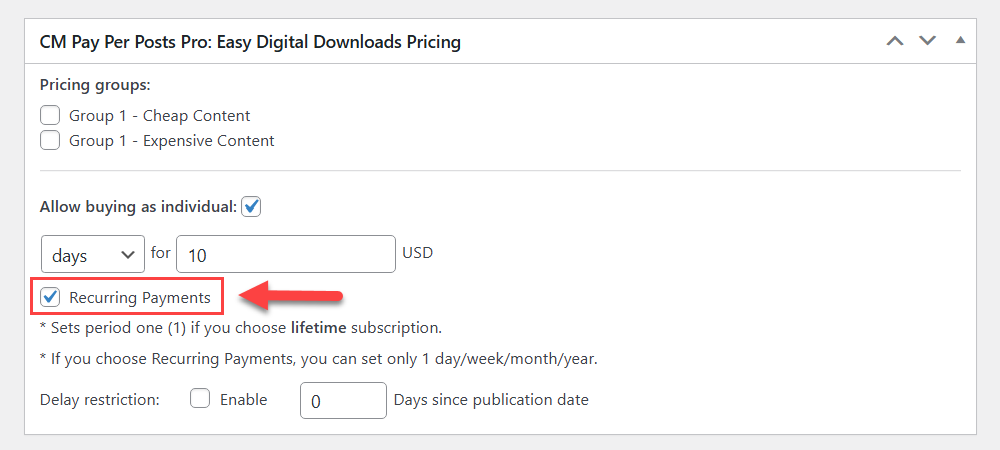
After enabling the option Recurring Payments for a price, the relevant product will be converted into the subscriptions product.
 |
More information about the WordPress Pay Per Post Plugin Other WordPress products can be found at CreativeMinds WordPress Store |
 |
Let us know how we can Improve this Product Documentation Page To open a Support Ticket visit our support center |