WordPress Disclaimer Plugin (CMWMD) - Add New Message
Add New Message
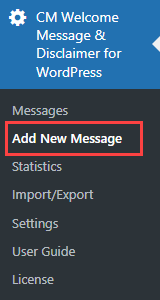
- To create new disclaimer message campaign using the WordPress Disclaimer Plugin, navigate to the plugin on the dashboard.
- Click on the plugin to activate the drop down menu. Then select Add New Message.
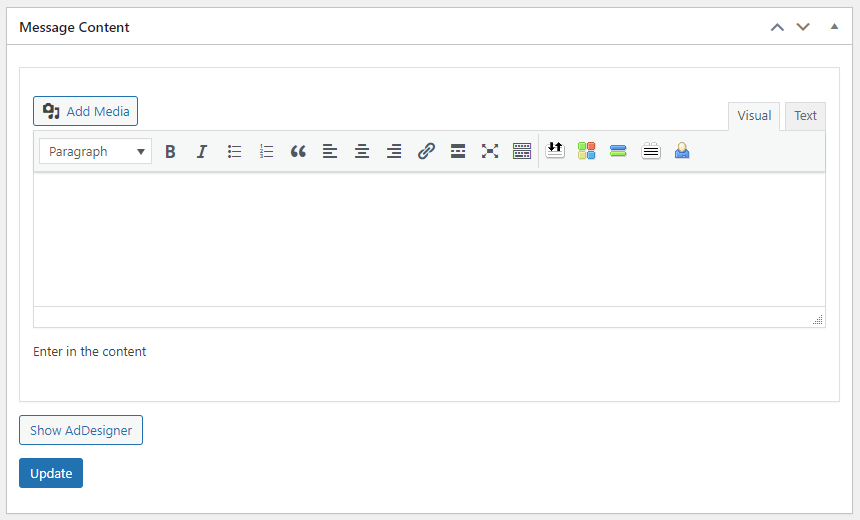
- At the top of the page, enter a title for the message in the box provided.

- In the Message Content box, enter the content of the Message as well as any media, video, hyperlinks, etc.
- All of the HTML valid for the post/page is also valid for the Message
- Click Update to save the changes.
Setting 1) Accept Button Options
In the Message - Options box, click on Accept Button.

Enabling the options will show additional settings:
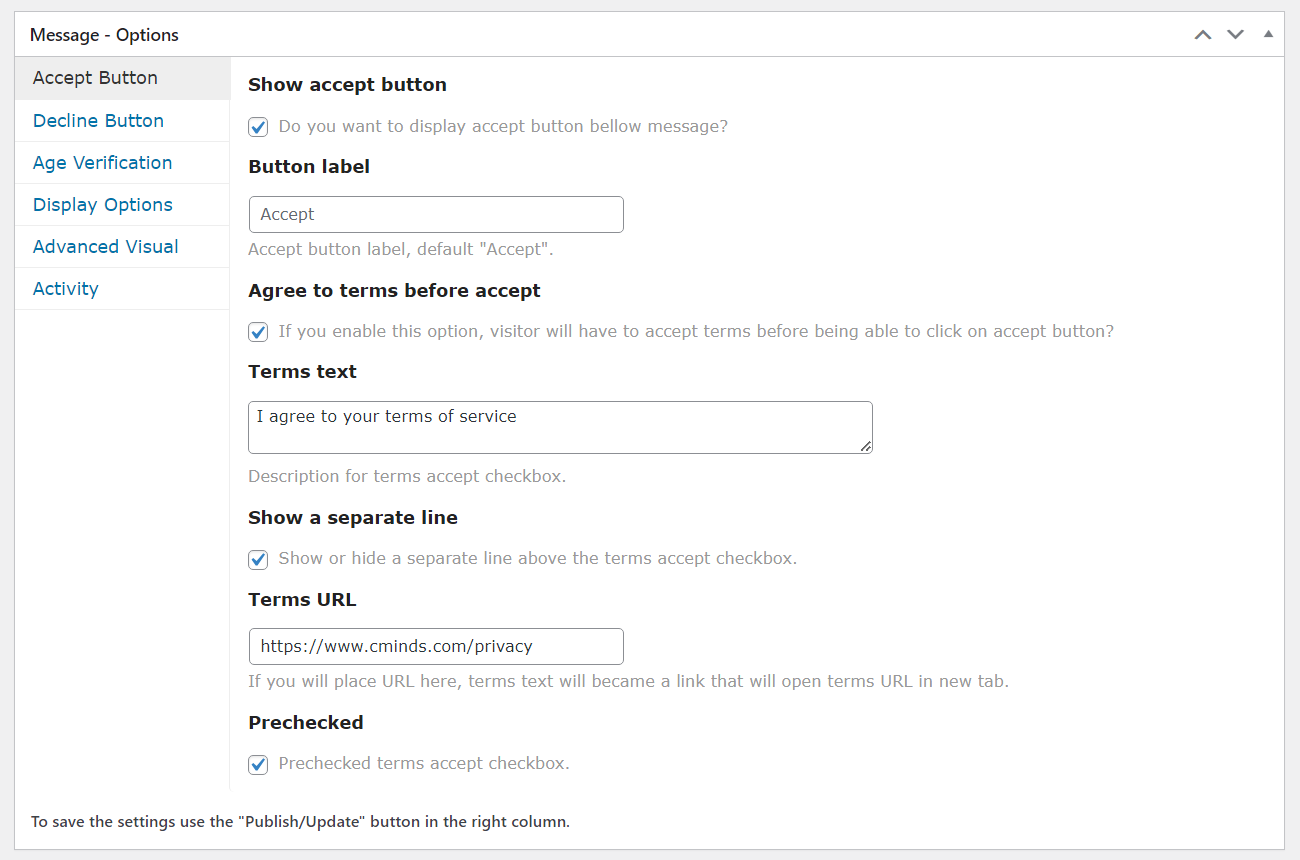
- Show accept button - Check this box to enable the "Accept" button in the popup message.
- Button label - This option allows you to change the label of the "Accept" button.
- Accept to terms before accept - Enable this option to a checkbox for agreeing the terms in the popup message.
- Terms text - Add here the text which will show up next to the agree option.
- Show a separate line - Show or hide a separate line above the terms accept checkbox. Note: this feature was introduced in version 1.6.0.
- Terms URL - Add here a link to your agree-to-terms page.
- Prechecked - If enabled, when the popup with disclaimer appears, the terms accept checkbox will be already checked. Note: This feature was introduced in version 1.3.8.
Setting 2) Decline Button Options
In the Message - Options box, click on the Decline Button.
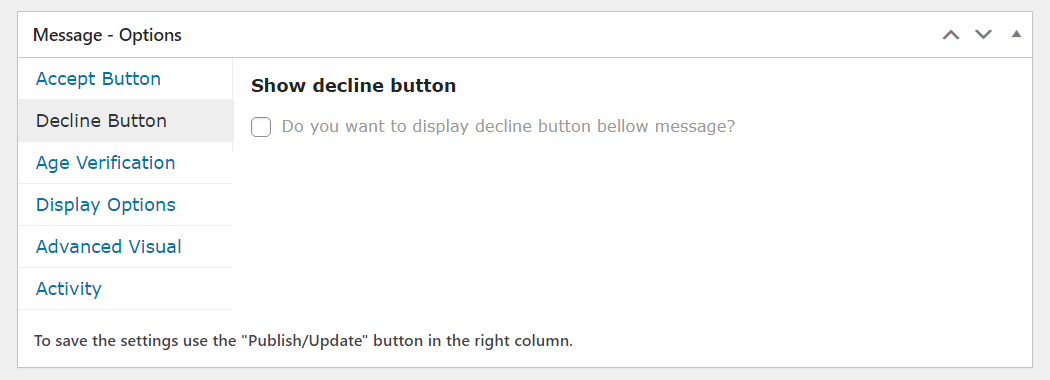
Enabling the option will show additional settings:
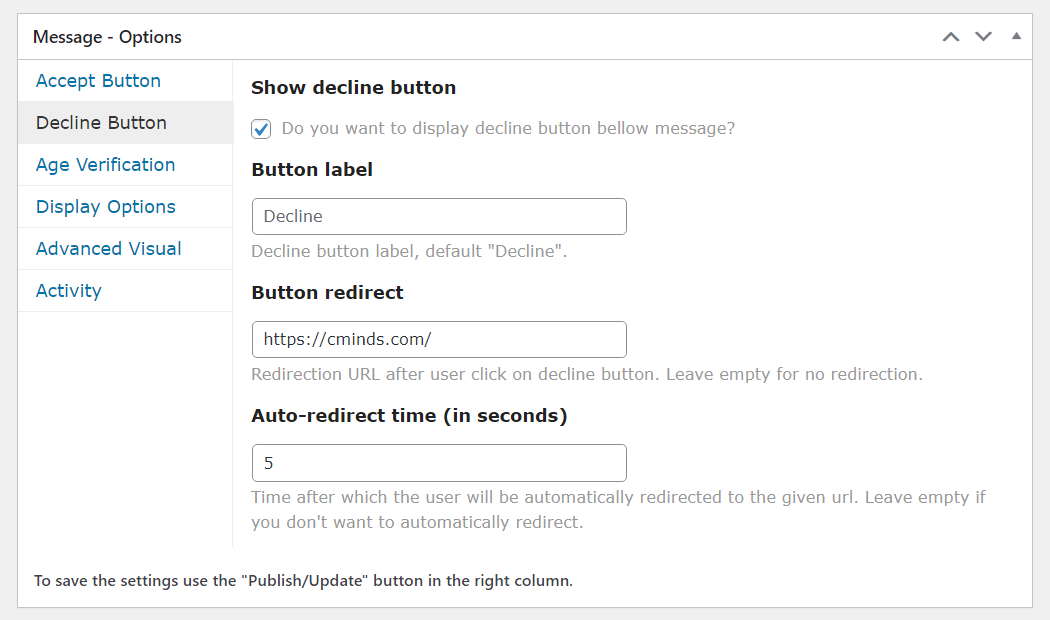
- Show decline button - Check this box to enable the "Decline" button in the popup message.
- Button label - Allows to change the label of the "Decline" button.
- Button redirect - Define here the URL where the user will be redirected after clicking the "Decline" button.
- Auto-redirect time (in seconds) - Define here the time after which the user will be automatically redirected to the defined URL. Leave empty to disable auto-redirection.
Setting 3) Age Verification
Note: the Age Verification functionality was introduced in version 1.5.0. Learn more about how to work with this feature in this use case guide:
In the Message - Options box, click on Age Verification.
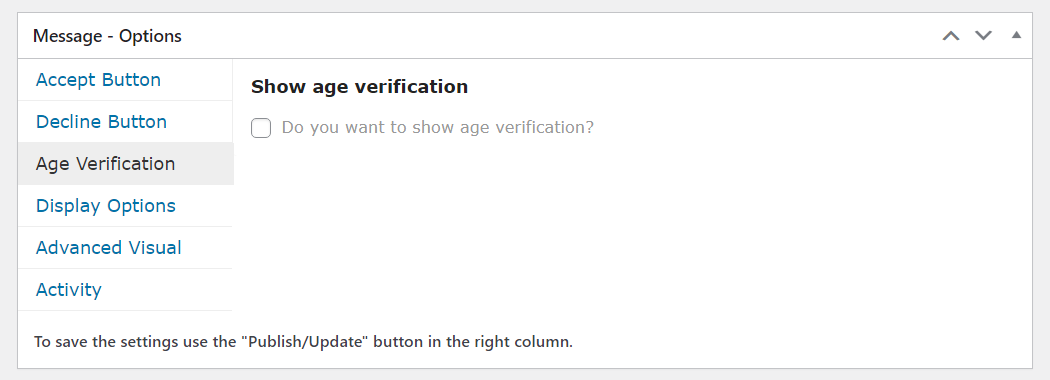
Enabling the first option will show additional settings:
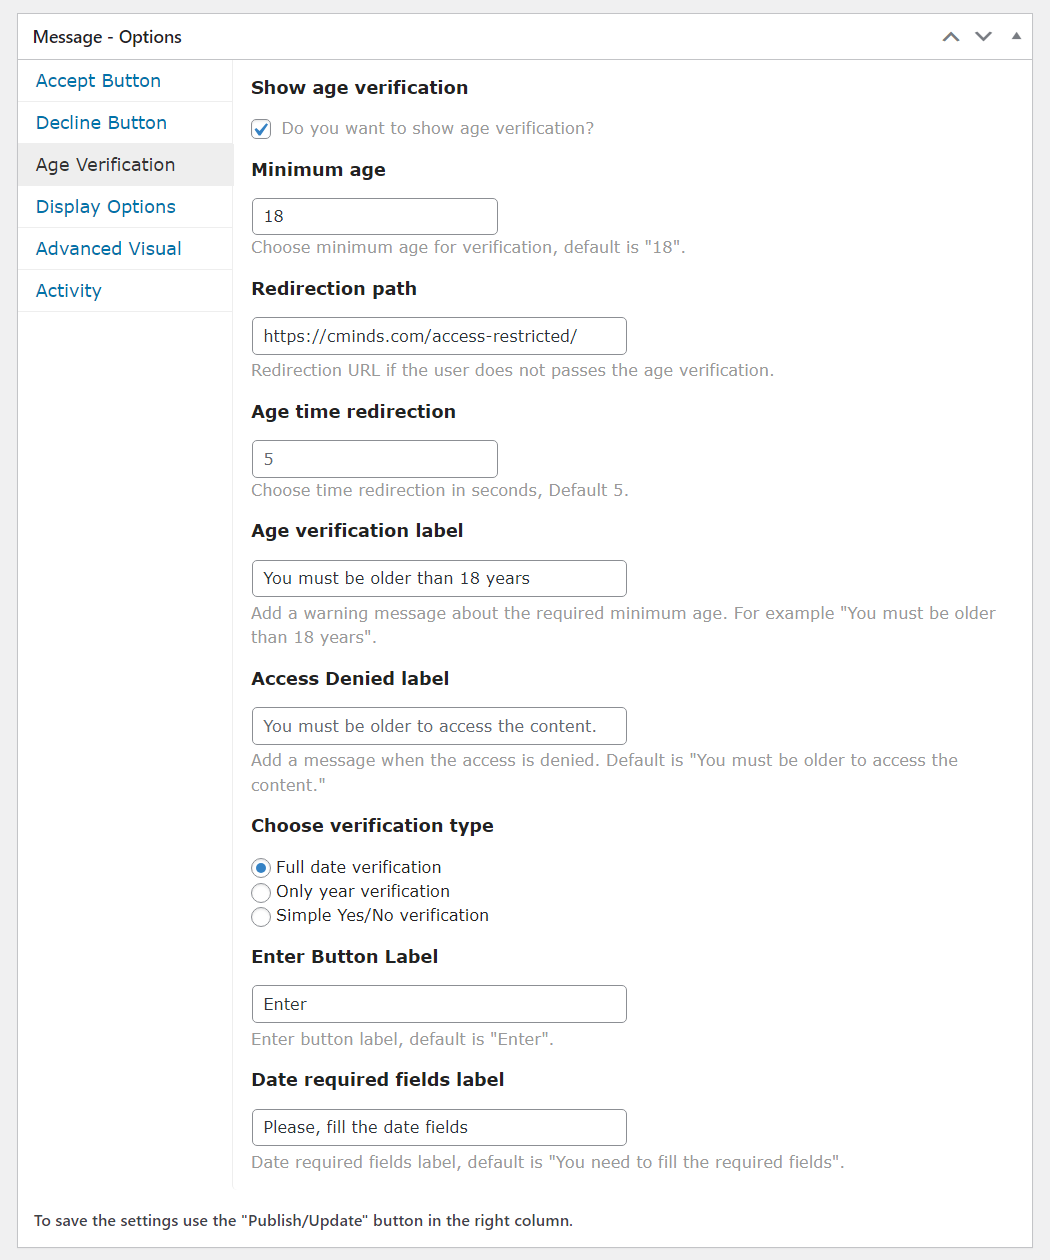
- Show age verification - Check this box to enable the age verification functionality.
- Minimum age - Define the minimum age required to access the content.
- Redirection path - Enter a URL, where the user will be automatically redirected in case if he did not pass the age verification. If this field is empty, the user will stay on the same page.
- Age time redirection - Define the amount of seconds the redirection will happen if the user did not pass the age verification. This timer works only for verification types Full date verification and Only year verification chosen in the option below. For the Simple Yes/No verification, the redirection will start after choosing the option No.
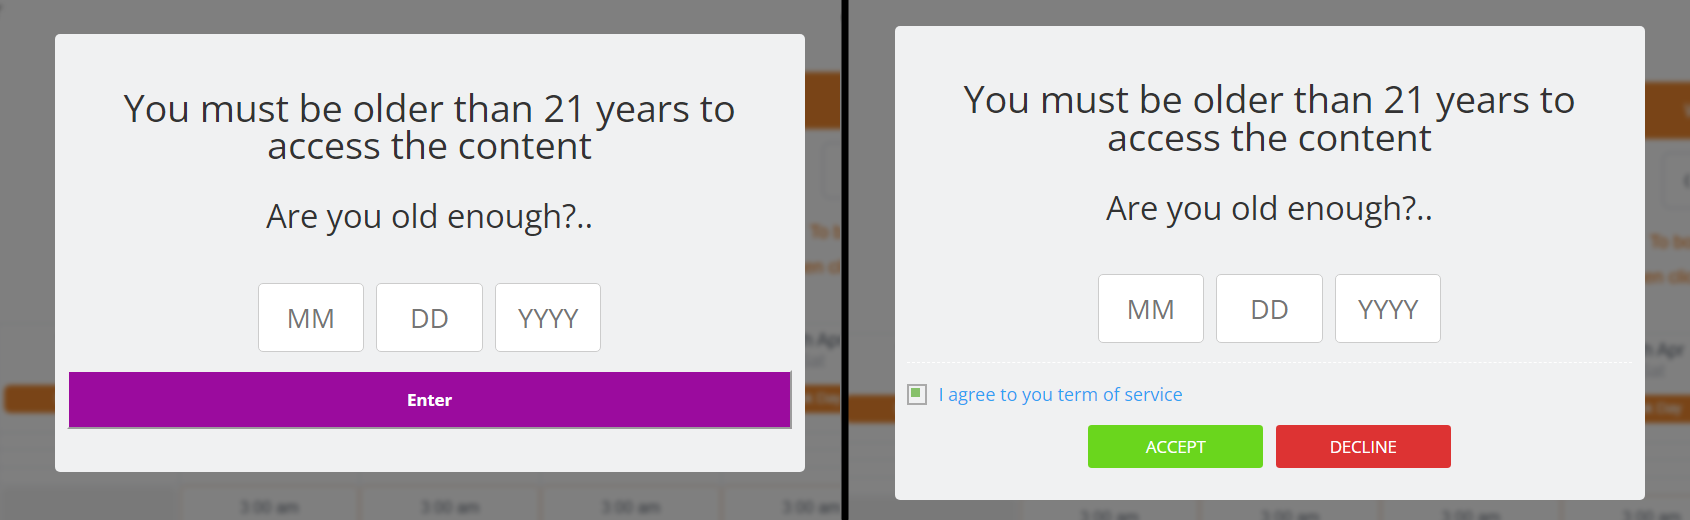
- Age verification label - Enter the text that will be displayed above the age verification functionality in the popup message. For example, it can be text like "You must be older than 18 years". If the field is empty, it will not be displayed on the front-end - instead, you can define formatted text in the Message Content area.
- Access Denied label - Enter here a message that will appear in case if the user did not pass the age verification. By default it shows "You must be older to access the content.".
- Choose verification type - Choose one of three age verification types. Have a note that all of them can behave a little bit differently depending on if you enabled Accept and Decline buttons.
- Full date verification - If chosen, the popup message will show 3 fields for entering month, day and year of birth. Note: in plugin settings you can choose between European or USA date formats. Learn more here: WordPress Disclaimer Plugin (CMWMD) - General Settings
- Only year verification - If chosen, the popup message will show only 1 field for entering a year of birth.
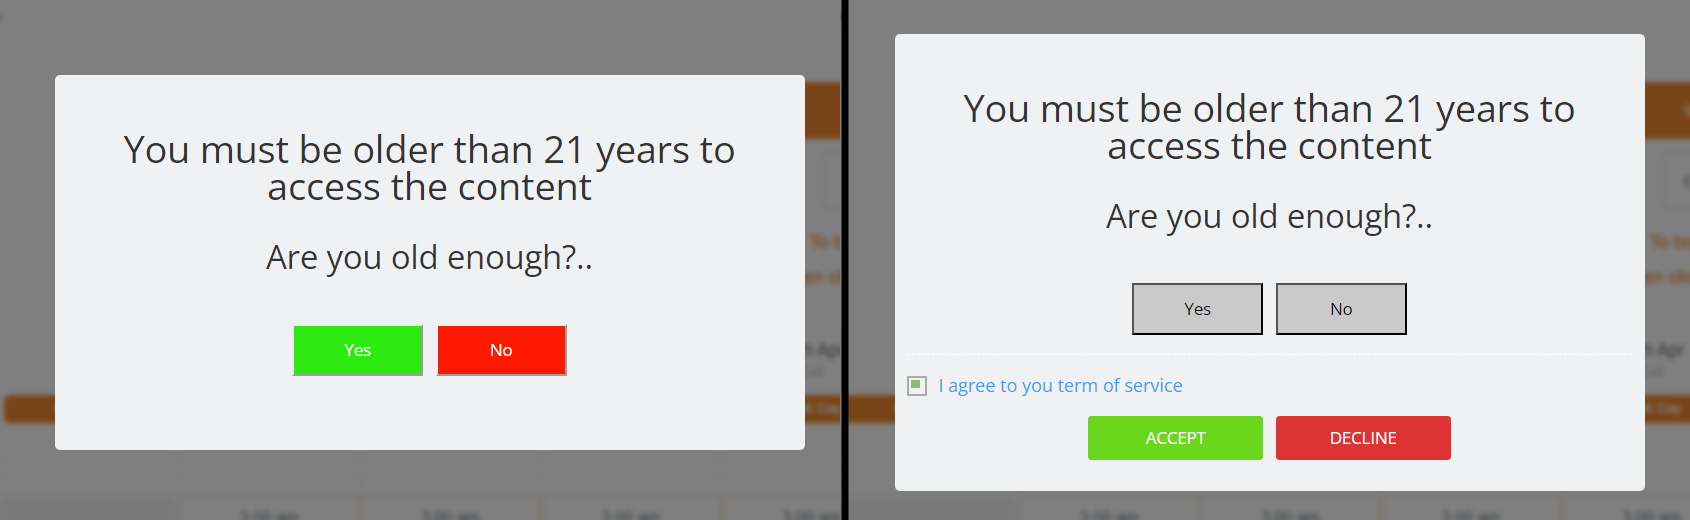
- Simple Yes/No verification - If chosen, the popup message will show buttons Yes and No, so the user will have to just approve if he old enough.
Additional labels:
- If you chose Full date verification or Only year verification, there will appear 2 more options:
- Enter Button Label - Define here the label for the approve age button. By default it shows "Enter".
-
Date required fields label - Define here the message that will be displayed in case if some date fields are not filled. By default it shows "You need to fill the required fields".

Additional labels for date verification types
- If you chose Simple Yes/No verification, there will appear 2 more options:
- Yes Button label - Define here the label for the Yes button.
-
No Button label - Define here the label for the No button.

Additional labels for simple verification type


Compatibility With Accept and Decline Buttons
The age verification feature can be used together with the Accept and Decline features. Consequently, the behavior changes a little bit in order not to show too many spare buttons.
1. Full age verification - If used on its own then it shows the button "Enter" to confirm the age. If used with Accept and Decline features, then the button "Enter" is replaced by "Accept" and "Decline" buttons.
2. Only year verification - The same as in the previous case.

3. Simple Yes/No verification - If used on its own then it shows buttons "Yes" and "No" to confirm the age. If used with Accept and Decline features, then buttons "Yes" and "No" work just as a selection. By default they're grey, but when some option is chosen, each button changes to green (for "Yes") or red (for "No"). The user will have the access to content only if he confirms his age and accepts terms of service by clicking the button "Accept". If the user doesn't confirm his age or declines terms of services, he will be redirected (if defined).
TIP
You can change font sizes, font colors and buttons background colors for all of these buttons in general plugin settings. Learn more: WordPress Disclaimer Plugin (CMWMD) - General Settings
Setting 4) Display Options Settings
In the Message - Options box, click on Display Options. There are 2 notification types - Pop-up and Bottom Notification Bar. The set of options is different for these types. Let's consider both of them.

Pop-up Type
First notification type is Pop-up. The options are:

- Define values for the width and height of the popup message. You can choose pixels or percentage options for your values. The options are:
- Message Width
- Message Height
- Message Width (For mobile devices)
- Message Height (For mobile devices)
- Shape - Select the shape of the message. The options are:
- Rounded Edges
- Sharp Edges
- Link for background image banner - Define a campaign background image. Enter the URL of the image you'd like to use for the popup. Note: this option was introduced in version 1.6.0.
- Background image type - You can choose how to process the image to fit the popup size:
- Centered Image - In this case the image will be cropped to fit the popup size.
-
Full Banner Image - In this case the image will be resized to fit the image to the popup size.
Note: this option was introduced in version 1.6.0.
- Message Background color - Define the background color of the popup message.
Bottom Notification Bar Type
Note: the Bottom Notification Bar functionality was introduced in version 1.6.0. Learn more about working with bottom notifications in this use case guide:
First notification type is Bottom Notification Bar Type. The options are:

- Bottom notification bar height - Define the height of the bottom notification bar in pixels.
- Cover whole bar with link - Makes the whole notification bar clickable to one link.
- Redirection link for banner - Add here a URL which you want to use for a banner. It applies either to the whole banner, if the option above is enabled or to the checkout button which is configured below.
- Label for Checkout Button - Define the label for the button that will be shown in the bottom bar. If this field is empty, then the button will not be displayed.
- Where to show additional buttons - The bottom notification bar can display not only the checkout button, but also Accept and Decline button, and Age verification buttons. You can define where to display them:
- Don't show
- On the left side from the banner content
- On the right side from the banner content
- Below the banner content
- Link for background image banner - Define a campaign background image. Enter the URL of the image you'd like to use for a bottom bar.
- Background image type - You can choose how to process the image to fit the bottom bar size:
- Centered Image - In this case the image will be cropped to fit the bottom bar size.
- Full Banner Image - In this case the image will be resized to fit the image to the bottom bar size.
- Message Background color - Define the background color of the bottom notification bar.
Setting 5) Advanced Visual Settings
Note: Have a note that not all options in this section can be applied to the Bottom Notification Bar type described in the previous chapter.
In the Message - Options box, click on Advanced Visual.
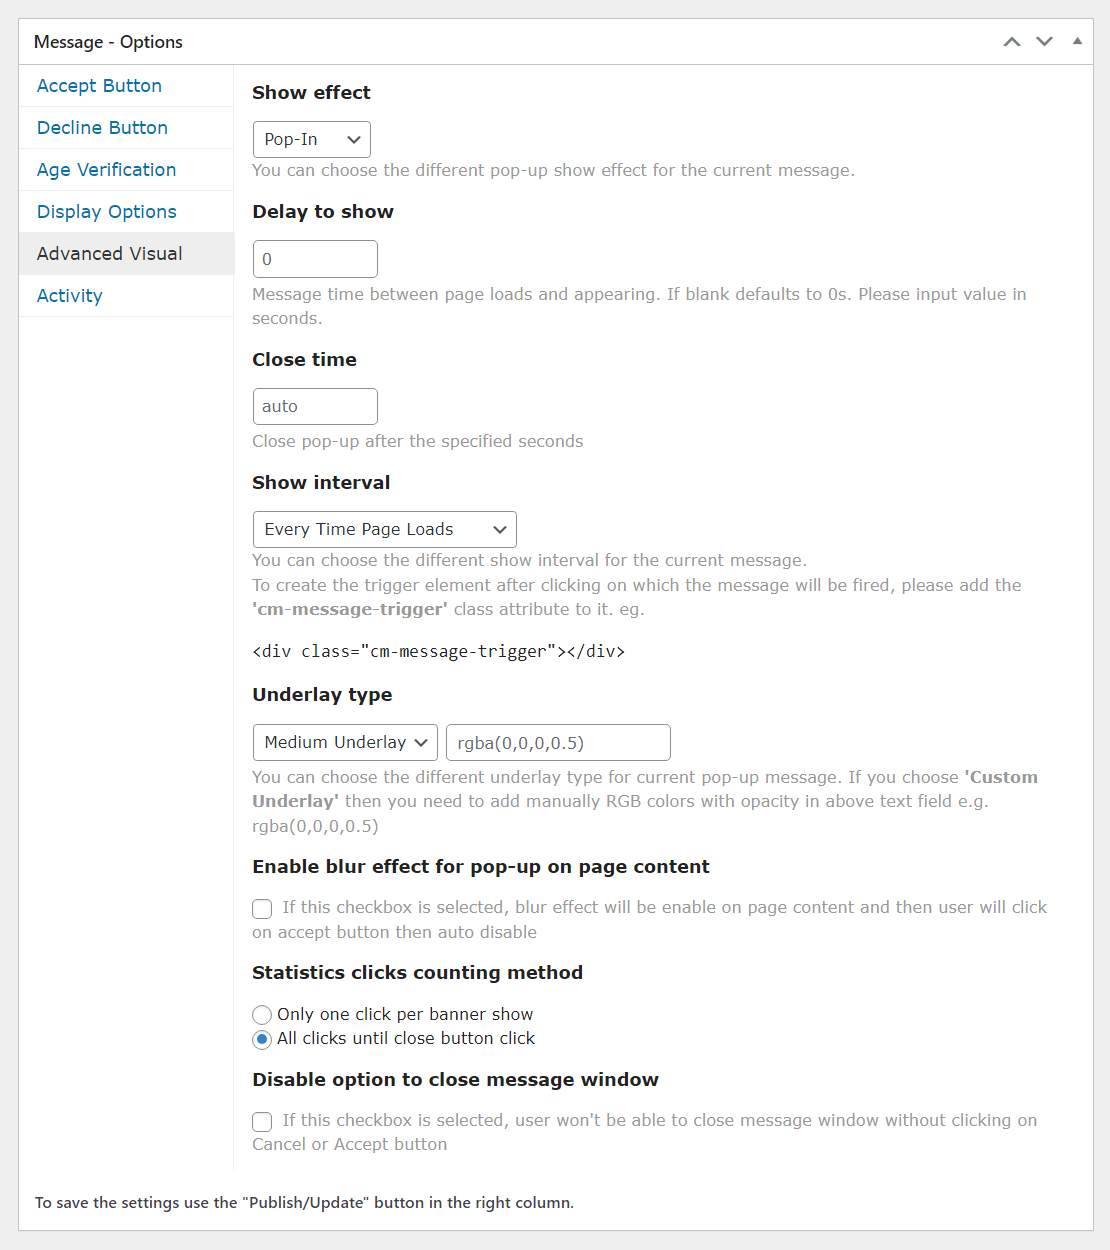
- Show effect - Select one of the following popup show effect types:
- Pop-In
- Bounce
- Shake
- Flash
- Tada
- Swing
- Rotate In
- No Effect
- Delay to show - Enter the amount of seconds to set for how much time will pass until the message appears.
- Close time - Enter the amount of seconds to after which the popup will be automatically closed.
- Show Interval - Choose how often the message will be shown. The options are:
- Every Time Page Loads
-
Only First Time Page Loads
Only Once On Any Page
Until Accepted
Trigger Only

Show interval settings - Repeat disclaimer every [days] - The user will have to accept the disclaimer again after the chosen period of days. Set "0" to disable this feature and never repeat the disclaimer. Note: this option is not available if the Show Interval is "Every Time Page Loads" and "Trigger Only".
- Underlay type - You can choose between different underlay types for the current popup message. The options are:
- Dark Underlay
- Medium Underlay
- Light Underlay
- No Underlay
- Custom Underlay - For this option you can manually add RGB colors with opacity, e.g. rgba(0,0,0,0.5).
- Enable blur effect for pop-up on page content - Enable it to blur the background content until the user closes or accept the terms in the popup message.
- Statistics clicks counting method - This is an important aspect of how the statistics are being counted. You can choose between:
- Only one click per banner show
- All clicks until close button click
- Disable option to close message window close option - Select this option if you want to prevent users from being able to close the welcome or disclaimer without accepting or declining the terms.

Setting 6) Activity Settings
In the Message - Options box, click on Activity.
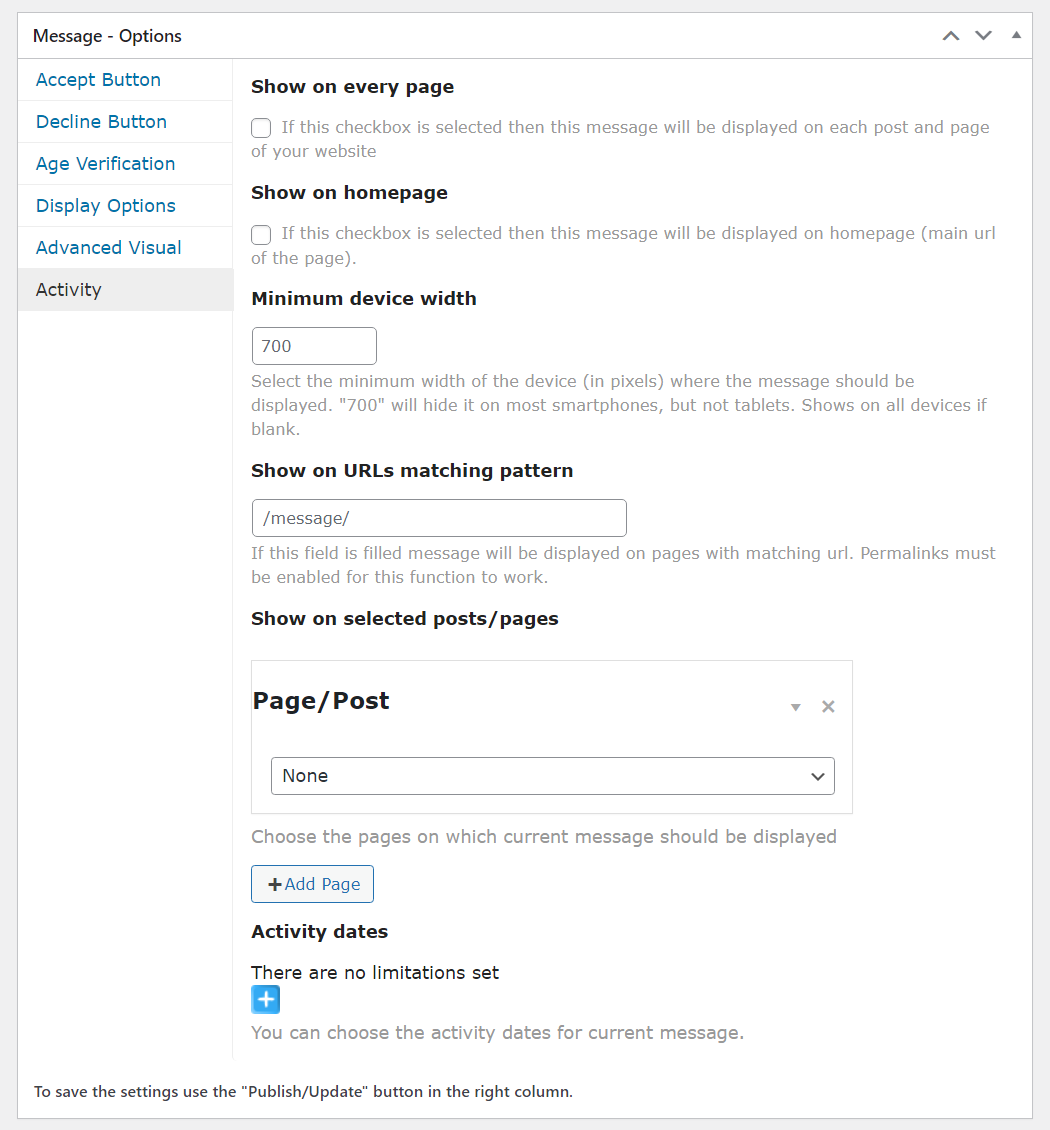
- Show on every page - Enable it to show the popup message on every page of your site.
- Show on homepage - Enable it to show the popup message on the homepage of your site.
- Minimum device width - Define the minimum device width where the message can be shown. Keep empty to show on all devices.
- Show on URLs matching pattern - If you haven't selected to show the message on every page, you can define a pattern in which this message will appear. It can be a category or a permalink path - for example your blog articles /blog/. This will cover all URL with the following pattern /blog/*
- Show on selected posts/pages - Select specific posts or pages where to display a popup message. You can select multiple pages and add them one by one using the +Add Page button.
-
Activity Dates - Click on the blue plus button to set an activity date for the message. This will determine if the message will show up only on specific dates. You can define multiple date range including exact time per each.

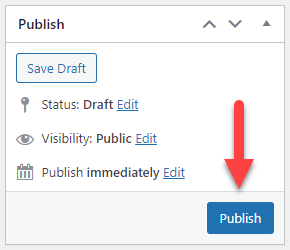
Setting up activity dates - Click the button Publish / Update to save changes.

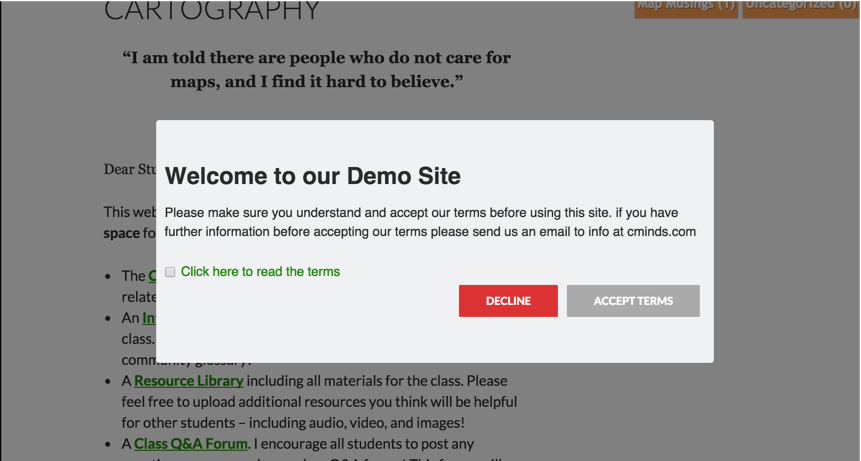
Front-End Look and Feel
Here is an example of how the Disclaimer pop up might look.
 |
More information about the WordPress Disclaimer Plugin Other WordPress products can be found at CreativeMinds WordPress Store |
 |
Let us know how we can Improve this Product Documentation Page To open a Support Ticket visit our support center |