WordPress Interactive Map Plugin (CMML) + PeepSo - Use Case - Letting Users Manage Their Locations in PeepSo Profile
Building a Community for Locations
Note: This guide covers features from:
- WordPress Interactive Map plugin - This document uses Pro version 2.8.5.
- Locations PeepSo Integration Add-on - This document uses version 1.1.6.
- PeepSo - This document uses version 4.2.3.0.
Video Use-Case
Introduction
The WordPress Interactive Map plugin allows you and your users to create and showcase locations in Google Maps, including images and notes for each location.
The plugin can receive social features by integrating with social platform PeepSo.
Use Case Front-End
User Dashboard Locations Tab
Stream With Automatic Update
Use Case Assumptions
In this example use case guide we will consider how to let your users add and manage locations from their PeepSo profiles.
We consider that you have already bought and configured the base plugin WordPress Interactive Map Plugin, but not installed PeepSo and the Locations PeepSo Integration Add-on.
TIP: Still New to WordPress Interactive Map Plugin?
This article focuses on the PeepSo integrations. If you haven't already created your site with maps, check these guides:
It follows:
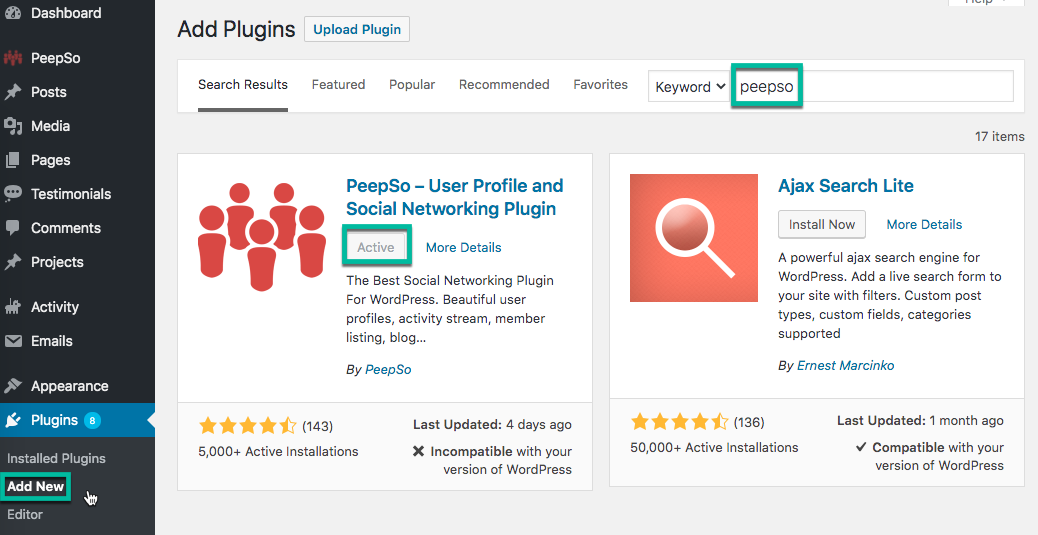
Installing the Plugin and Add-on
The process is the same for all CM plugins and add-ons.

- Download the plugin from your customer dashboard.
- Log in to WordPress and navigate to the WordPress Admin → Plugins settings.
- Click on Add New.
- Activate it and add the license.
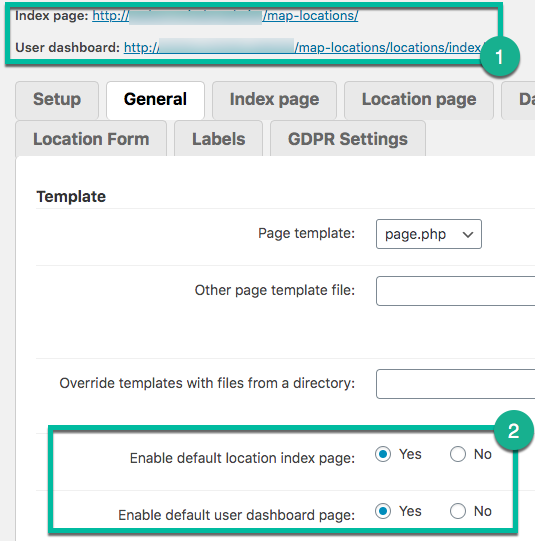
TIP: Automatic Index and Dashboard
Upon installation, the plugin automatically creates a page for the location index and another for the dashboard. Head to Settings → General tab to:
- Find shortcuts to these pages
- Enable or disable them (useful if you want to create your own)
Quick Recap
If you need help with these:
- Perform initial setup (Google Maps API and OpenWeather)
- Adding locations
- Changing visual options
- Configuring user interaction: submit form, who has access, and moderation
- User dashboard
- Custom fields and taxonomies
- Plugin shortcodes
- Translating the plugin interface
Then check the relevant articles:
Initial Setup - PeepSo
What is PeepSo?
PeepSo is a free WordPress plugin that allows you to create a social platform similar to Facebook.
How Do I Install PeepSo?
PeepSo can be downloaded from the WordPress back-end.
Once installed, follow its documentation for the initial setup.
Integration Settings
Then you need to install and activate Locations PeepSo Integration Add-on. Upon activating the Integration Plugin and installing the license for it, new settings will become available in the PeepSo settings on the WordPress dashboard.
1) User Profile and Widget: Locations Tab
This tab will show all the user's published locations and allows managing them.

This tab can be configured from the box User Profile: User's Locations Tab. The options are:
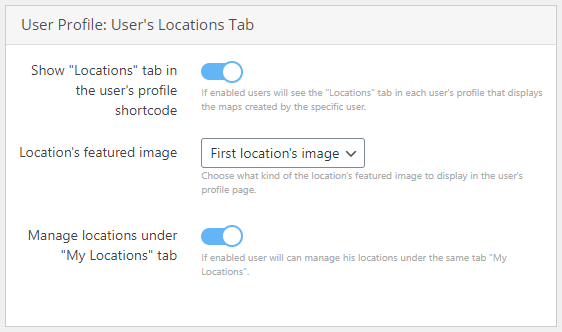
- Show "Locations" tab in the user's profile shortcode - If enabled, users will see the Locations tab in each user's profile that displays the maps created by the specific user.
- Location's featured image - Choose what kind of location's image to display in the user's profile page. You can choose between:
First location's image

Location preview with an image Location's icon

Location preview with an icon None

Location preview without images
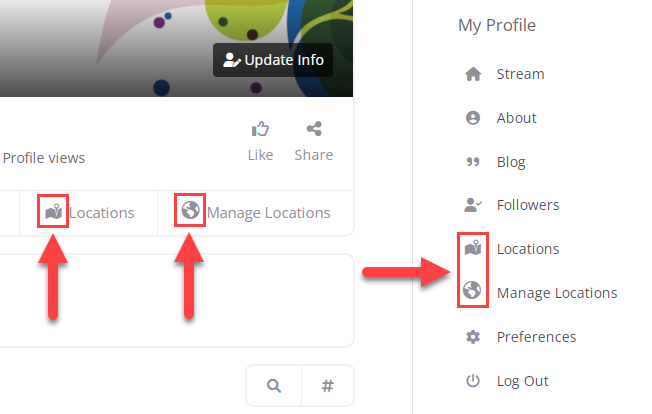
Manage locations under "My Locations" tab - If enabled, the user will be able to manage his locations under the same tab Locations, using the button Manage Locations.
Tip: Manage Button is Private
The Manage Locations button changes the tab content from the location public list to the action shortcuts.
The button only appears to the currently logged-in user.

'Manage Locations' button


2) User Profile and Widget: Manage Locations Tab
The Admin has the option to add the Manage Locations tab to users' navigation menus as well or instead.
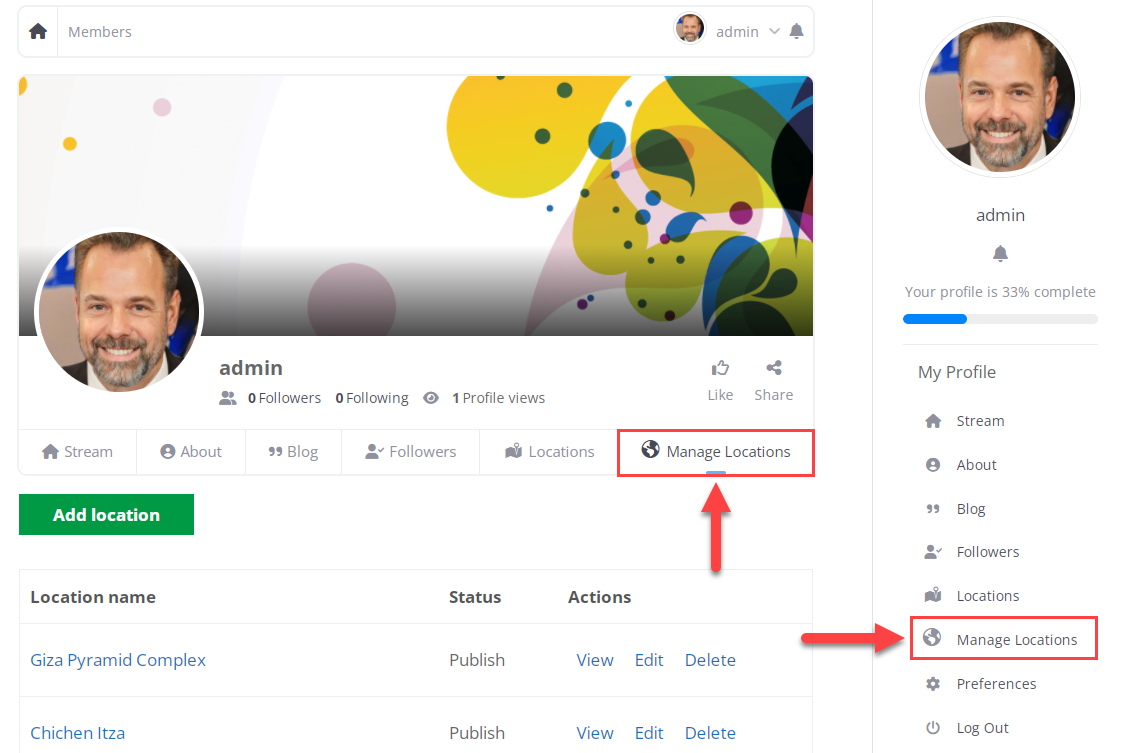
This is done by enabling the option Show separate "Manage Locations" tab in the user's profile:
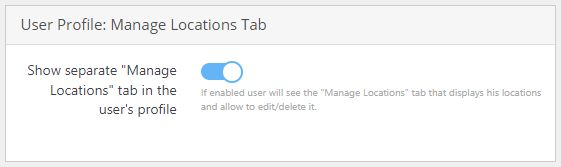
TIP: The Tab Is Also Private
This tab only appears to the currently logged-in user.
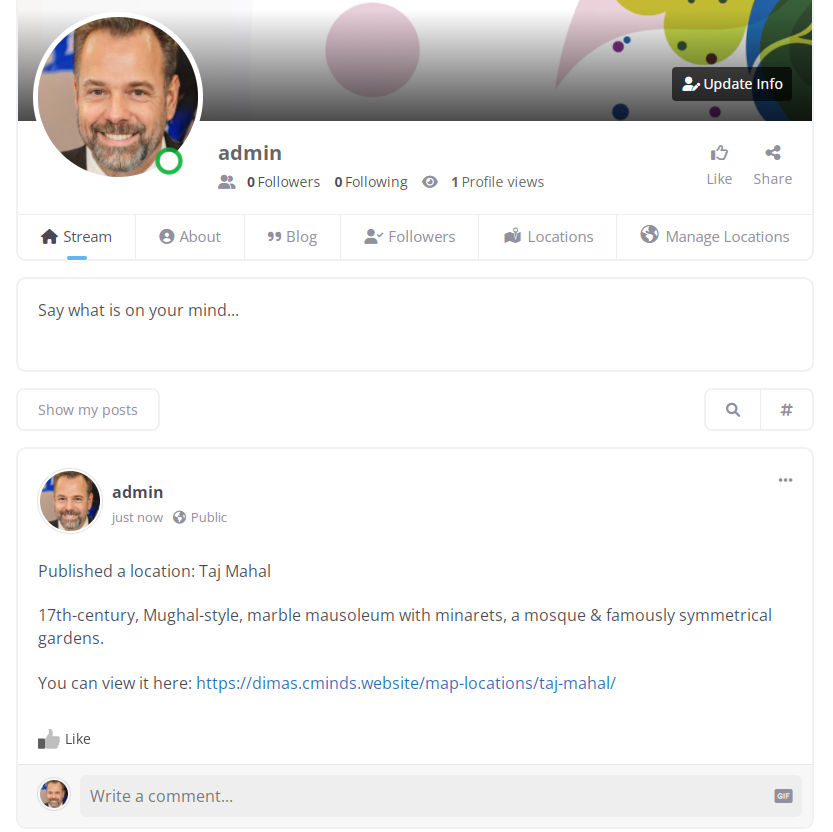
3) Activity Feed
It's possible to have status updates to be automatically posted to a user's profile page and to the activity feed when they create a new Map Location.
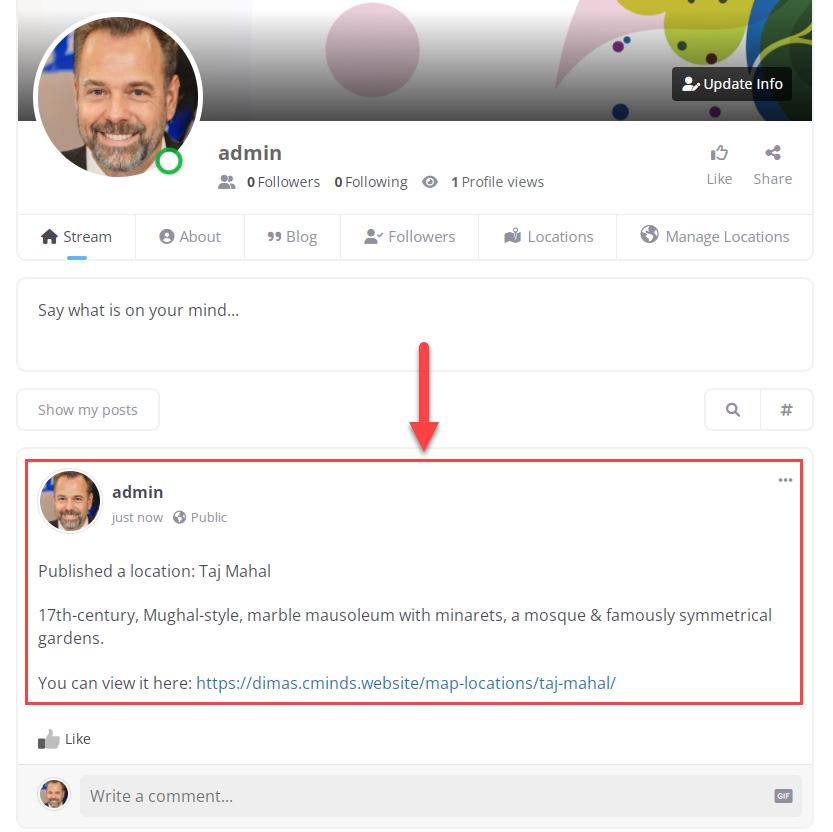
There are two options under the Activity Feed box for configuring automatic updates:
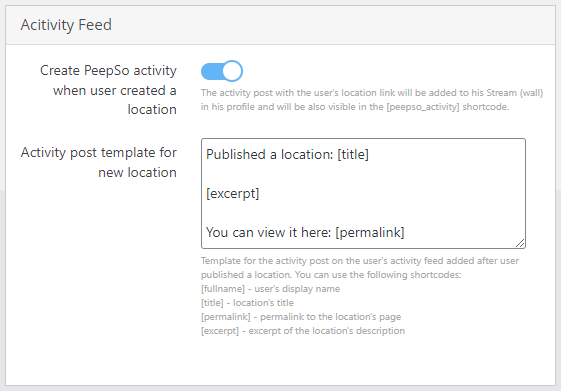
- Create PeepSo activity when user created a location - Turn on this option to make automatic updates work. The activity post with the user's location link will be added to his Stream (wall) in his profile and will be also visible in the
[peepso_activity]shortcode. - Activity post template for new location - Customize the template that is used to generate the posts. You can use the following shortcodes:
[fullname]- user's display name[title]- location's title[permalink]- permalink to the location's page[excerpt]- excerpt of the location's description
4) Dashicons
The tabs in user profile and links in the widget have dashicons that you can change.
The dashicons can be changed in the Profile Widget box, the options are:
- Locations link icon CSS
- Manage Locations link icon CSS
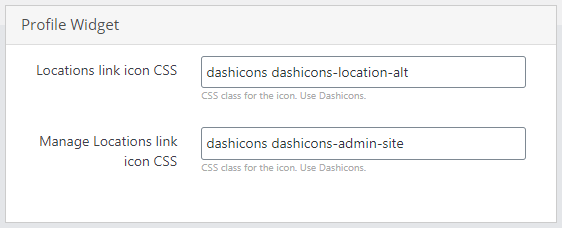
You can find more dashicon links here: Developer Resources: Dashicons
When you finished configuration, don't forget to click the button Save Settings at the bottom of the page.

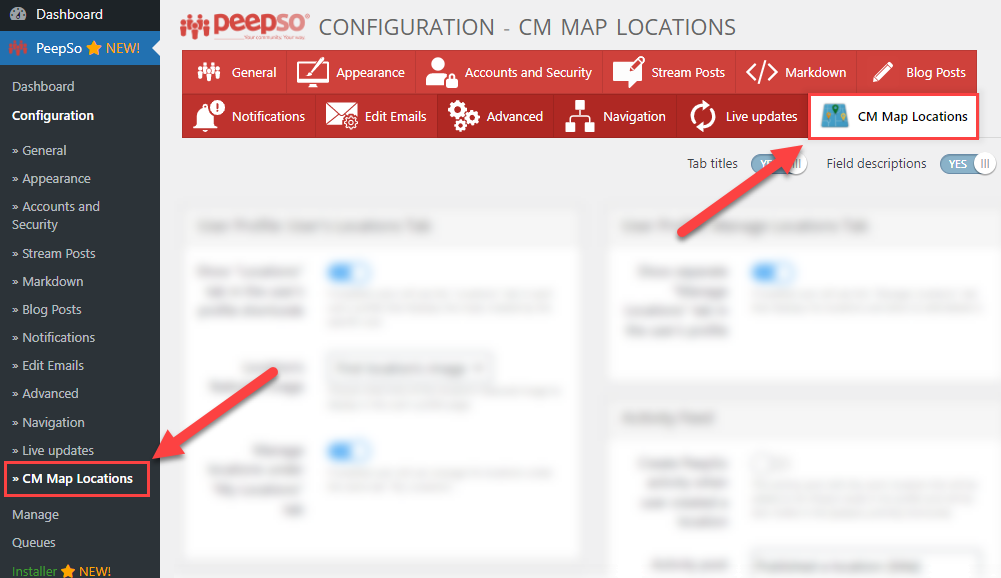
Labels
You can change the names of front-end labels - tabs and buttons. To do this, navigate to Admin Dashboard → CM Map Locations Pro → Settings → Labels.
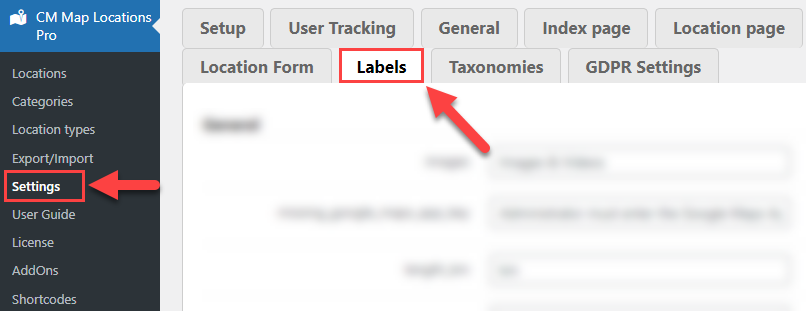
The labels related to PeepSo integration are located in the corresponding section:
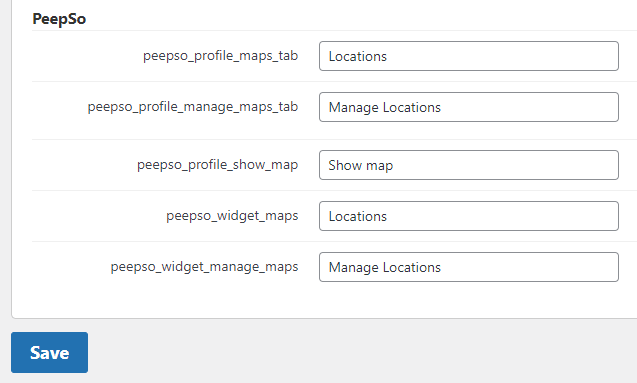
End Result
Following instructions found in the plugin and guides, you and your users should be able to add multiple locations to your site from the PeepSo profile.
Use Case Front-End
User Dashboard Locations Tab
Stream With Automatic Update
 |
More information about the WordPress Interactive Map Plugin Other WordPress products can be found at CreativeMinds WordPress Store |
 |
Let us know how we can Improve this Product Documentation Page To open a Support Ticket visit our support center |