Tooltip Glossary PeepSo Integration - Installation
Installation
Prefer a Complete Step-by-Step?
Check our use case guide:
Here are the steps needed to install and activate the PeepSo Integration Add-on for Tooltip Glossary Pro.
Notes
- To use an add-on, you must have the base plugin installed.
- The process to install an add-on is the same as that of a base plugin.
- To configure the PeepSo integration, the official PeepSo plugin must be installed first.
Plugin/Add-on Installation
- To manually install the plugin or add-on, you first must download it from Client Dashboard (Pro version) to your computer.
- Navigate to the Plugin tab on the Wordpress Admin Panel to install the plugin.
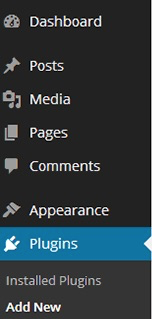
- Hover over the Plugin tab and click on Add New.
- Select Upload Plugin and then Choose File. Select the .zip file you have just downloaded and click on Install


Plugin Activation
- You should see a message similar to this, indicating a successful installation - from this moment on, it can be configured in your plugin directory.
- Click on Activate plugin.


License Activation
- Head to the License tab of the plugins' configuration, insert the License Key and click on Activate License.

- The license is now active. Congratulations!


PeepSo Plugin Installation
The PeepSo plugin can be installed directly from the WordPress back-end.
To do this, head to Plugins → Add New and click the button Install Now, highlighted below:
 After activation, a PeepSo settings tab will be available, as shown:

 |
More information about the CM Tooltip Glossary PeepSo AddOn Other WordPress products can be found at CreativeMinds WordPress Store |
 |
Let us know how we can Improve this Product Documentation Page To open a Support Ticket visit our support center |