User Guide
User Guide
Product Settings
If you want to set the configuration for adding products to your catalog, visit the Products Settings section under configuration.

General
- Attributes set: Determines what set of the attributes will be used in 'Adding Product F
orm'. Default is supplierfrontendproductuploader_product_attributes. - Default product tax class: Determines default tax class for products added by suppliers.
- Allow suppliers to enter product SKU: This option allows suppliers to define the SKU of the
suppliers product. - Current auto increment SKU number: If
suppliers can’t define a SKU, this option will define auto increment value of the product. The number showed in this field is the last SKU used for a product.Default is 10001. - Maximum allowed images per product: Determines how many images can be added per product by each supplier.
- Allow to create virtual products: Determines if suppliers can create a virtual product.
- Allow to create downloadable products: Determines if suppliers can create downloadable products.
- Allow suppliers to delete their products: Determines if suppliers can delete products.

Downloadable Product Settings
In this section the admin may choose the extension type allowed for downloadable products files and their maximal size.

Finally, remember to Save the Configuration!
Settings
The Multiple Products per Vendor feature allows the admin to set how customers will see a product with different suppliers at your store.
- Multiple Vendors per Product: define if the feature is enabled or not. In affirmative case, multiple products from different vendors assigned to the same product can be arranged according the following field.
- Show these Products depends on:
- Sort Level: will show first product with the lowest sort level (product attribute can be set by Admin to each products)
- Lower Price: will show first product with the lowest price
- Supplier Rating: will show first product is assigned to supplier with the highest rating

Finally, remember to Save the Configuration!

Store Visibility of Multiple Products
The admin can check products status and visibility at Suppliers Products list, via Catalog → Supplier Products.
When Multiple Products feature is enabled, only 1 product will be visible to customers at the frontend. The image below shows the example when the 'Lower Price' condition was chosen, so the cheapest product has visibility 'Catalog, Search' while the others have 'Not visible Individually'.

Besides the condition defined on Product Settings, the admin is able to set one of the products as 'Main' and this product will be shown to customers, despite of what was set previously.
For the same example above it is possible to see the change in visibility when a specific product is ' Set as Main'.
 At the store, customer will find only the product with visibility "Catalog, Search".
Cloning Products
Suppliers can add new products by cloning existing products in the store.
For that, go to "Add a Product" link at the navigation bar of Vendor Portal, and select ' Use existing Product'.
 Then, by using the products Name, SKU or Supplier Code, it is possible to see all current products for the same code in the catalog, visible or not.
 After selecting the product to be cloned, the supplier can simply add his or her own information of price, special prices and quantity.
Vendor Portal
Customers that belongs to Supplier or Supplier Pro group have additional links on their dashboard page.
 When clicking on the 'Vendor Portal', the customer will be redirected to his or her own Dashboard, as shown in the image below.
The Supplier Dashboard shows Revenues of supplier products, where revenue is calculated for all paid products.
Average Revenues Per Order is the average amount of revenue for all paid products. Items Sold refers to the total number of sold items.
Supplier Notification Settings
In order to always be up-to-date on their sales, suppliers can choose to be notified when their products were ordered by customers, or approved by the store admin.
To enable or disable these notifications, please go to Vendor Panel and then Settings → Notifications.
Adding Products
To add a new product, click “Add a Product” in the navigation bar of the Vendor Panel.
 After defining your product's attribute set and type, you will see the form 'Add Product' that allows suppliers to describe and characterize their new product.

Basic requirements
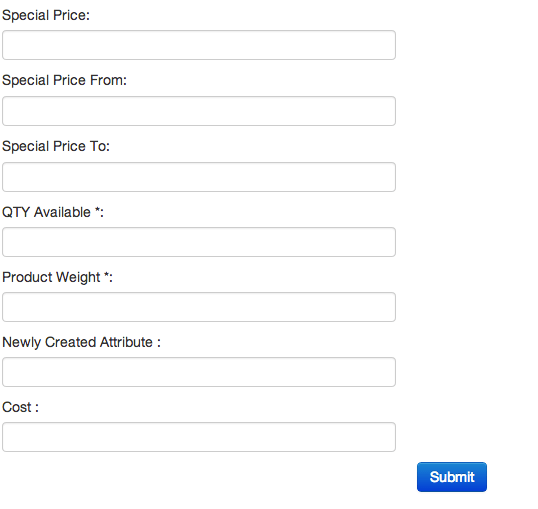
Some fields are mandatory in order to properly publish your new product. These fields are:
- Product Name
- Short Description
- Detailed Description
- Price
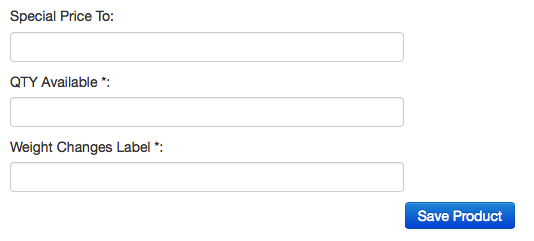
- Quantity Available in stock
- Product Weight
Special Offers
Suppliers can also define a special offer or deal for a product, and limit the period of time for which that special offer will be available for customers.

Adding Images
Suppliers can also add one or more product images on the right side of the form.
To set any picture as the main picture for the product, just click on the house icon and the thumbnail of the selected image will have a green border around it.

Selecting categories
The next step is to select the product categories, which is a required operation.
If the product is not assigned to any category, customers will not be able to find it in the store catalog.
It is possible to configure the categories and define which will be visible to specific vendors from the Admin Panel. For more information, please read Customizing Product Form article.

After filling out all required field in the "Add a Product" form, remember to click on the Save Product button!
Supplier Product List
On the navigation bar of the Supplier Dashboard there will be the Product List link.
On this screen, suppliers can see the list of all their products, their current actual status and quantity available.
New products added to the catalog need to be approved by the admin, so products that present ' Pending' status are still waiting to be approved by the store admin (except when admin set 'Allow Auto Approval of Products' to "Yes" at Configuration).
Only the supplier can enter the product page, the rest of the viewers will see a 404 page when they enter the URL.
Suppliers can preview their products in order to see how they will be displayed on the store. After clicking on ' Preview' the product page will be shown in a new window.

The supplier can choose to activate or deactivate their approved products and the status of any product can be easily changed by using the ' More Actions' button.
Customizing Product Form
The Product Form can be freely customized in the Admin Panel and you will be able to:
- Add new elements to the supplier form
- Change labels of the existing inputs
- Select available categories for the form
Add new elements to the supplier form
New form elements are based on the product attributes, so if you want to add new fields, you must define new product attributes.


Attributes include the following input types:
- Text Field
- Text Area
- Date
- Yes/No
- Multiple Select
- Dropdown
- Price
- Media Image
- Fixed Product Tax

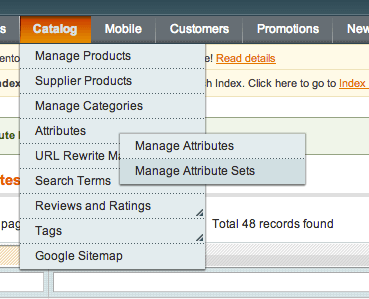
After creating an attribute, you must assign it to an attribute set on Catalog → Attributes → Manage Attribute Sets.
If you want to add new attributes to an attribute set or group, just drag and drop the desired attribute from the right column, "Unassigned attribute", to the suitable group on the left column.
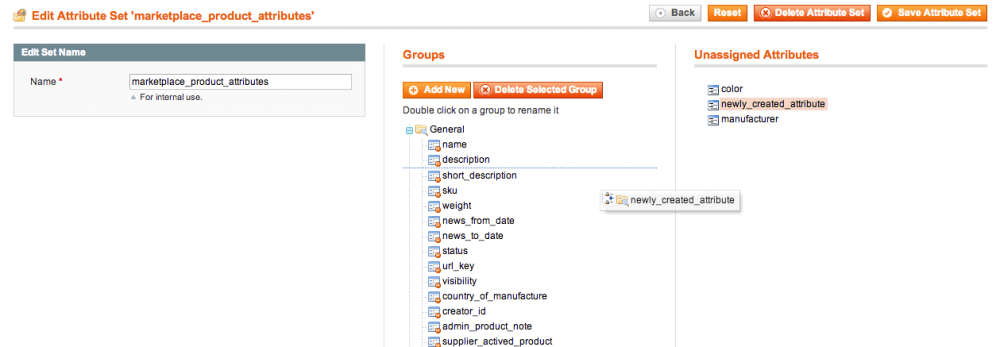
Remember to save your changes and a new attribute is added on the form!
Change labels of the existing inputs
There are two ways to change the attribute labels on the supplier frontend form. You can change the labels for the entire store view, or you can define a label to be displayed only on the supplier frontend form. Both changes can be made in same place.
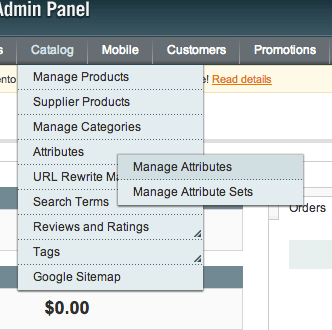
First, navigate to Catalog → Attributes → Manage Attributes and choose an attribute.
Next, go to the section titled Manage Label / Options and type your name in the field titled Supplier Frontend Form.

After saving, the attribute label changes.
Select available categories for the form
The admin can define which categories will be listed in the product form in the supplier control panel.
Under Catalog → Manage Categories, the store admin is able to select which categories are available for the suppliers.

After selecting the desired category, go to General tab and on the field ' Available for Supplier?' select "Yes" to make the category visible in the supplier form or "No" to disable it.
Suppliers Products Widget
In the Admin Dashboard, you will find a new widget which shows the last 5 products added by suppliers.

Generate suppliers Sales Report
To generate a report, go to Reports → Sales → Suppliers Item Ordered.
Reports follow default Magento reporting, where you can apply a time period filter and export the results in a CSV or PDF file.
Admin Products Control
Sometimes suppliers products can be mixed with the products which were originally in the store. For that reason, admin have a separated grid that provides a list of all products added by suppliers.
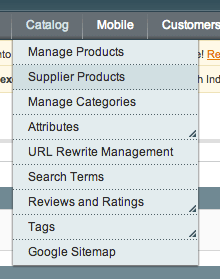
To find the list of products only added by suppliers, please navigate to Catalog → Supplier Products.
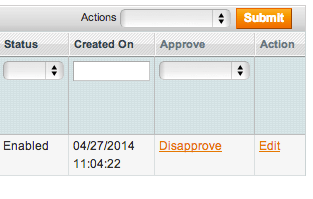
Enable / Disable products
Easily enable or disable products by clicking on the Disapprove / Approve button in the specific row with the product
Admin can change the products supplier
A product can be manually reassigned to any supplier.
For that, select the product you wish to reassign, and on the Product Information page, under General tab, choose the supplier on the dropdown list on "Supplier" field.

Admin can add notes to the product
The admin can leave comments about the product directly to the supplier.
In the General tab in the product form, you will find the "Remark" text area.

When the remark is added, the supplier is notified in his Vendor Panel.
 The remark can be read in the 'Edit Product' page.
Admin Settings
The admin can allow suppliers to create virtual products.
Please navigate to System → Configuration → Supplier Frontend Product Uploader→ Products Settings in the Magento Admin Panel.
Next, set " Allow to create virtual products" to 'Yes'.

Supplier Settings
To add a Virtual Product, please go to the Vendor Portal and click on "Add a Product" in the navigation bar.
Now you can easily choose Virtual Product in Product Type field and follow with the process to add a new product as described in Supplier Frontend Product Inventory Management article.
Admin Settings
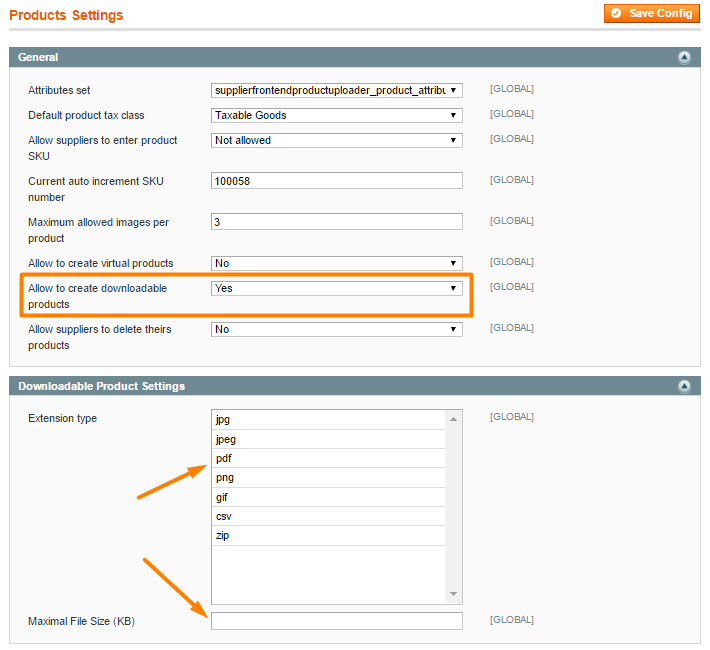
The admin can allow suppliers to create downloadable products.
Please navigate to System → Configuration → Supplier Frontend Product Uploader→ Products Settings in the Magento Admin Panel.
Next, set " Allow to create downloadable products" to 'Yes'.
In Downloadable Product Settings section, choose the Extension type and Maximal File Size of your downloadable product.
Supplier Settings
To add a Downloadable Product, please go to the Vendor Portal and click on "Add a Product" in the navigation bar.
Now you can easily choose Downloadable Product in Product Type field.

When in the "Add Product" form, on the right side, the supplier will find fields to upload the file on the bottom of Product Categories.

The other fields of the new product are described in Supplier Frontend Product Inventory Management article.