WordPress Interactive Map Plugin (CMML) - Integration - Business Directory Plugin
Integration with Business Directory Plugin
Table of Contents
- What is this feature
- Video tutorial
- Showing map
- ZIP search
- Business pages with a map
- Business Directory with a map
API Key is Required
This feature requires an API key from Google. Learn how to generate one:
Map Locations and Routes - Getting Started - Adding API Keys (Google Maps and OpenWeatherMap)
What is This Feature
The WordPress Interactive Map Plugin can be integrated with the Business Directory Plugin.
This way, you can add a map to the listing of business.
Video Tutorial
The following video shows the integration using the Business Directory plugin as an example.
1) Showing Map
You can display the map by using a shortcode [cmloc-business]
It has three attributes:
- category - Specify one or more categories by their id or slug.
- theme - Use one of the following values to choose the needed map theme: "silver", "retro", "dark", "night" or "aubergine".
- categoryfilter - Set "1" to allow users to filter categories and "0" to disable it (Default is "1").
- searchbar - Set "1" to display the search bar or "0" to hide.
- mapheight - Define the map height in pixels.
- mapwidth - Define the map width in pixels.
- width - Define the width in pixels.
- show_map_on_load - Set "1" to show the map on the page load. If set to "0", the map will be hidden. This parameter is needed to override the option Show map on page load in settings of the Business Directory plugin. Note: this option was introduced in version 3.0.6.
- tags - Specify one or more tags. Important: this parameter accepts only tags which come from the Business Directory plugin. Example: [cmloc-business tags="shop,parking,clinic"]. Note: this option was introduced in version 3.2.3.
[cmloc-business category="id|slug" categoryfilter="1|0" show_map_on_load="1|0"]
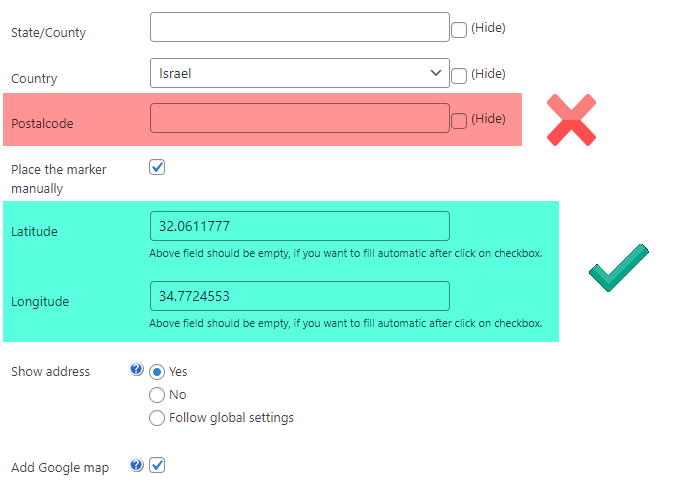
Latitude and Longitude are Required!
The map will only display items that have latitude and longitude in their address.
You can add them by choosing the precise point on the map. To do so, enable the option Place the marker manually.

Alternatively, you can use services such as Get Lat Long from Address Convert Address to Coordinates to obtain coordinates.
2) ZIP Search in Business Directory
You can enable a ZIP search filter in business directory as well. This includes both a ZIP code filter and a Radius dropdown.
Example

Enabling ZIP Search
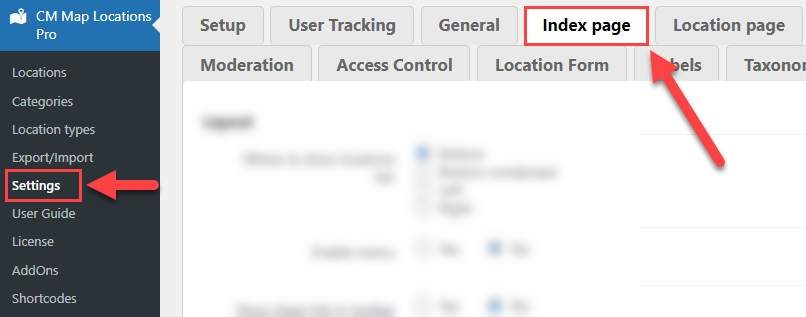
To enable this filter, you have to check the WordPress Interactive Map plugin setting. Head to Admin Dashboard → CM Map Locations Pro → Settings.

Click on the Index page tab.

Scroll down to the ZIP code radius filter section.
Enable ZIP code neighborhood filter - Adds the two search boxes: ZIP filter and Radius.

ZIP code and radius search in business directory - Country code for the ZIP code searching - The ZIP filter will work only within a single country. Note: it works only within a single country that you've set up in the settings.

Note that geolocation does not work with Business Directory plugin.
Still in this screen, you can also set the Radius field increments. Learn more WordPress Interactive Map Plugin (CMML) - Searching by ZIP
ZIP Code Comes From Coordinates
The Zip code of the business is fetched from the coordinates, and not from the Postalcode field.
The postalcode field is used as a public information you can show on the page
3) Business Pages With a Map
You can also show a Google map on each listing page.
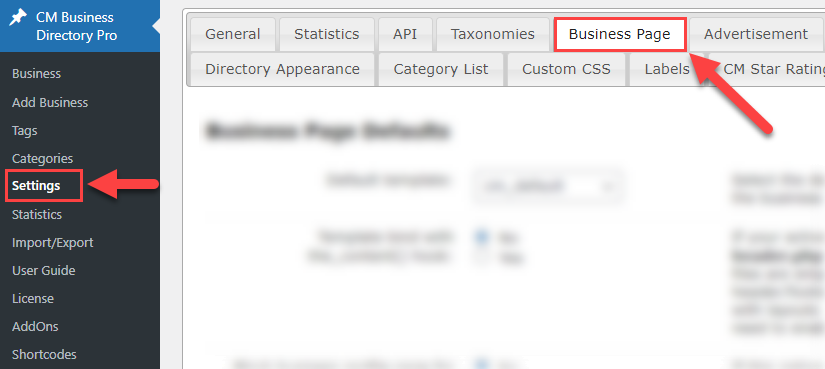
Choose the default options in Admin Dashboard → CM Business Directory Pro → Settings → Business Page tab.
Then configure Display map (where and how it should be shown).

TIP: Enabling/Disabling on Single Page
While editing a business page, you can toggle the map on or off for that page alone.

Business Directory With a Map
You can show a Google map on the WordPress business directory.
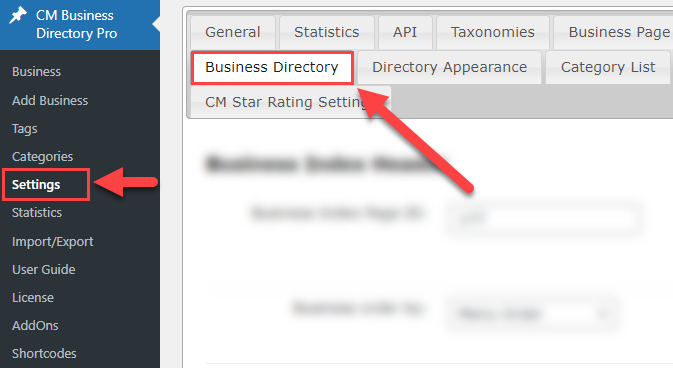
Navigate to Admin Dashboard → CM Business Directory Pro → Settings → Business Directory tab.
Find and configure the following options:
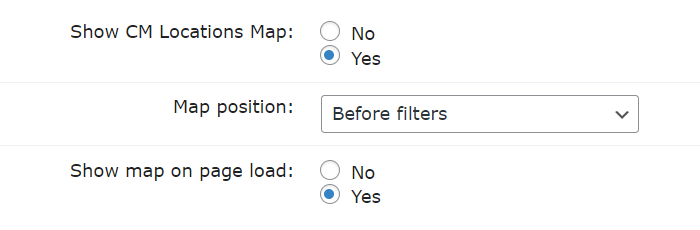
- Show CM Locations Map - Enable it to show the map.
- Map position - Select the map position on the business directory index page. Choose between:
- Before filters
- Between the filters and results
- After resultsNote: this option was introduced in Business Directory plugin 2.3.1 and requires Map Locations plugin 3.0.4 and higher.
- Show map on page load - If enabled, the map will be displayed on page load, otherwise - only when user clicks on the button. Note: this option was introduced in Business Directory plugin 2.3.1 and requires WordPress Interactive Map plugin 3.0.4 and higher.
Then navigate to Admin Dashboard → CM Map Locations Pro → Settings → Index Page.
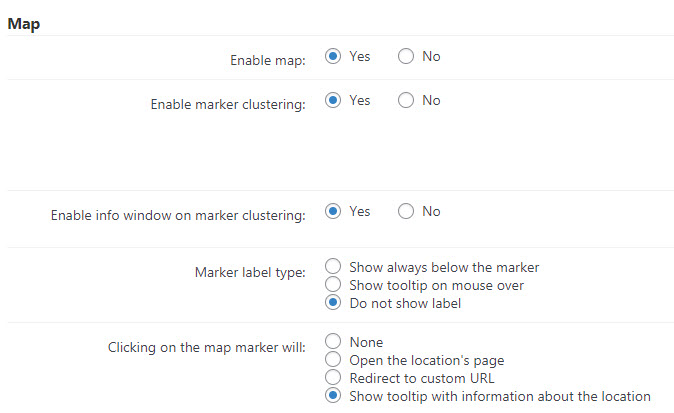
Find the section Map and configure the following options:
- Enable map - Enable this option to display the map on the Business Directory page.
- Enable marker clustering - If enabled, multiple markers will be combined as a single when overlapping due to the zoom.
- Enable info window on marker clustering - Shows a tooltip when clicking on a clustered marker, listing each location.
- Marker label type - Choose the label type with the marker's name on the location's map. The options are:
- Show always below the marker
- Show tooltip on mouse hover
- Do not show label
- Clicking on the map marker will - Choose the action when the user click on the marker. The options are:
- None
- Open the location's page - Directs to the business page.
- Redirect to custom URL - Directs to the address in the "URL" field of the location entry.
- Show tooltip with information about location - Displays part of the description without directing the user to another page. This feature has extra settings.
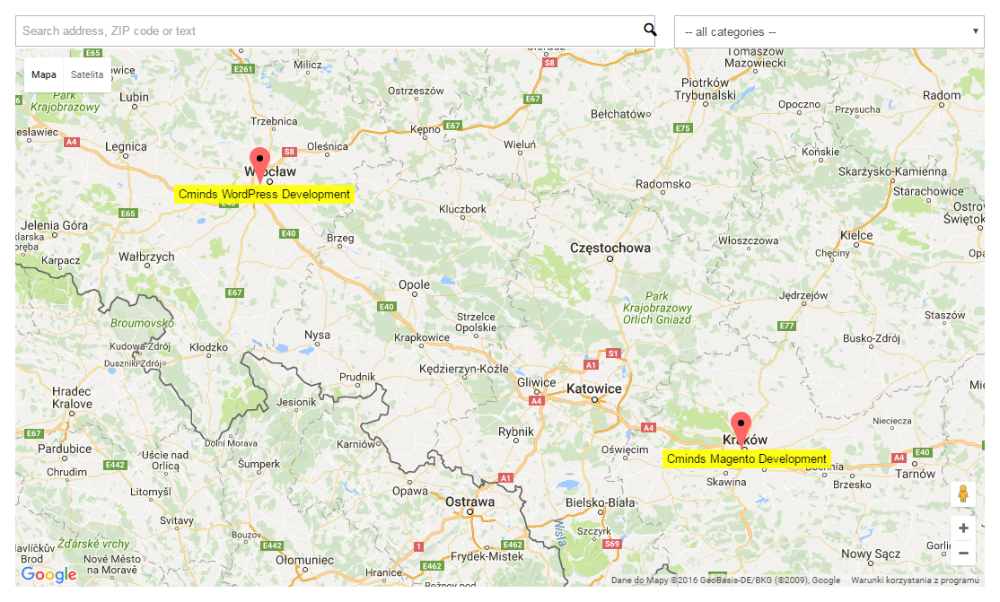
Example on the Front-end:
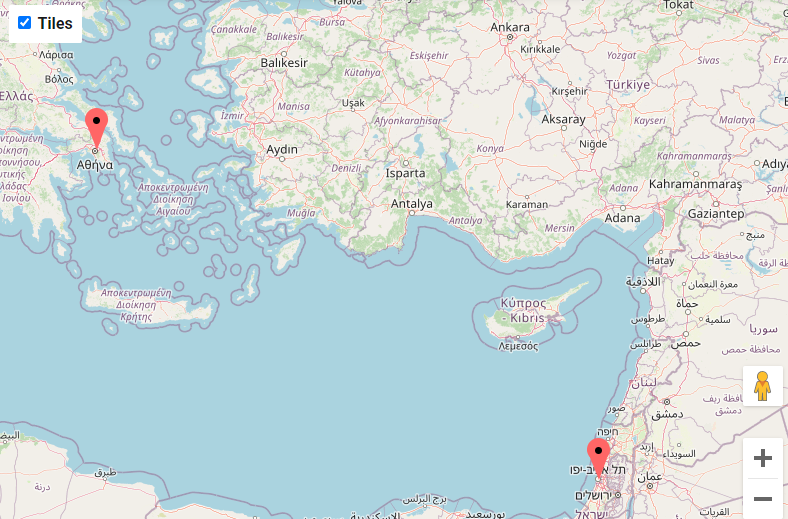
 |
More information about the WordPress Interactive Map Plugin Other WordPress products can be found at CreativeMinds WordPress Store |
 |
Let us know how we can Improve this Product Documentation Page To open a Support Ticket visit our support center |